> ## Documentation Index
> Fetch the complete documentation index at: https://docs.libratech.ai/llms.txt
> Use this file to discover all available pages before exploring further.

# Assistants

> Pre-configured AI experts for recurring tasks. Build them once; reach for them whenever the task comes up.

<video autoPlay muted loop playsInline src="https://mintcdn.com/libra-4206ec93/azhR9hqtFjs66ITC/assets/videos/features/assistants-introduction.webm?fit=max&auto=format&n=azhR9hqtFjs66ITC&q=85&s=01f2ba58ffb95ac23d1c3d498dda4bef" className="rounded-xl border w-full" data-path="assets/videos/features/assistants-introduction.webm" />

An **Assistant** is a custom AI expert you configure once and reach for whenever the same kind of task comes up. Set up your *"M\&A specialist"* with the right instructions, the reference documents it should know about, and the research sources it should search, then use it across every M\&A matter without re-typing anything.

<div className="libra-buddy-callout">
  <img src="https://mintcdn.com/libra-4206ec93/wgVZXcGnHS4aJk9T/assets/images/libra-buddy/clipboard.png?fit=max&auto=format&n=wgVZXcGnHS4aJk9T&q=85&s=cde036cf23ea2d67cd50f1c295db549a" alt="Libra mascot with a clipboard" width="725" height="605" data-path="assets/images/libra-buddy/clipboard.png" />

  <div className="libra-buddy-callout-content">
    Assistant instructions persist across every turn; **Tools → Add context** injects context for one turn. For an always-on prompt, build the Assistant.
  </div>
</div>

## What's in an Assistant

| Element                   | What it does                                                                                                                    |
| ------------------------- | ------------------------------------------------------------------------------------------------------------------------------- |
| **Prompt instructions**   | The system prompt. Who the Assistant is, how it responds, what it expects. The only one of these four you have to fill in.      |
| **Conversation starters** | Optional prompts that appear as clickable buttons when you open a chat with the Assistant.                                      |
| **Knowledge**             | Optional reference documents the Assistant can draw on: your firm's NDA template, your house style guide, the relevant statute. |
| **Resources**             | The base **Model** the Assistant runs on, and the **Research sources** it searches — scoped by **Jurisdictions**.               |

When you start a chat with an Assistant, all of these are applied automatically. You skip straight to the question.
<Note>
  There is no output-format setting on an Assistant. If you want every answer to come back in the same shape, say so in the prompt instructions — see [Specify the output format](#tips-for-designing-good-assistants) below.
</Note>

Alongside these, each Assistant carries a name (required), plus a description, practice area, and tags. Those don't change how it answers; they determine how you find it again in a library that has grown to thirty Assistants.

## When Assistants pay off

Assistants reward two things: **recurrence** and **specialisation**.

| Good fit                                                | Less good fit                                           |
| ------------------------------------------------------- | ------------------------------------------------------- |
| Tasks you do at least once a week.                      | One-off questions.                                      |
| Tasks with a consistent input shape.                    | Anything where the input changes drastically each time. |
| Tasks that benefit from your firm's specific knowledge. | General-purpose research.                               |
| Tasks where the output should look the same every time. | Free-form analytical questions.                         |

## Common Assistant patterns

<AccordionGroup>
  <Accordion title="Contract reviewers">
    Pre-configured to read against your standard. Output a structured findings list with risk levels.
  </Accordion>

  <Accordion title="Drafters">
    Pre-loaded with your firm's templates and style guide. Produce first-draft text in your house format, ready to copy out of the chat.
  </Accordion>

  <Accordion title="Researchers">
    Pre-set jurisdictions, pre-set Research sources. Optimised for sourced answers in a specific area of law.
  </Accordion>

  <Accordion title="Intake processors">
    Take an intake form, extract the key fields, flag conflicts, propose an engagement letter outline.
  </Accordion>

  <Accordion title="Compliance checkers">
    Pre-loaded with the relevant regulation; check submitted documents against requirements.
  </Accordion>
</AccordionGroup>

## Where Assistants live

Assistants are templates. Open **Templates** in the sidebar and you land on the [Templates library](/en/features/templates/about) with the **Assistants** tab selected, alongside **Workflows**, **Reviews**, and **Discoveries**.

Filter the tab by **Practice area**, **Tags**, or **Author**. The **Author** filter is the one that answers "whose Assistant is this?":

| Author filter | What you'll find                                           |
| ------------- | ---------------------------------------------------------- |
| **Yours**     | Assistants you've created.                                 |
| **Team**      | Assistants shared with you by colleagues or by your firm.  |
| **Libra**     | Pre-built Assistants from the Libra team for common tasks. |

The Assistants picker inside chat splits the same content slightly differently — **All**, **Yours**, **Shared**, and **Libra**.

## Using an Assistant

<Steps>
  <Step title="Pick the Assistant">
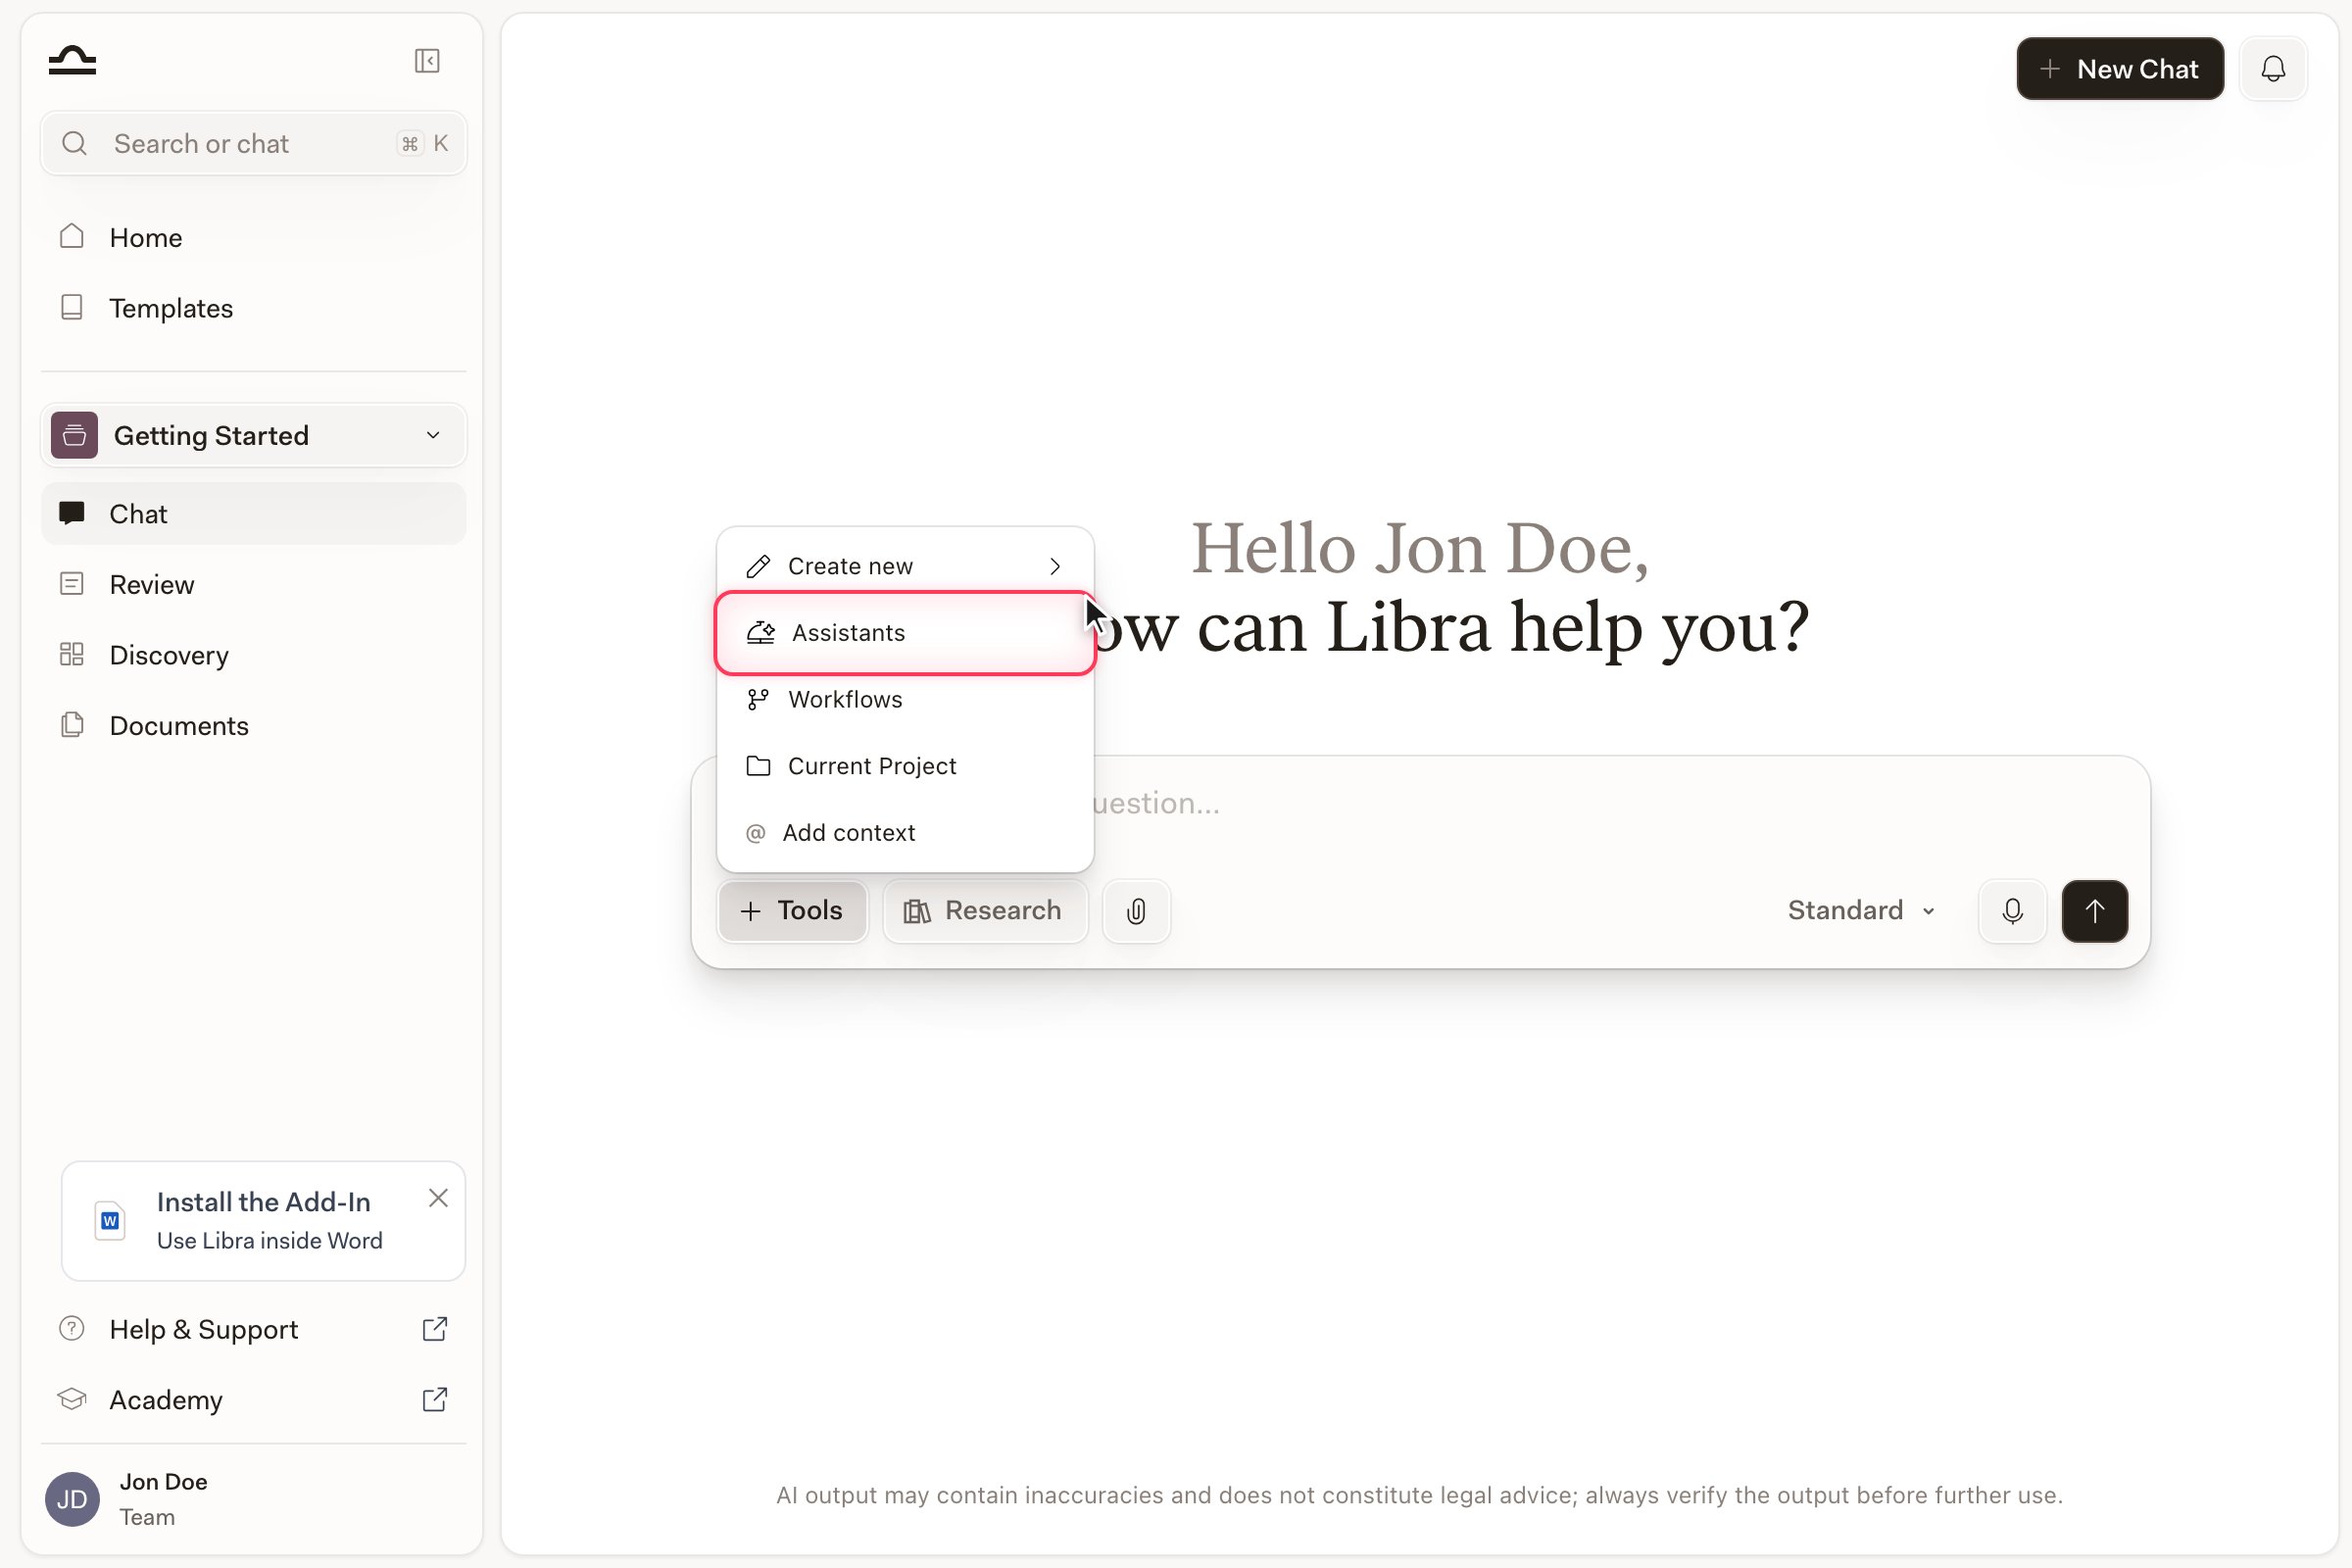
    In a chat, click **Tools → Assistants** and choose one; the Assistant attaches to the chat you are already in. Or, from the **Assistants** tab of the Templates library, hover an Assistant's card and click **Run**, which opens a new chat with the Assistant already attached — the card's **…** menu offers the same **View** and **Run** actions.

    <img src="https://mintcdn.com/libra-4206ec93/DvY4COCBKazHNw7v/assets/images/app/assistants-picker.png?fit=max&auto=format&n=DvY4COCBKazHNw7v&q=85&s=c74f9b04cf4021610fda138065bf5ed8" alt="Tools menu open in a Libra chat with the Assistants entry highlighted" width="2400" height="1600" data-path="assets/images/app/assistants-picker.png" />
  </Step>

  <Step title="The Assistant attaches to the composer">
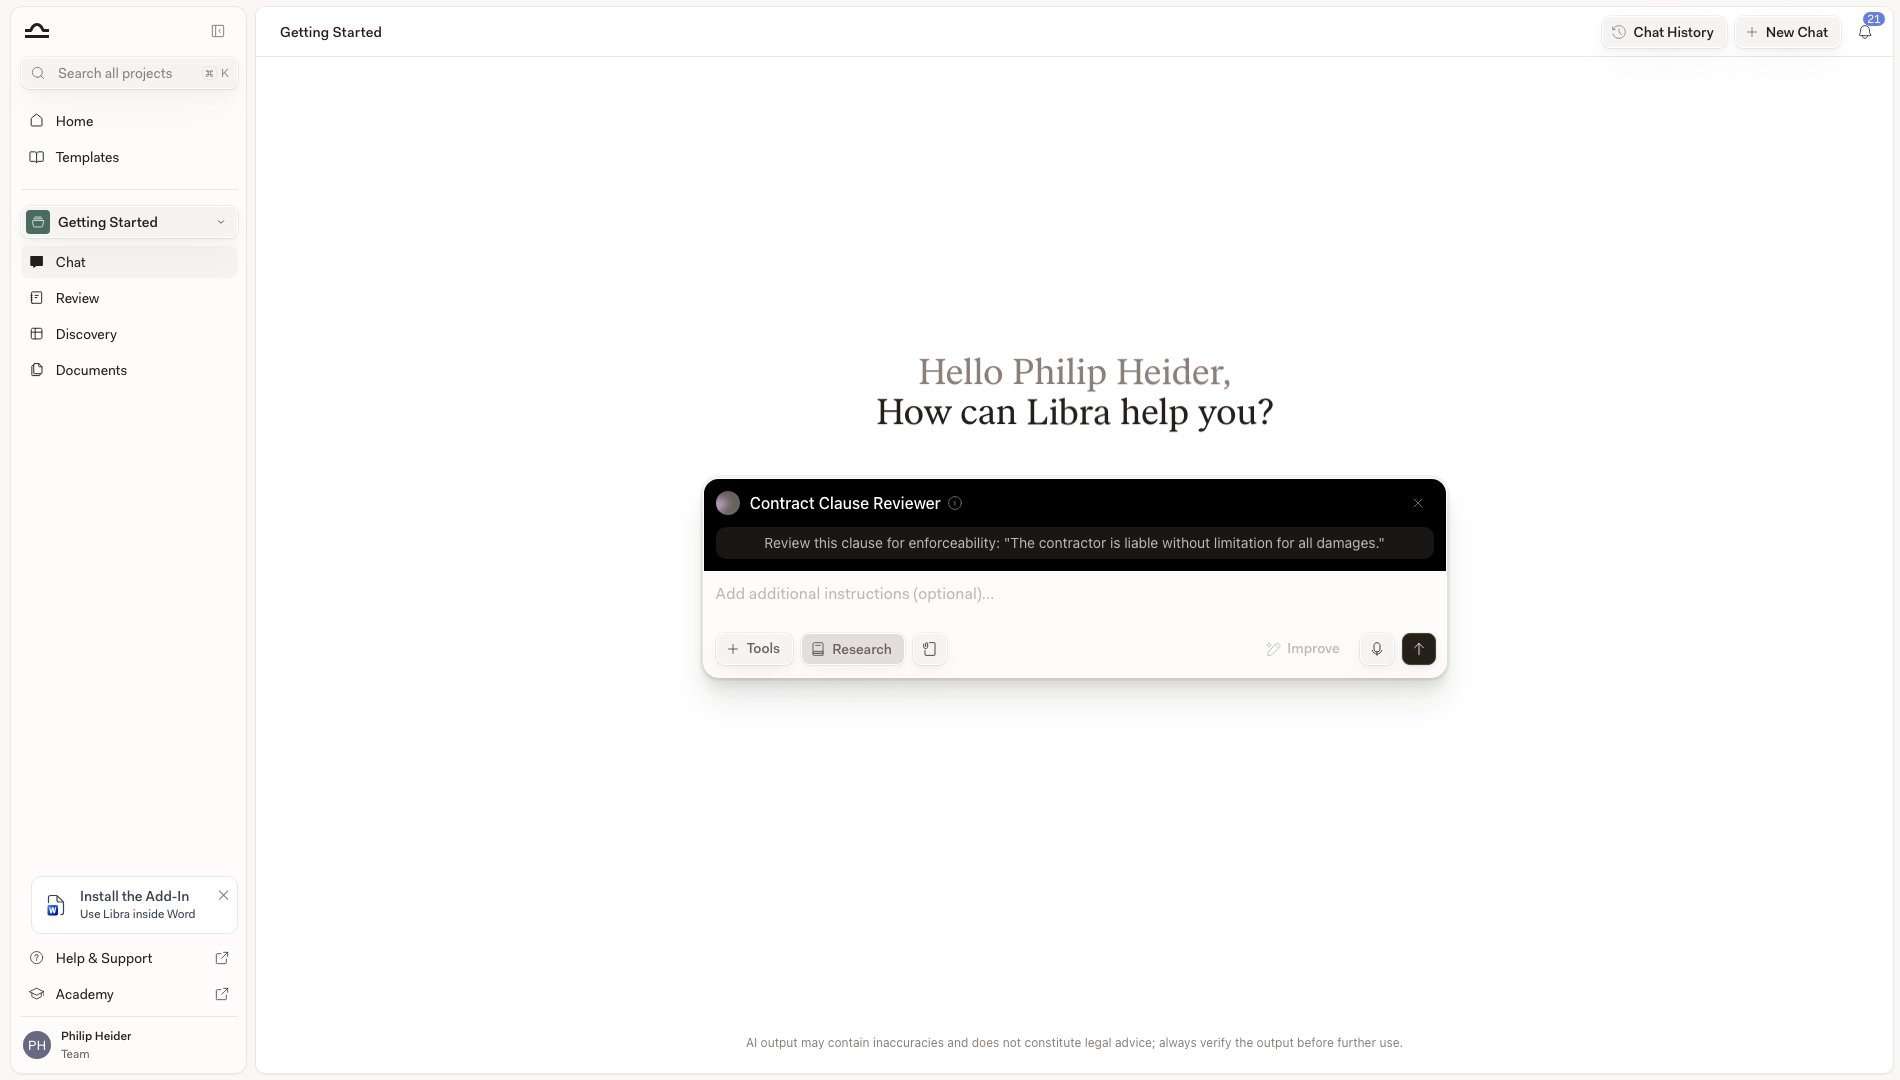
    The active Assistant appears as a dark bar sitting on top of the chat composer, showing its name. Its instructions, knowledge, and resources now apply to the whole conversation. If it defines conversation starters, they appear as clickable buttons you can send as-is or edit first.

    For your own and your team's Assistants, the **i** button on the bar opens its details. The **✕** clears the Assistant and returns you to an ordinary chat.

    <img src="https://mintcdn.com/libra-4206ec93/DvY4COCBKazHNw7v/assets/images/app/assistants-in-chat.png?fit=max&auto=format&n=DvY4COCBKazHNw7v&q=85&s=ee25a5ca305f837b396ff8824cf5a73f" alt="Active Assistant shown as a bar above the Libra chat composer, with a conversation starter loaded" width="1900" height="1080" data-path="assets/images/app/assistants-in-chat.png" />
  </Step>

  <Step title="Ask your question">
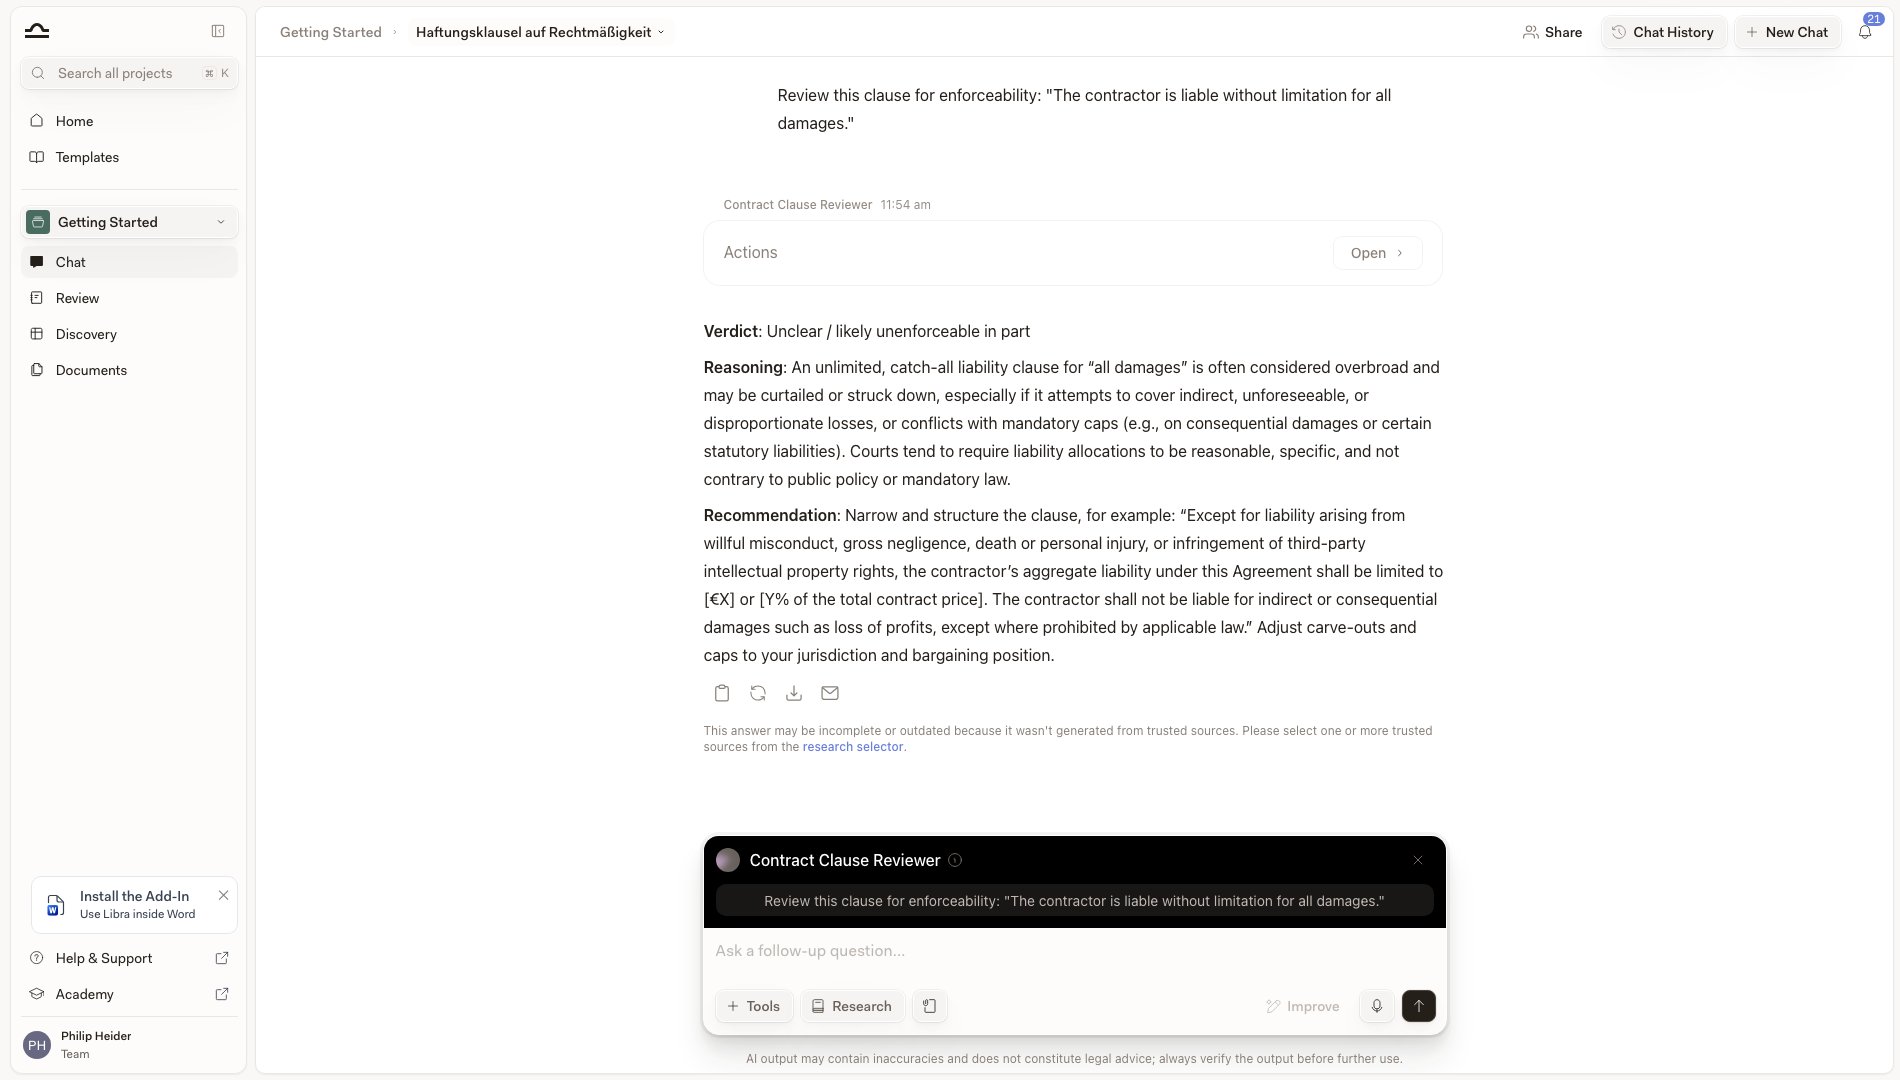
    The Assistant interprets your question through its configuration, so you don't need to repeat instructions it already knows. Its replies are labelled with the Assistant's name, and it stays attached for your follow-up questions.

    <img src="https://mintcdn.com/libra-4206ec93/DvY4COCBKazHNw7v/assets/images/app/assistants-chat-response.png?fit=max&auto=format&n=DvY4COCBKazHNw7v&q=85&s=a431917d49ef44f69177baec631a9048" alt="Assistant reply labelled with the Assistant's name, with the Assistant still attached to the composer" width="1900" height="1080" data-path="assets/images/app/assistants-chat-response.png" />
  </Step>
</Steps>

## Sharing Assistants

Same model as the rest of the Templates library; see [Starring & sharing](/en/features/templates/starring-and-sharing). The standard pattern: build an Assistant, validate it on a few real prompts, share it with your team.

## Tips for designing good Assistants

<AccordionGroup>
  <Accordion title="One Assistant, one job">
    A "do everything for M\&A" Assistant struggles to give consistent output. Three Assistants, one for analysis, one for drafting, and one for summarising, work better. Chain them with a Workflow if you need them sequentially.
  </Accordion>

  <Accordion title="Front-load the instructions">
    The first paragraph of an Assistant's prompt instructions sets the tone. Put the most important thing first: who the Assistant is, what it does, and what it never does.
  </Accordion>

  <Accordion title="Add knowledge documents you'd hand a junior">
    The reference documents, the house style guide, the standard templates: anything you'd put in a junior associate's onboarding pack belongs in an Assistant's knowledge.
  </Accordion>

  <Accordion title="Specify the output format">
    Because format isn't a separate setting, it has to live in the instructions. *"Output as a numbered list with three sections: Risks / Recommendations / Open questions"* gives consistent answers. Without a format spec, you'll get whatever the model felt like that day.
  </Accordion>

  <Accordion title="Write conversation starters for the obvious first questions">
    Starters turn a blank composer into one click. They're also the fastest way to show a colleague what the Assistant is actually for.
  </Accordion>

  <Accordion title="Tag and star the ones you use">
    A library with 30 Assistants is unmanageable without tags. Set the practice area and tags at creation; star the ones you reach for weekly.
  </Accordion>
</AccordionGroup>

## Next steps

<Columns cols={2}>
  <Card title="Create a custom Assistant" icon="plus" href="/en/features/assistants/custom">
    Build an Assistant for a specific task.
  </Card>

  <Card title="About templates" icon="book-marked" href="/en/features/templates/about">
    Where Assistants live in the Templates library.
  </Card>
</Columns>