- Create a new Discovery (or start from a template).
- Add columns for what to extract.
- Add documents and run.
- Work with the results: verify, edit, and export.
Create a new Discovery

Name the Discovery
A descriptive name. “NDA Q4 review”, “Lease portfolio extraction”, “Employment contracts, Berlin office”. The name shows up in the Documents panel and in Search.

Pick the answer type carefully. Currency and Date sort numerically and filter by range; Text does neither. Changing type later wipes values.
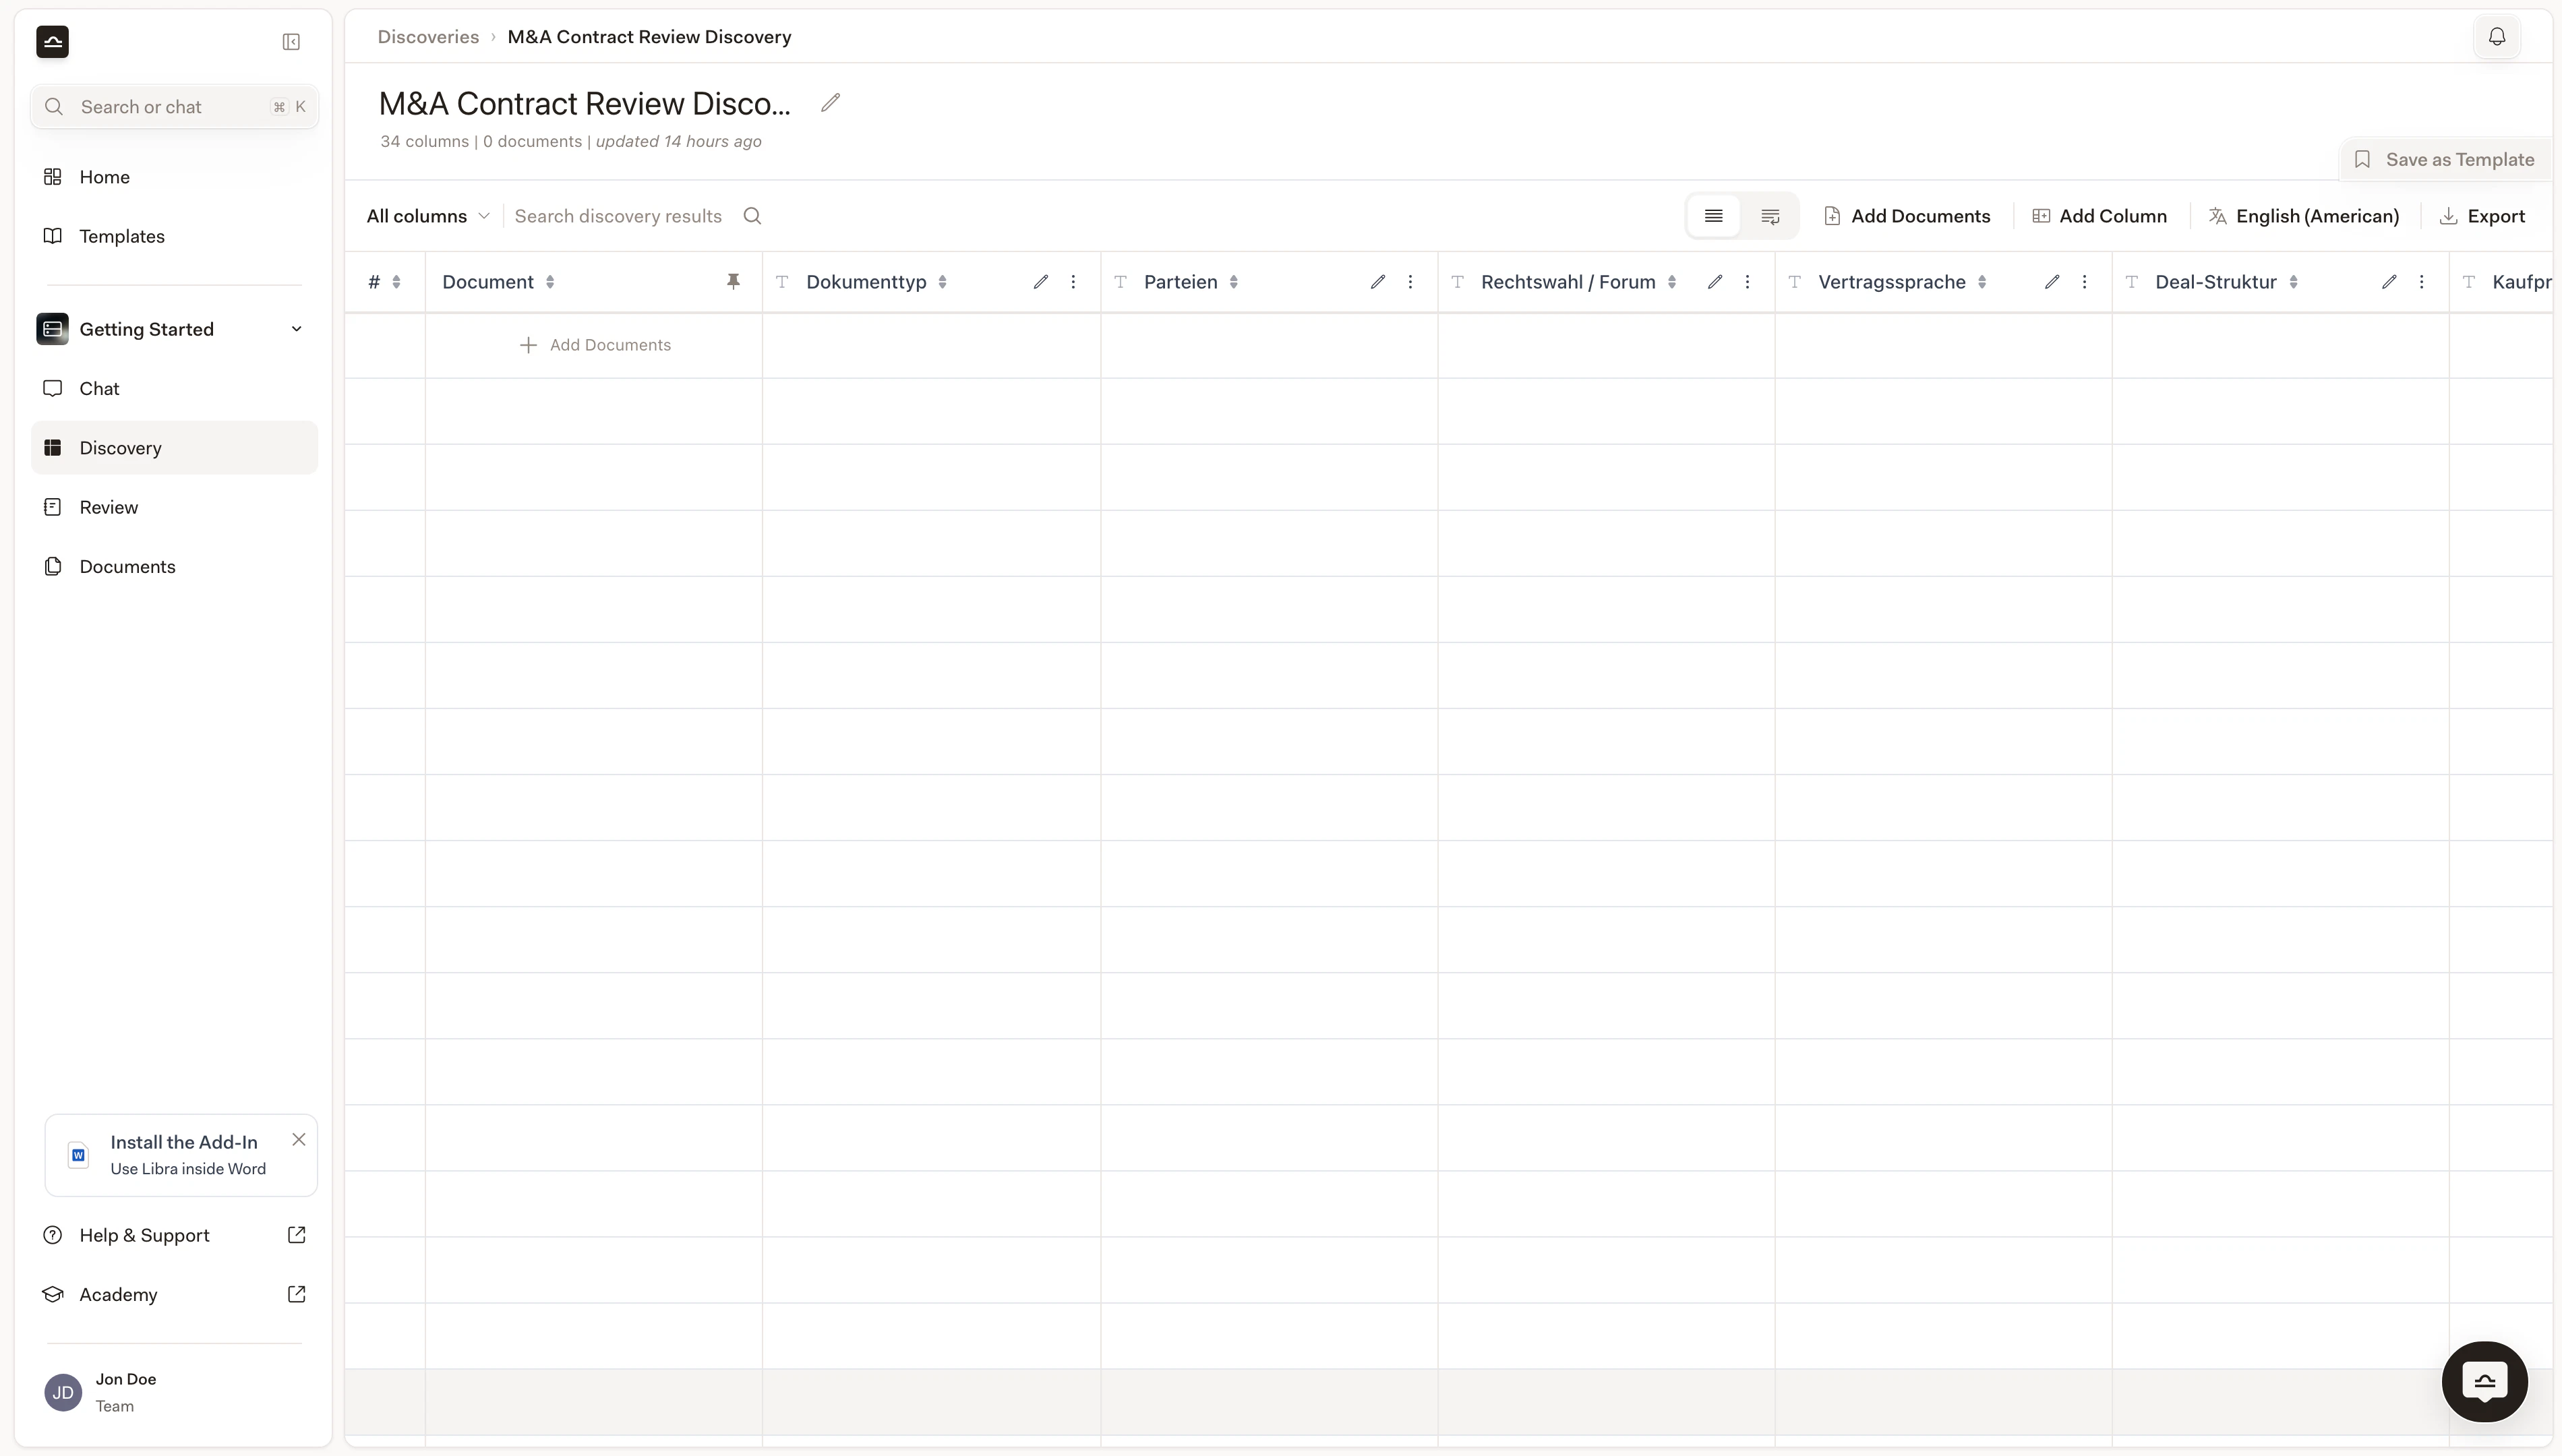
Add columns
Each column is a question Libra answers for every document.Set the column label
The header text. Short and clear: “Document Type”, “Notice Period”, “Counterparty”.
Write the prompt
The instruction Libra follows when extracting. The more specific, the better the result.Bad: “Extract notice period.”
Good: “Identify the notice period for termination, in days. If multiple notice periods are specified, return the longest.”
Pick the answer type
The format determines how the cell is rendered, sorted, and filtered.
| Type | Best for |
|---|---|
| Text | Free-form descriptions, names, summaries. |
| Yes/No | Presence checks (e.g. “Does the contract have a non-compete clause?”). |
| Number | Quantities (e.g. headcount, days, percentages). |
| Date | Signing dates, deadlines, expiry. |
| Currency | Monetary values. |
| Bullet List | Multiple items per cell. |
Add documents
Each document becomes a row.
Pick from the project, or upload
Browse the project’s existing documents, or upload new files (PDFs, Word, images, emails, text; see File types & previews).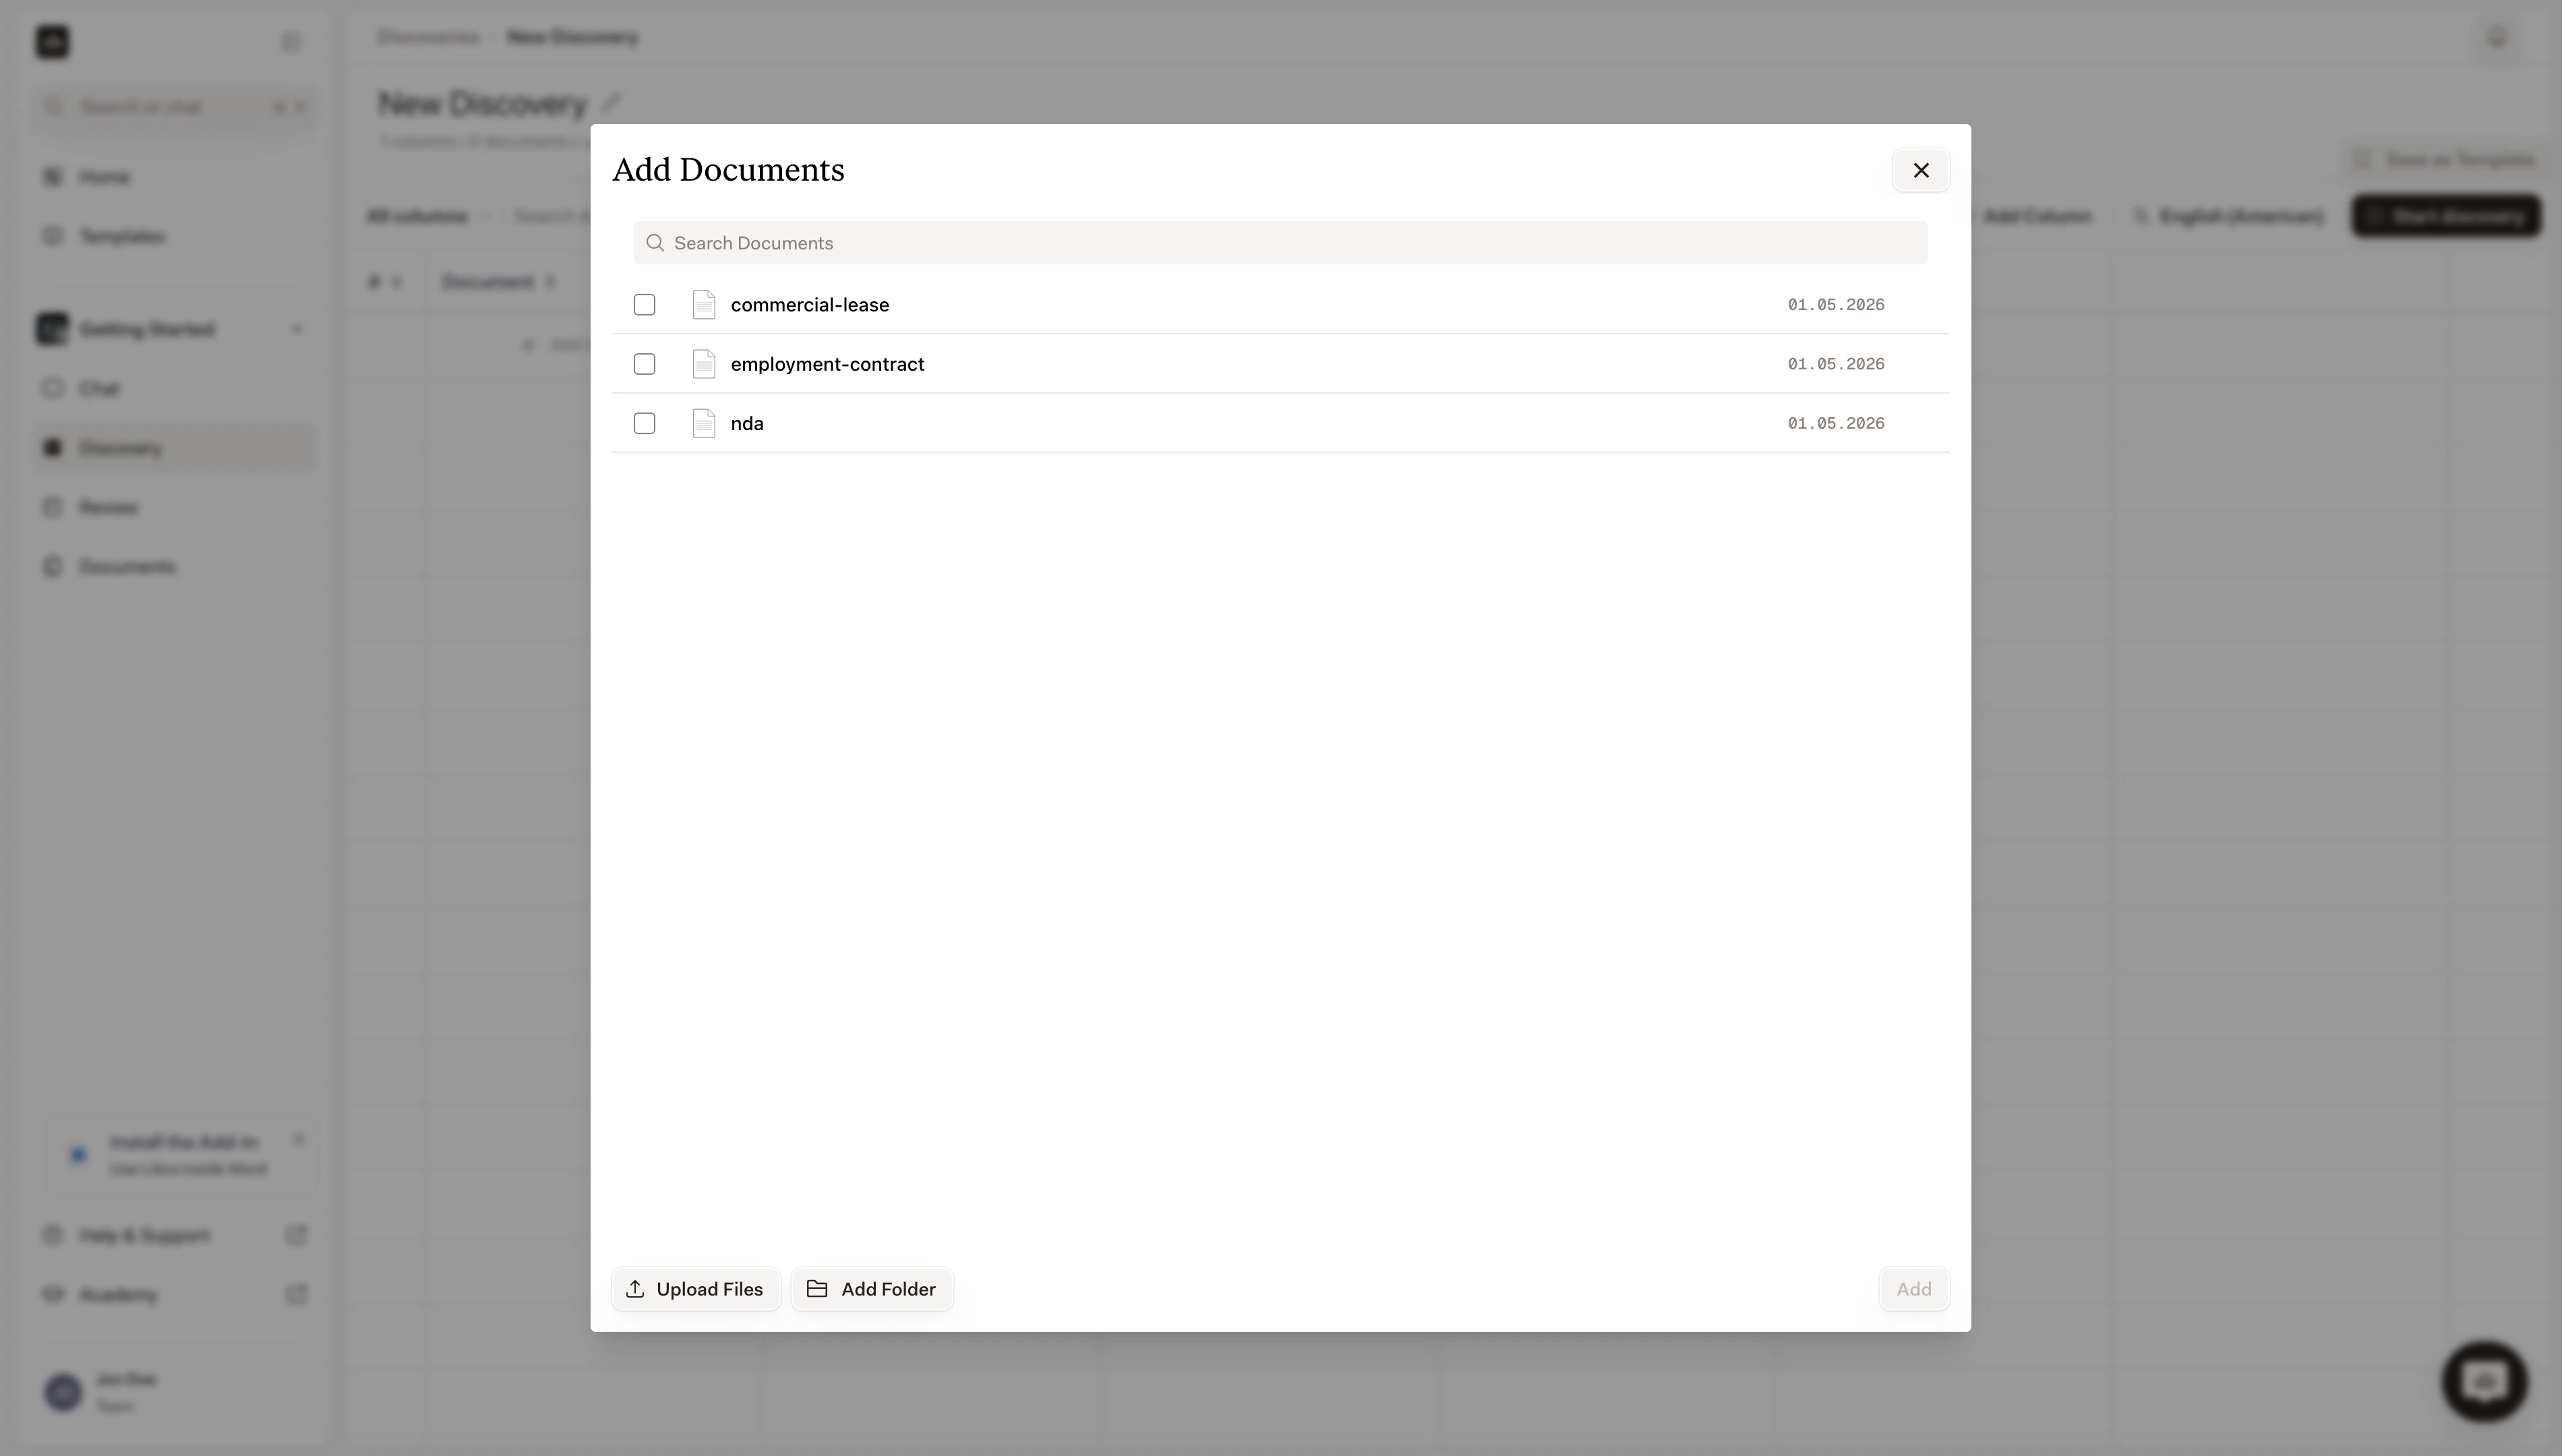
Wait for processing
Libra prepares each document. Larger files take longer. You can leave the Discovery and come back; extraction continues in the background.
Click Start Discovery
Once documents are ready, the Start Discovery button activates. Click to begin.
Work with results
After the Discovery completes, the table is sortable, searchable, and clickable.Sort and search
| Action | How |
|---|---|
| Sort | Click any column header. Click again to reverse the order. |
| Search | Use the global search field above the table to filter rows by content. |

Verify a cell
Click any cell and a panel opens on the right with everything Libra used to extract that value, for the whole row, not just the one cell you clicked.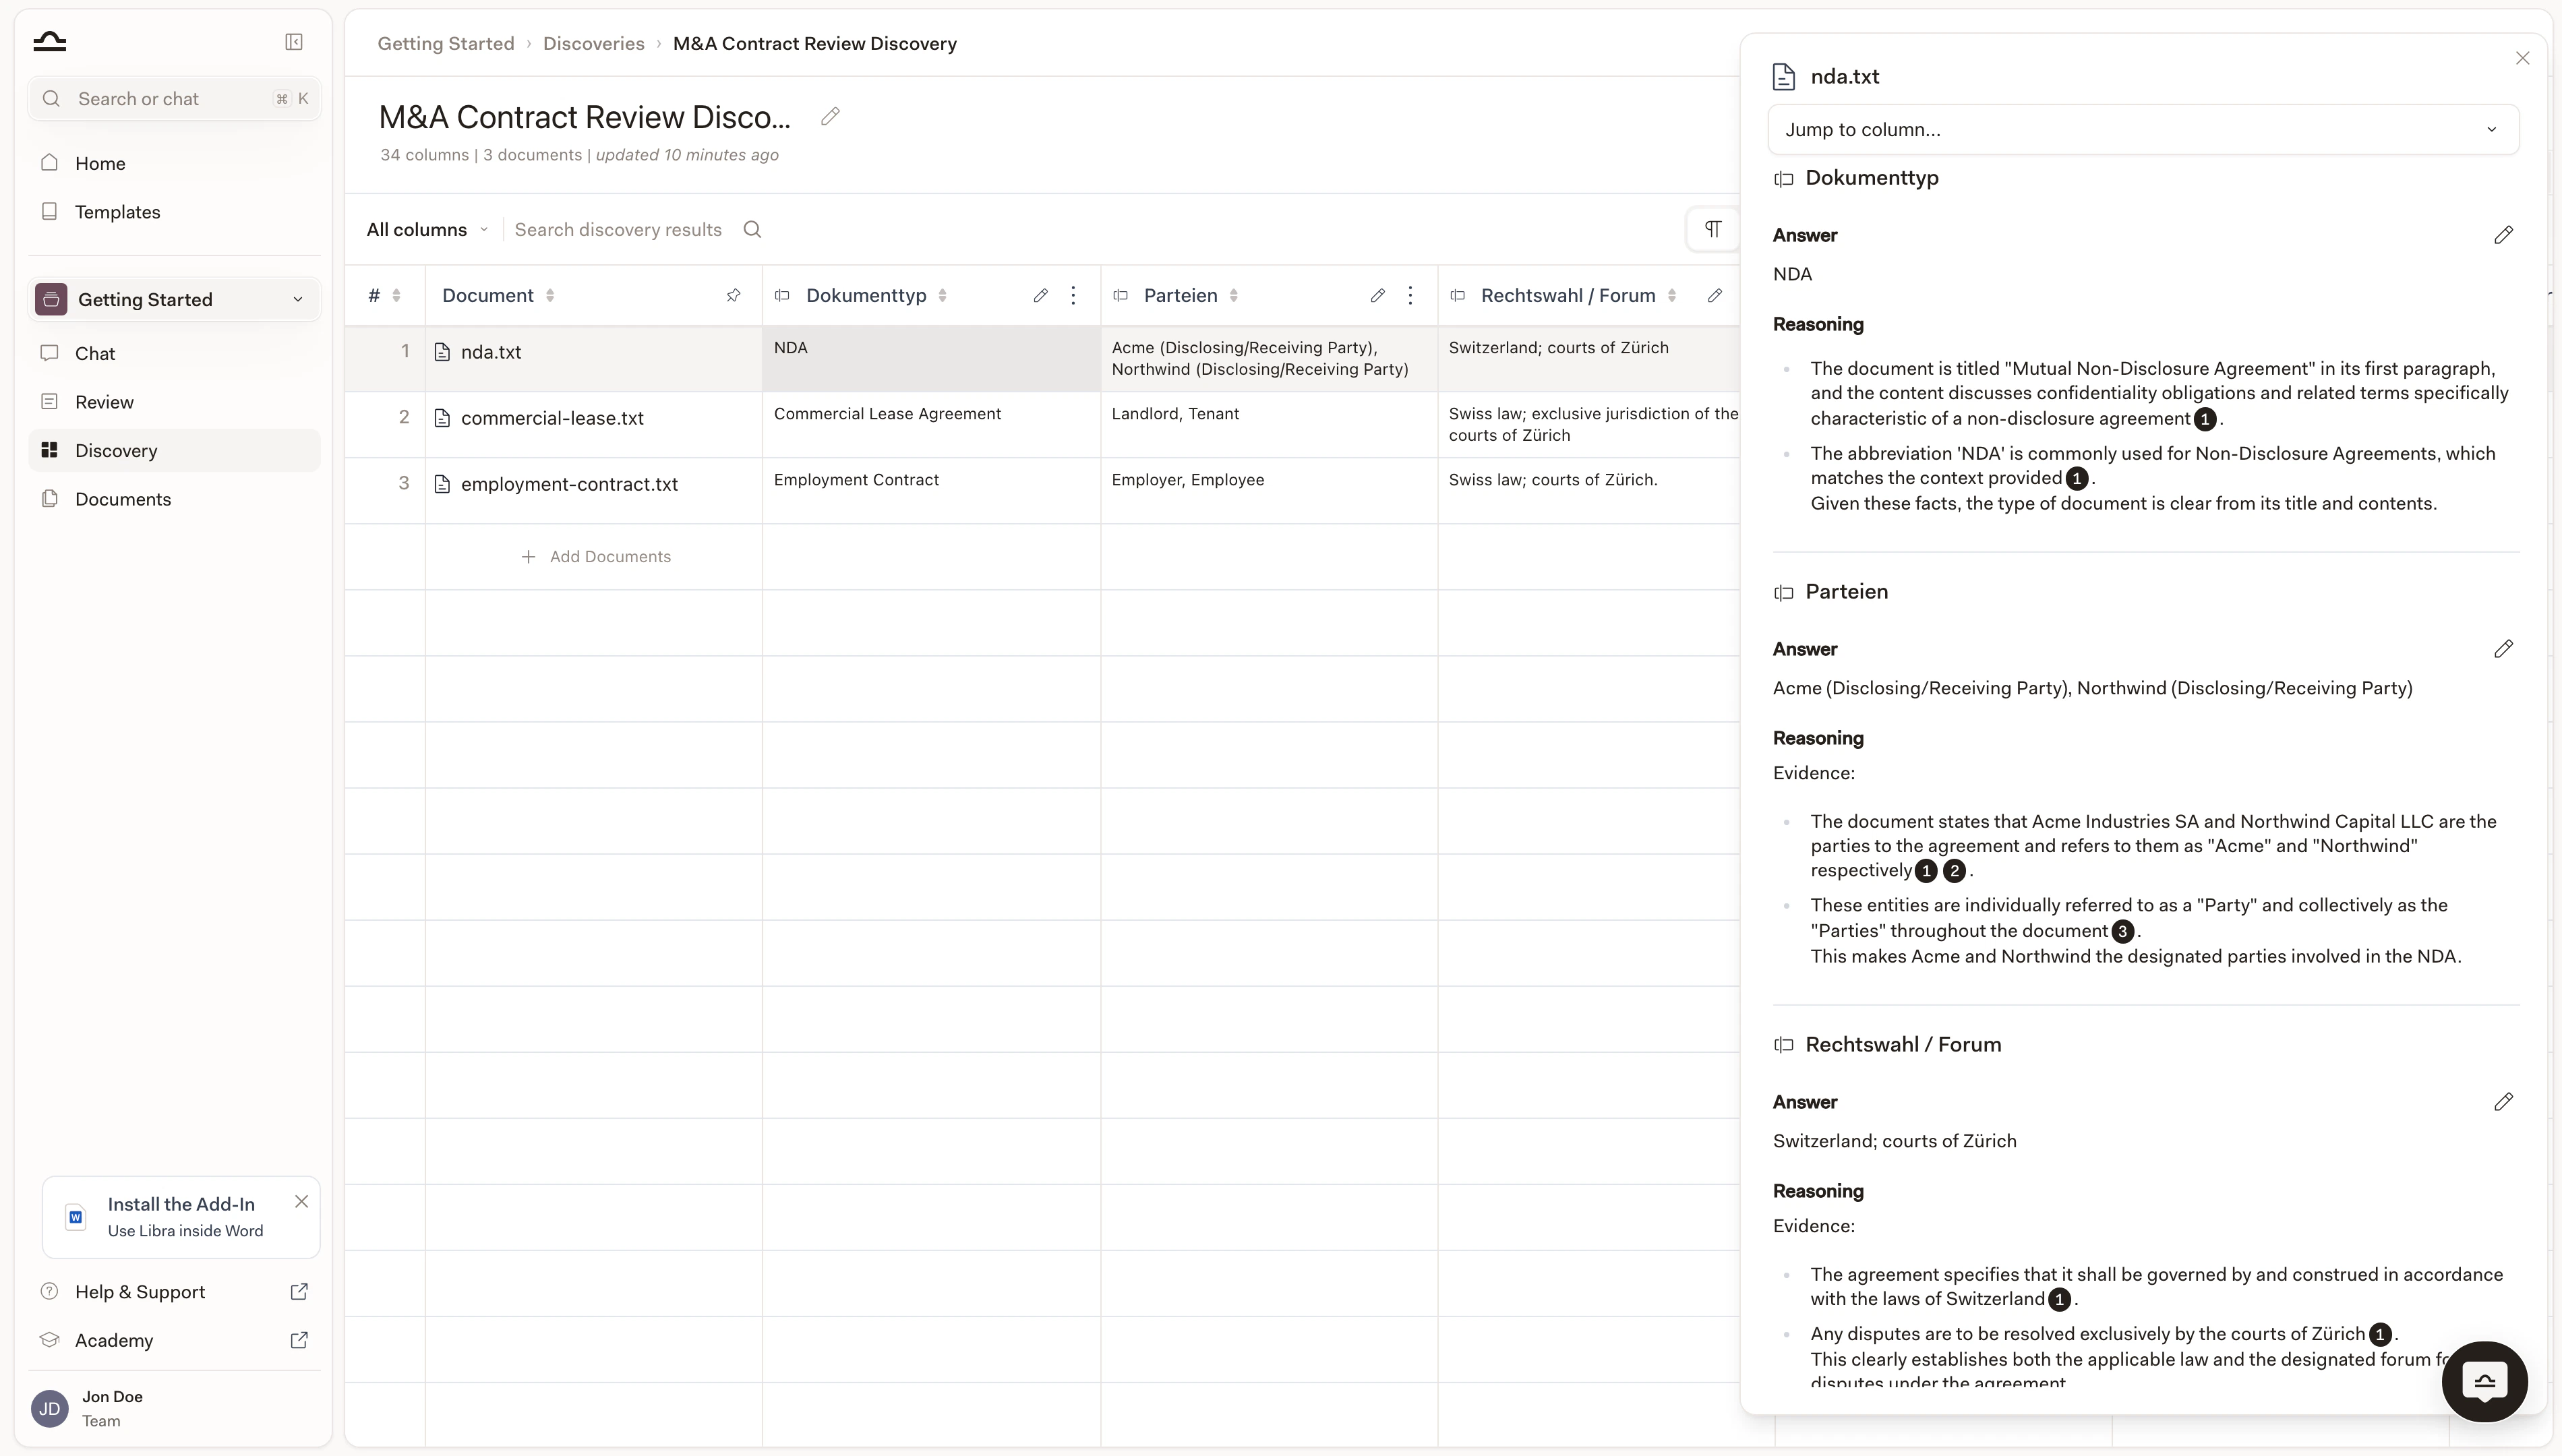
Click any cell in a row
The panel slides in on the right, headed with the document name. Use Jump to column… at the top to scroll straight to a specific column instead of paging through them.
Read the Answer, Reasoning, and Evidence for each column
Every column appears as its own block. Answer is the value Libra put in the cell. Reasoning explains how Libra got there. Evidence quotes the exact source passages: the small numbered pills (1, 2, 3) tie each claim back to a specific sentence in the document.
Edit a cell
If you need to override an extracted value:Add or remove columns after running
You can iterate on a finished Discovery.Add a new column
Click + Add Column as before. Libra runs the new column across every existing document; the rest of the Discovery stays unchanged.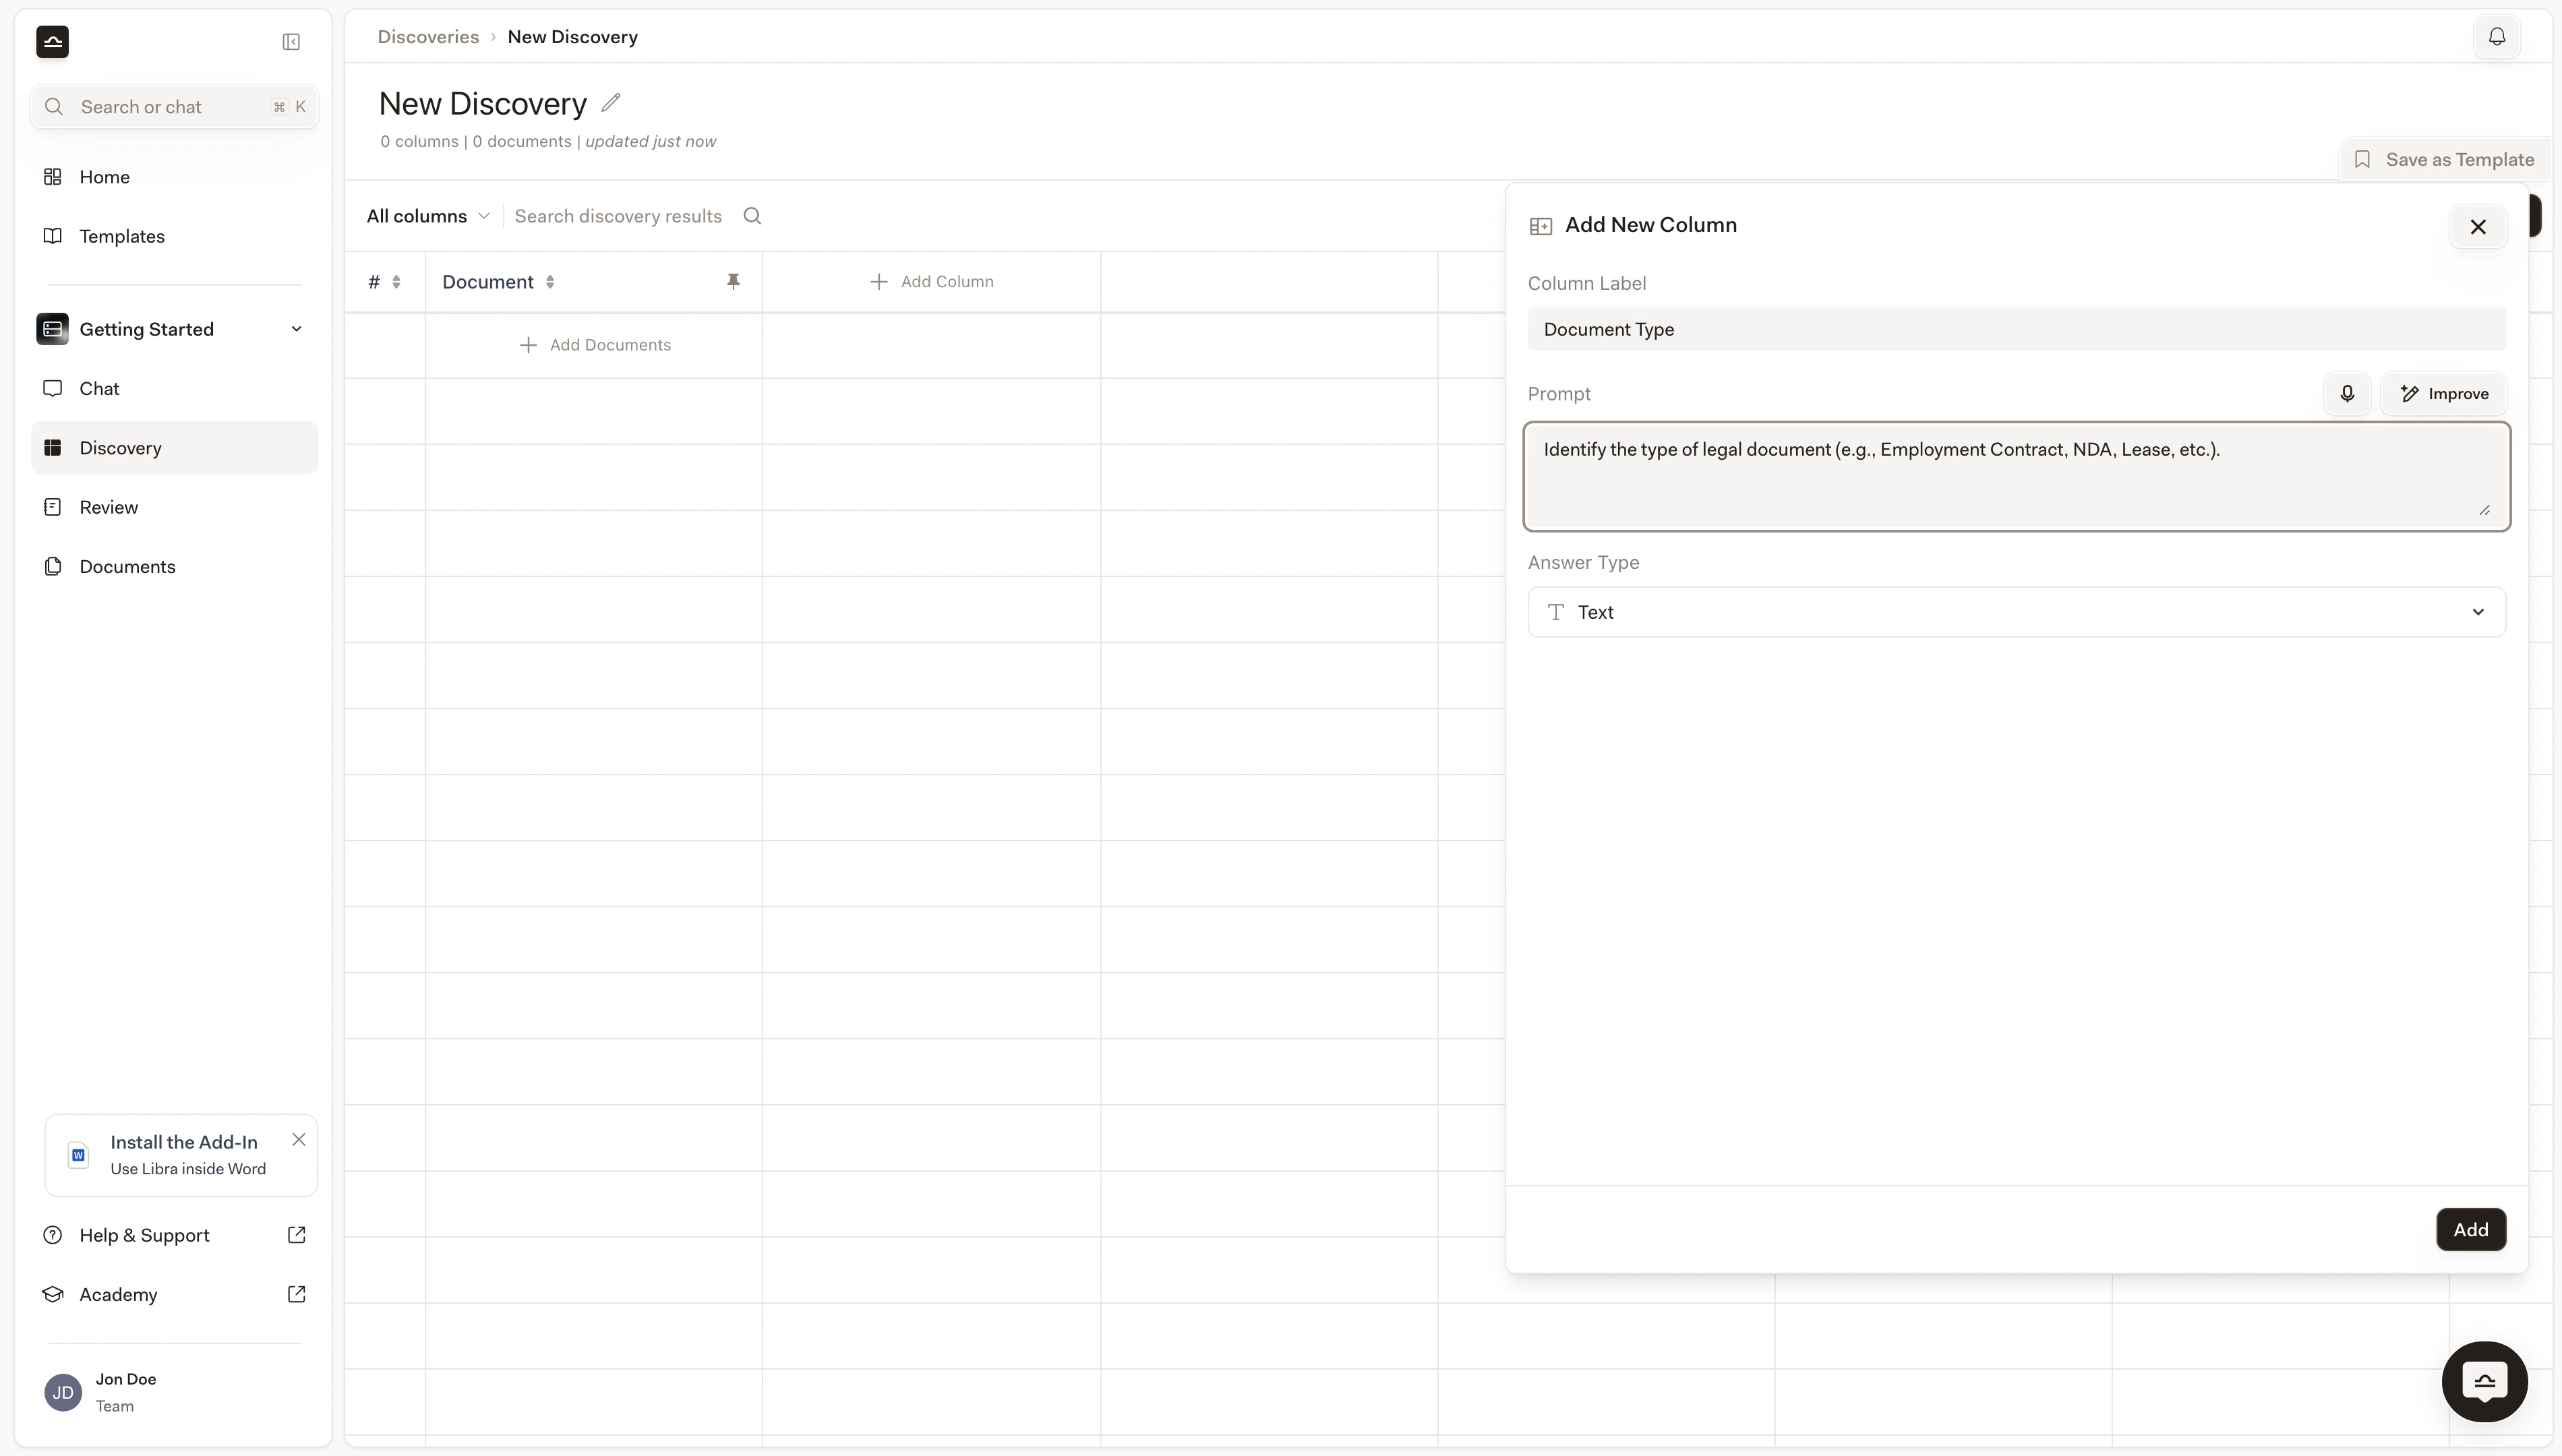
Export
Pick the format
| Format | Best for |
|---|---|
| Excel | The default for tabular data, preserving columns and types. |
| CSV | For pulling into another tool. |
| For printing or sharing as a document. | |
| Word | For pulling into a memo. |

Continue analysis in chat
Once you have a Discovery, the most powerful next step is to ask follow-up questions about it.Open a chat in the same project
From the project sidebar, click Chat to open a new conversation. Discoveries are project-scoped, so the chat needs to live in the same project as the Discovery.
Attach the Discovery as context
Type 
@ in the chat input and pick the Discovery from the picker, or use Tools → Add context. The Discovery appears as a pill alongside any documents you’ve attached.Ask a follow-up
“Which rows have notice periods longer than 90 days?”, “Compare counterparties by contract value, sorted descending.”, “Draft an email summarising the high-value contracts for the partner.”
Read the citation-backed answer
Libra cites specific cells, rows, and columns. See Discovery from chat.
Tips for effective Discoveries
Group similar documents in one Discovery
Group similar documents in one Discovery
A Discovery on a mix of NDAs, leases, and employment contracts will produce inconsistent columns. Split by document type.
Write specific column prompts
Write specific column prompts
“Extract notice period in days, taking the longest if multiple are specified” gives consistent results across documents. “Notice period?” doesn’t.
Use the right answer type
Use the right answer type
A Currency type lets you sort by amount; a Text type doesn’t. Pick the right type up-front and your downstream filtering and sorting just works.
Verify columns that drive decisions
Verify columns that drive decisions
Spot-check the cells that you’ll use to make a decision, at least one cell per column, on a high-stakes Discovery.
Save as template once it works
Save as template once it works
Once a Discovery’s columns are tuned, save it as a template. The next time you have a similar set of documents, you’ll start with the right columns automatically.
Next steps
Discovery templates
Reuse and share Discovery configurations.
Reference in chat
Use a finished Discovery as context for follow-up.