
Chat Modes
The mode picker sits to the right of the input field and decides what Libra is allowed to do with your document. It starts on Edit and then remembers the last mode you chose, so a new chat opens in whatever mode you left the picker in — worth a glance before you send if you have been using Auto.
Auto is available only in the Word desktop app for Windows and Mac. In Word on the web the picker offers Ask and Edit only, and a chat that was left in Auto falls back to Edit.
The + button beside the input adds files from your Libra project to the conversation, so Libra can answer against more than the open document.
Ask Questions
Select Ask in the mode picker and type your question. Libra answers from the document you have open together with its own legal knowledge, and leaves your text untouched. Select a passage before you ask and it appears as a chip above the input, so Libra knows what “this clause” refers to. Libra also offers suggested questions about the open document — click one to put it in the input, then send it.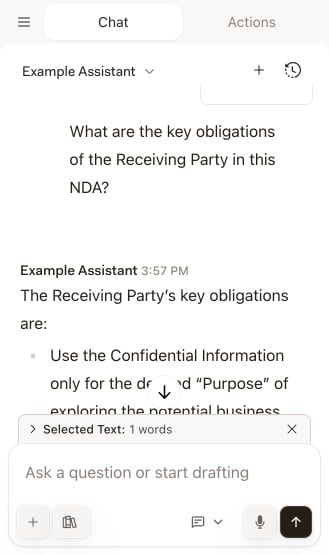
Request Text Edits
Use Edit mode when you want Libra to change the text but you want the last word on every change.1
Select the text to revise (optional)
Highlight the passage you want changed. This keeps Libra focused on the right section instead of the whole document.
2
Switch to Edit mode
Open the mode picker next to the input and choose Edit.
3
Describe the change
Tell Libra what you want:
- “Rewrite this in a more formal tone”
- “Make this clause favor the landlord”
- “Shorten the confidentiality term to two years”
4
Review the Changes card
Libra returns its revisions in a Changes card. Nothing reaches your document until you act on them.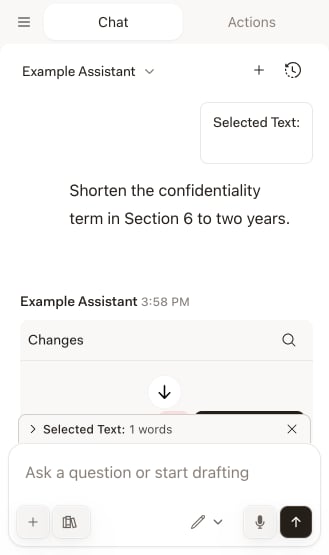
5
Apply or reject
Apply writes the revision into the document and Reject discards it. The chevron next to Apply opens a menu holding Apply All, for when you want every revision at once, and Undo rejection, for when you reject something and change your mind. Once a revision is in the document, the card keeps Undo and Apply again available.
Track Changes
The add-in has its own Track Changes switch, in the menu behind the chevron next to Apply. It is on by default, so applied revisions arrive as tracked changes that you accept or reject with Word’s normal reviewing tools. You do not need to turn Word’s own Track Changes on first. For the moment it takes to write a revision, the add-in sets the document’s tracking mode from that switch and then restores whatever you had before — so the switch in the add-in, not Word’s ribbon, is what governs the result. Turn it off if you would rather have revisions written as plain text.Auto Mode
In Auto mode you skip the review step: each revision is applied as soon as Libra has finished writing it. While Libra is applying, a red stop button appears in the card — click it to stop the remaining revisions. Anything already applied stays in the document, and Undo is still available per revision. The Track Changes switch governs Auto mode too, so with it on you still end up with tracked revisions to accept or reject.Use Research Mode
Click the Research icon beside the input to open the source panel, and toggle on the databases you want Libra to search. Ask your question, and the answer comes back with citations you can click to open the underlying source.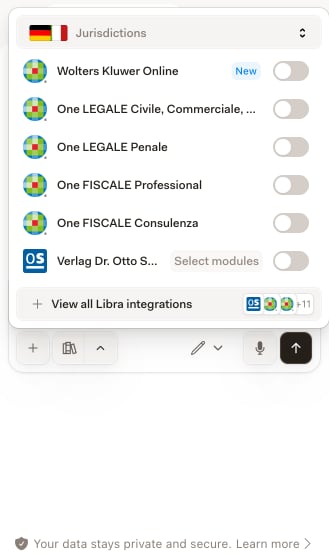
Tips for Better Results
Select text for context
Select text for context
When asking about a specific section, select that text first. Libra then knows exactly what you are referring to.
Be specific about edits
Be specific about edits
Instead of “Fix this,” try “Rewrite this paragraph to emphasize the buyer’s remedies if delivery is delayed.”
Leave Track Changes on
Leave Track Changes on
With the add-in’s Track Changes switch on, every revision Libra applies is a tracked change, which fits straight into a normal contract negotiation workflow.
Review before applying
Review before applying
In Edit mode, read the revision in the Changes card before you click Apply. If you only notice a problem afterwards, Undo puts the original text back.