
Set the Type in Step 2, Name, Address, Date, Currency, before pointing at a reference doc. Type is the biggest accuracy lever in the flow.
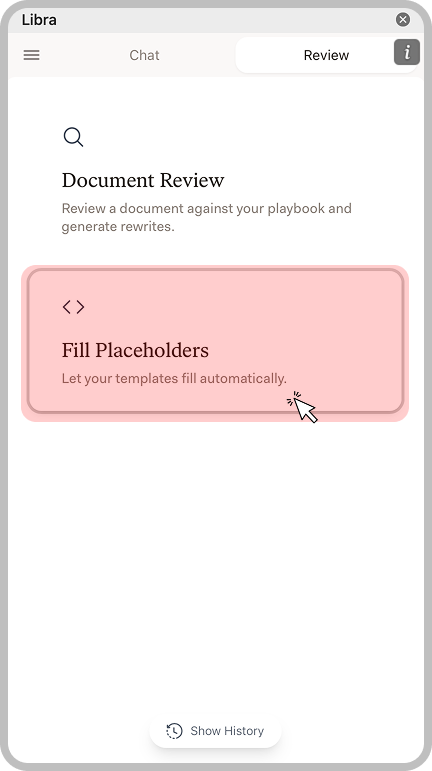
Start the Wizard
The wizard guides you through five steps to fill your template.
Step 1: Placeholder Formats
Configure which placeholder formats Libra should detect in your document.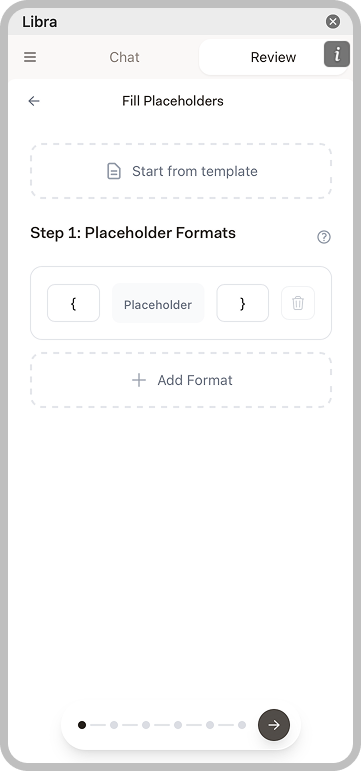
- Start from template: Click to use the current document as your template
- Placeholder format: Define the format pattern (e.g.,
{Placeholder}) - Add Format: Add additional formats if your templates use multiple styles
{Placeholder}- curly braces[Placeholder]- square brackets{{Placeholder}}- double curly braces
Step 2: Enrich Placeholders
Libra scans your document and displays all detected placeholders. Configure each one for better accuracy.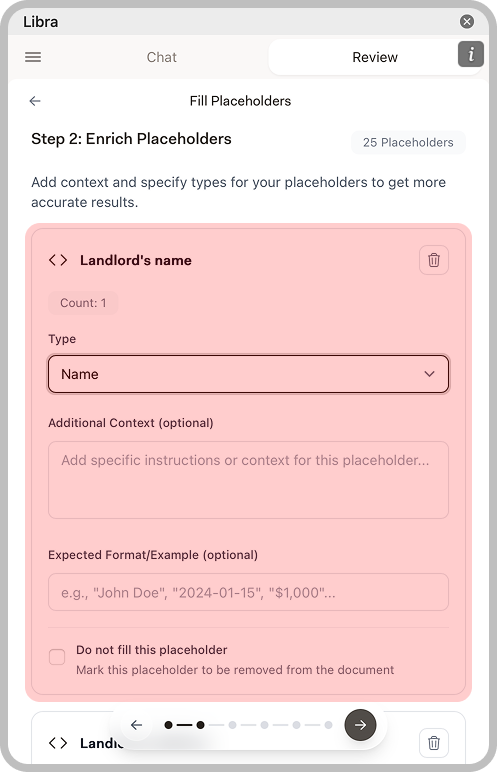
| Option | Description |
|---|---|
| Type | Select the data type (Name, Address, Date, etc.) for more accurate extraction |
| Additional Context | Add specific instructions for this placeholder |
| Expected Format/Example | Provide an example of how the value should look |
| Do not fill | Mark placeholders that should be removed rather than filled |
Step 3: Add Context
Choose where Libra should extract the placeholder values from. You have two options:Select Documents
Upload reference documents that contain the information to extract (contracts, intake forms, correspondence).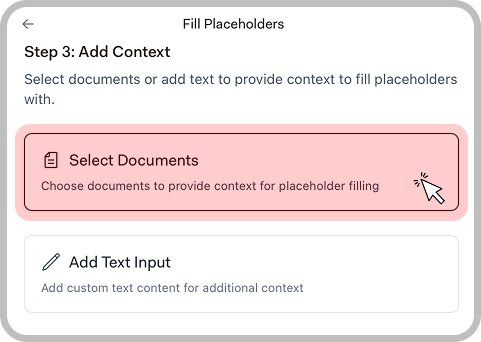
Add Text Input
Type or paste custom text content to use as context. This is useful when information isn’t in a document or needs manual entry.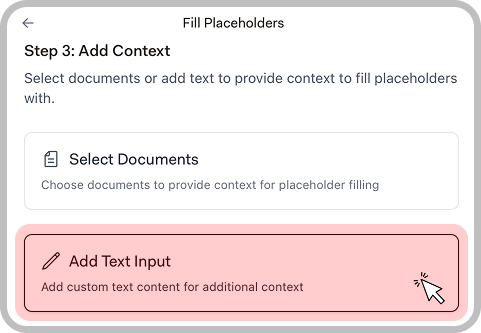
Step 4: Confirm Placeholders
Review the generated content for each placeholder before applying.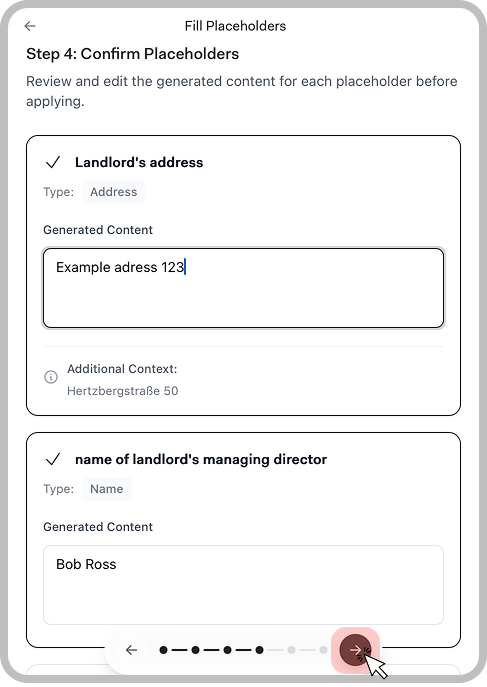
- Type: The data type you configured
- Generated Content: The value Libra extracted (editable)
- Additional Context: Any context information that was used
Step 5: Apply Placeholders
Review all changes and apply them to your document.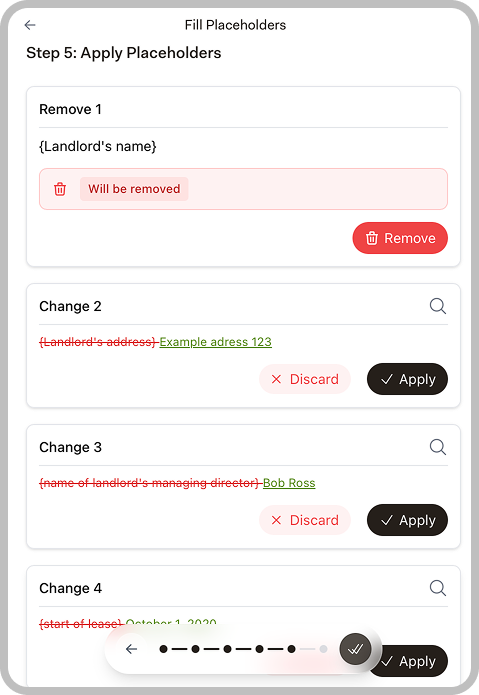
| Action | Result |
|---|---|
| Apply | Insert the generated value into your document |
| Discard | Keep the original placeholder unchanged |
| Remove | Delete the placeholder entirely (for items marked “do not fill”) |
Completion
Once all placeholders are processed, you see a completion confirmation.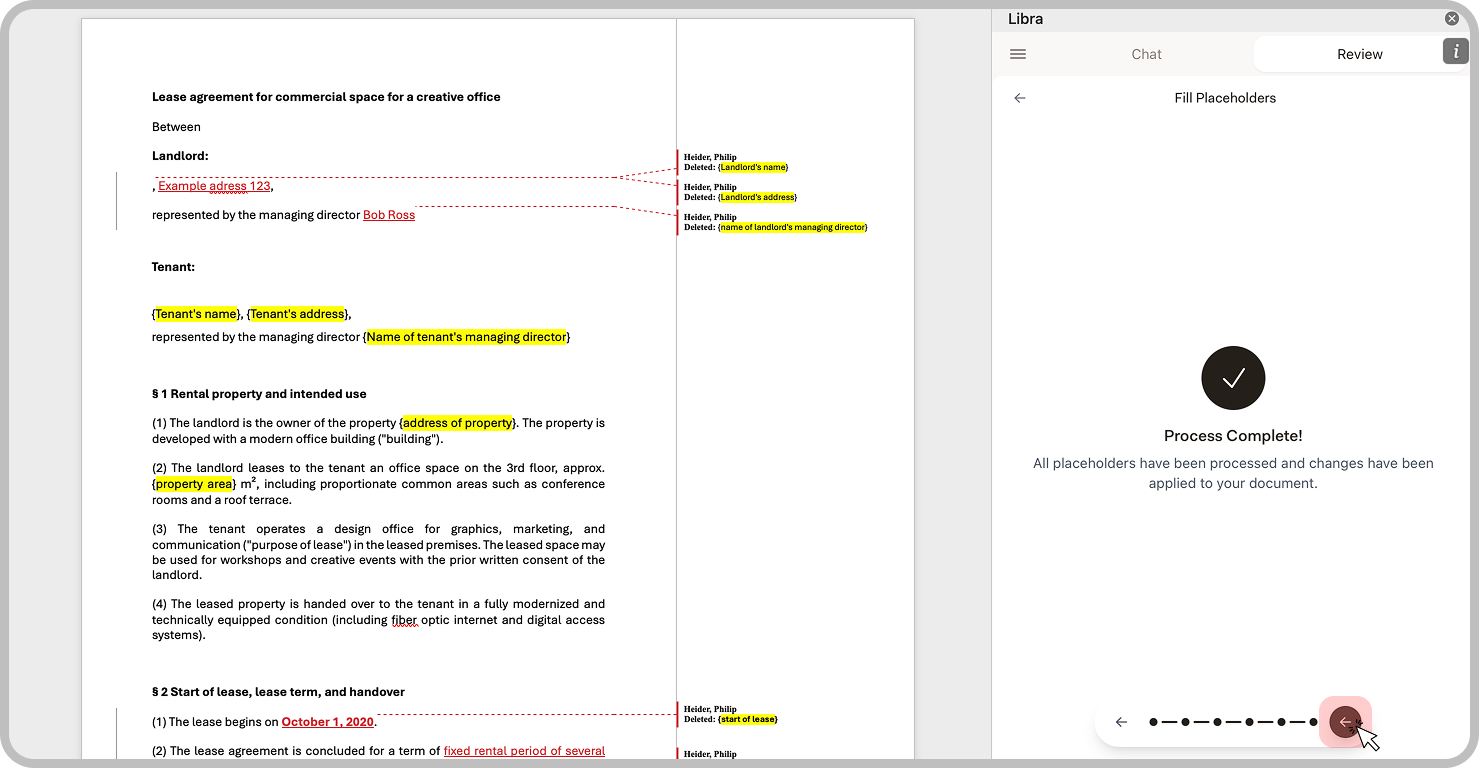
Example Use Cases
Engagement letters
Engagement letters
Upload the client intake form. Libra fills in client name, matter description, fee arrangement, and contact details.
Lease agreements
Lease agreements
Upload the signed term sheet or prior correspondence. Libra fills landlord details, tenant information, property address, and key dates.
Contract summaries
Contract summaries
Upload the executed contract. Libra fills in party names, dates, key terms, and financial figures.
Standard correspondence
Standard correspondence
Upload case information or prior correspondence. Libra fills names, dates, case numbers, and references.
Tips for Better Results
Use descriptive placeholder names
Use descriptive placeholder names
{Landlord's name} is easier to fill correctly than {Party A}. Descriptive names help Libra understand what information to extract.Set placeholder types
Set placeholder types
In Step 2, setting the correct type (Name, Address, Date, Currency) significantly improves accuracy.
Provide structured reference documents
Provide structured reference documents
Documents with clear headings, labeled fields, and organized information produce better extraction results.
Add context for ambiguous placeholders
Add context for ambiguous placeholders
Use the Additional Context field to provide specific instructions when a placeholder name isn’t self-explanatory.
Review before applying
Review before applying
Always check the generated values in Step 4. Edit any incorrect extractions before applying to your document.