


The
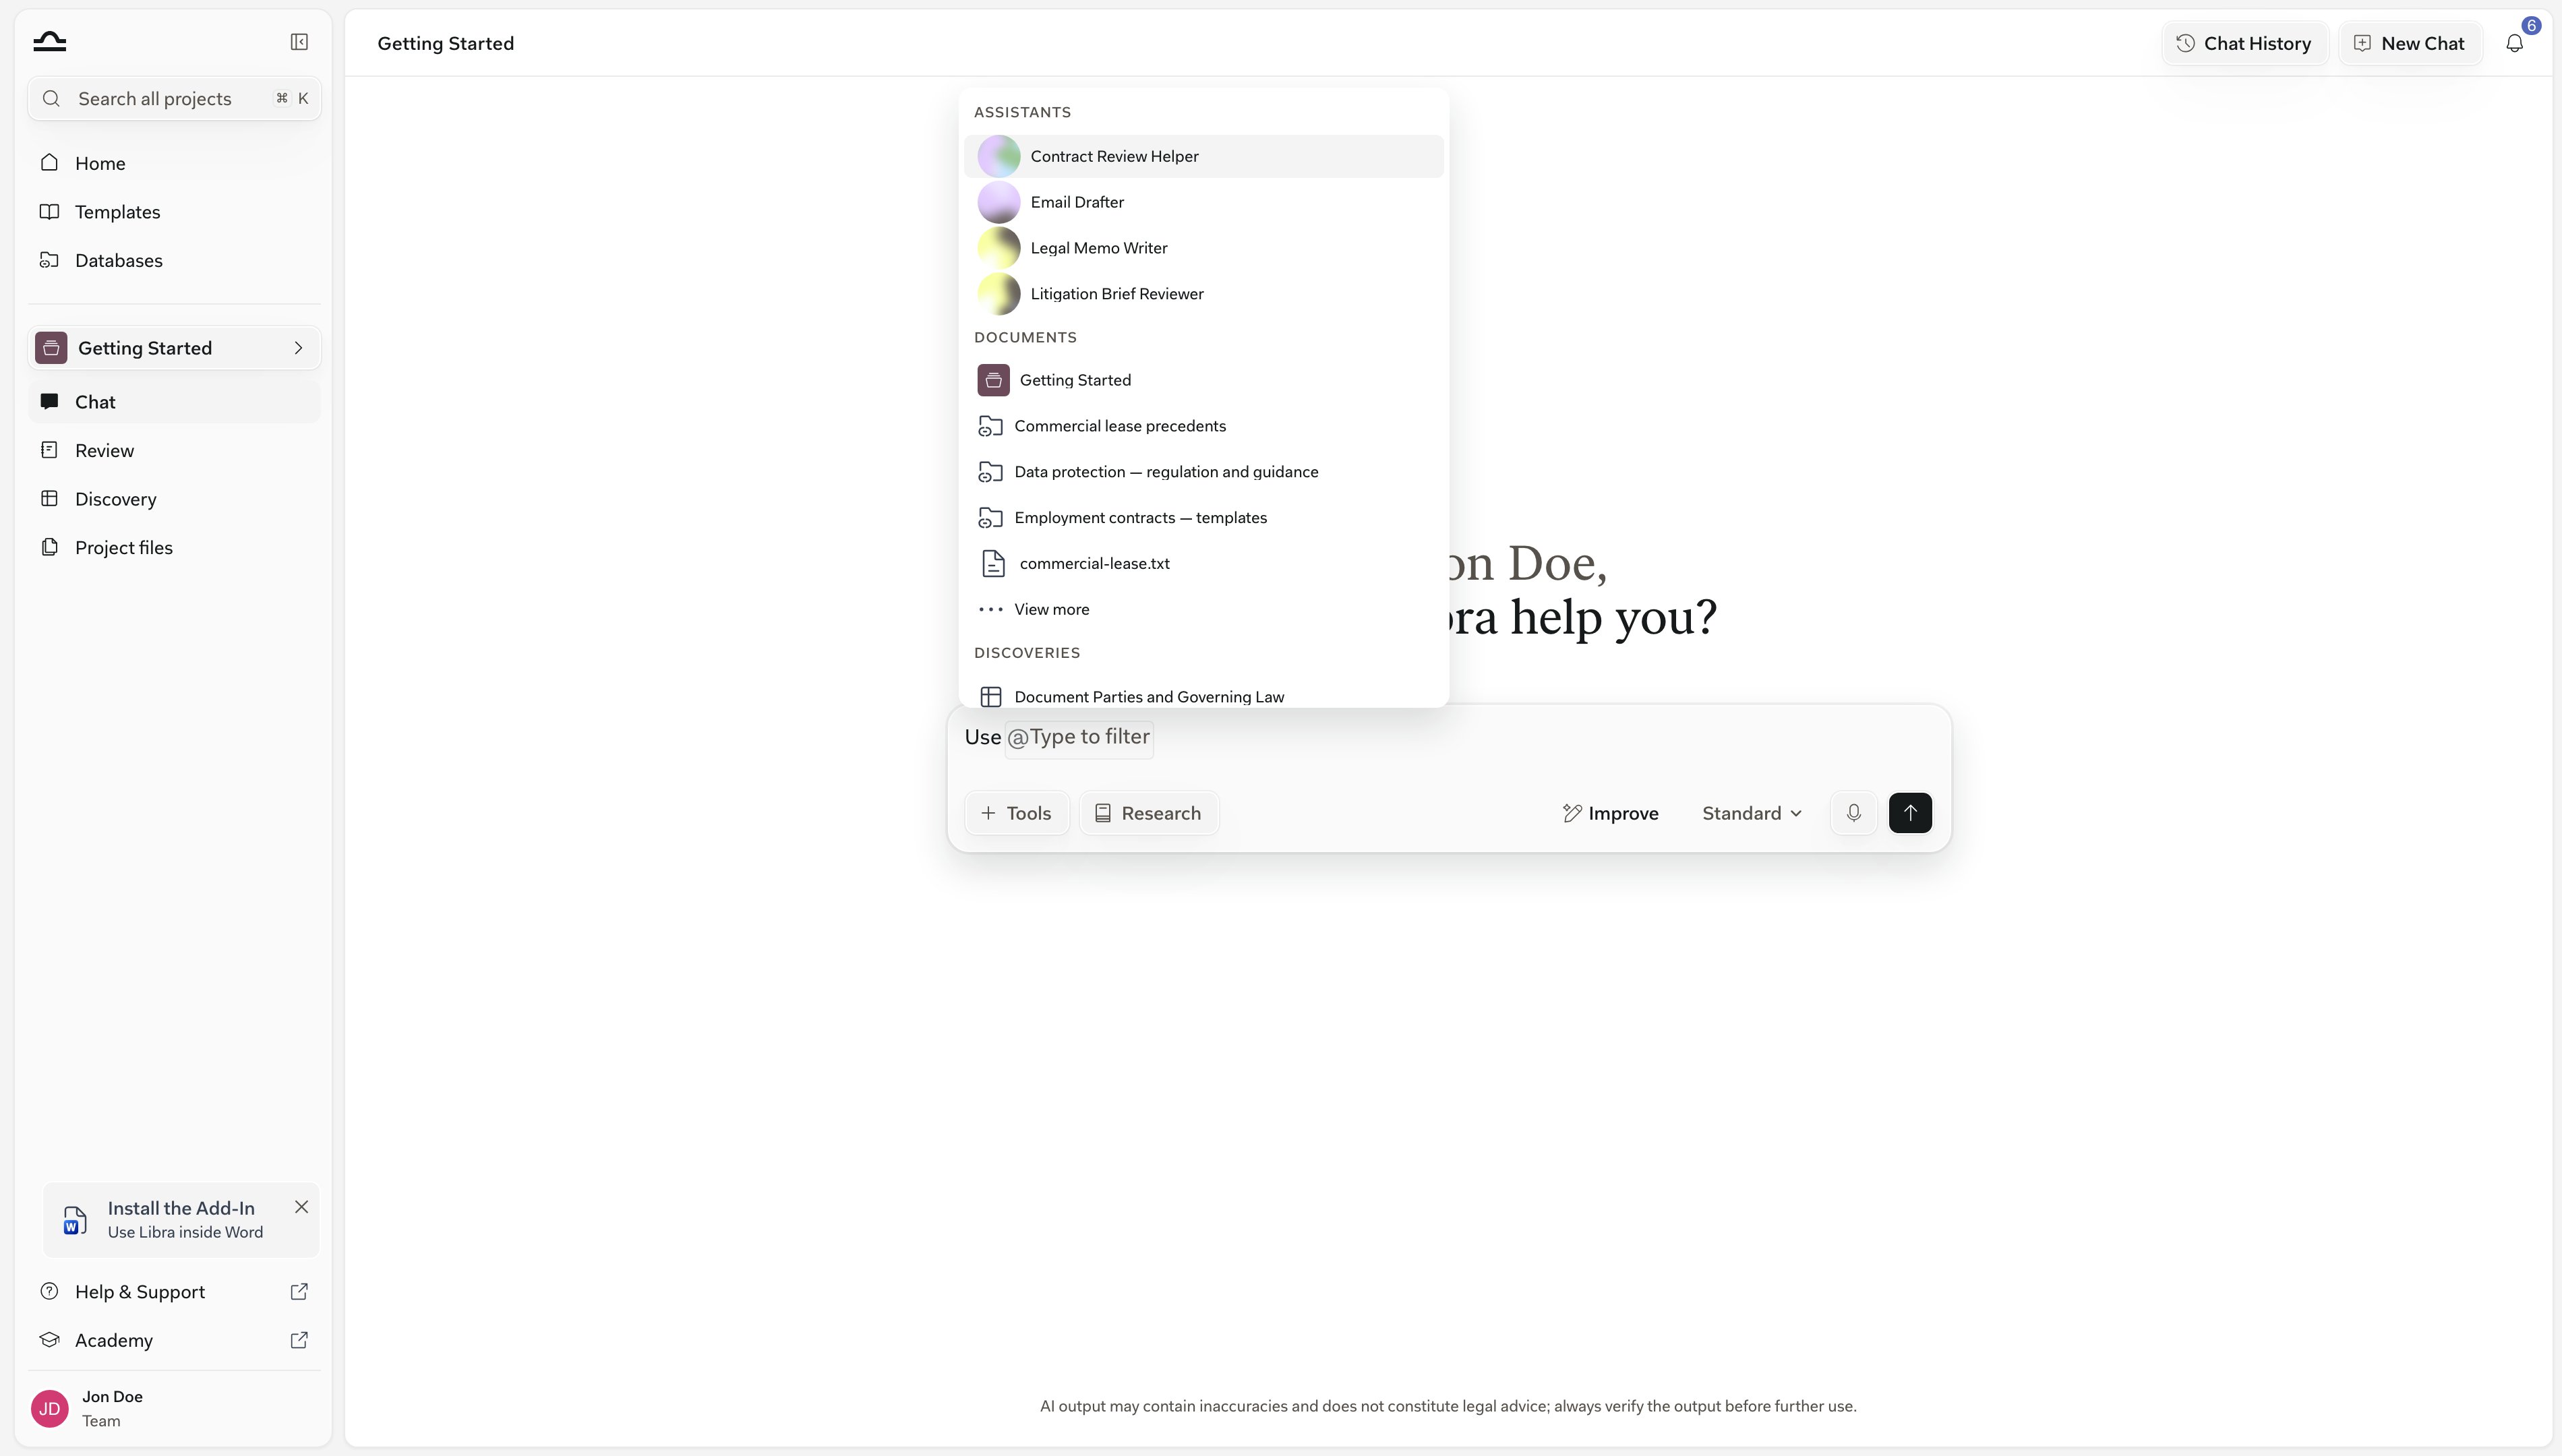
@ picker filters as you type: @nda narrows every section to the items named for it. ↑↓ + Enter inserts.The chat input, left to right
Start at + Tools on the left and finish at the send arrow on the right. Some of the row only shows up when it applies — Improve stays greyed out until you type, and the mode button disappears while an Assistant is driving the chat.
Attaching a document opens the same picker everywhere in Libra — chat, Project files, Databases, Review, Discovery and an Assistant’s knowledge. What you can reach from one, you can reach from all of them.
You can also drag a document’s tab out of the file viewer onto the chat to attach it — or onto a folder in Project files to move it there. A still-processing document shows File is not processed. instead.
Whatever you type stays in the box until you send it. Leave the conversation, switch chats or reload the page, and the half-written prompt is still there. Each chat keeps its own draft.
Sending the message clears that chat’s draft, and so does New chat — Libra reads that as a deliberate fresh start rather than an accident. Signing out clears all of them.
The @-mention picker
Type@ in the message box to point Libra at one specific thing — the lease you want checked, an Assistant, a whole project — instead of describing it in words. The picker opens as soon as you type the character.
1
Type @ anywhere in your prompt
2
Filter by typing
As soon as you type after the
@, the five-item cap drops away and every section filters live by name.3
Pick with arrow keys + Enter, or click
The mention is inserted as a pill in your prompt. Send the message; the referenced item is now part of the chat’s context.
Modes: how much thinking to spend
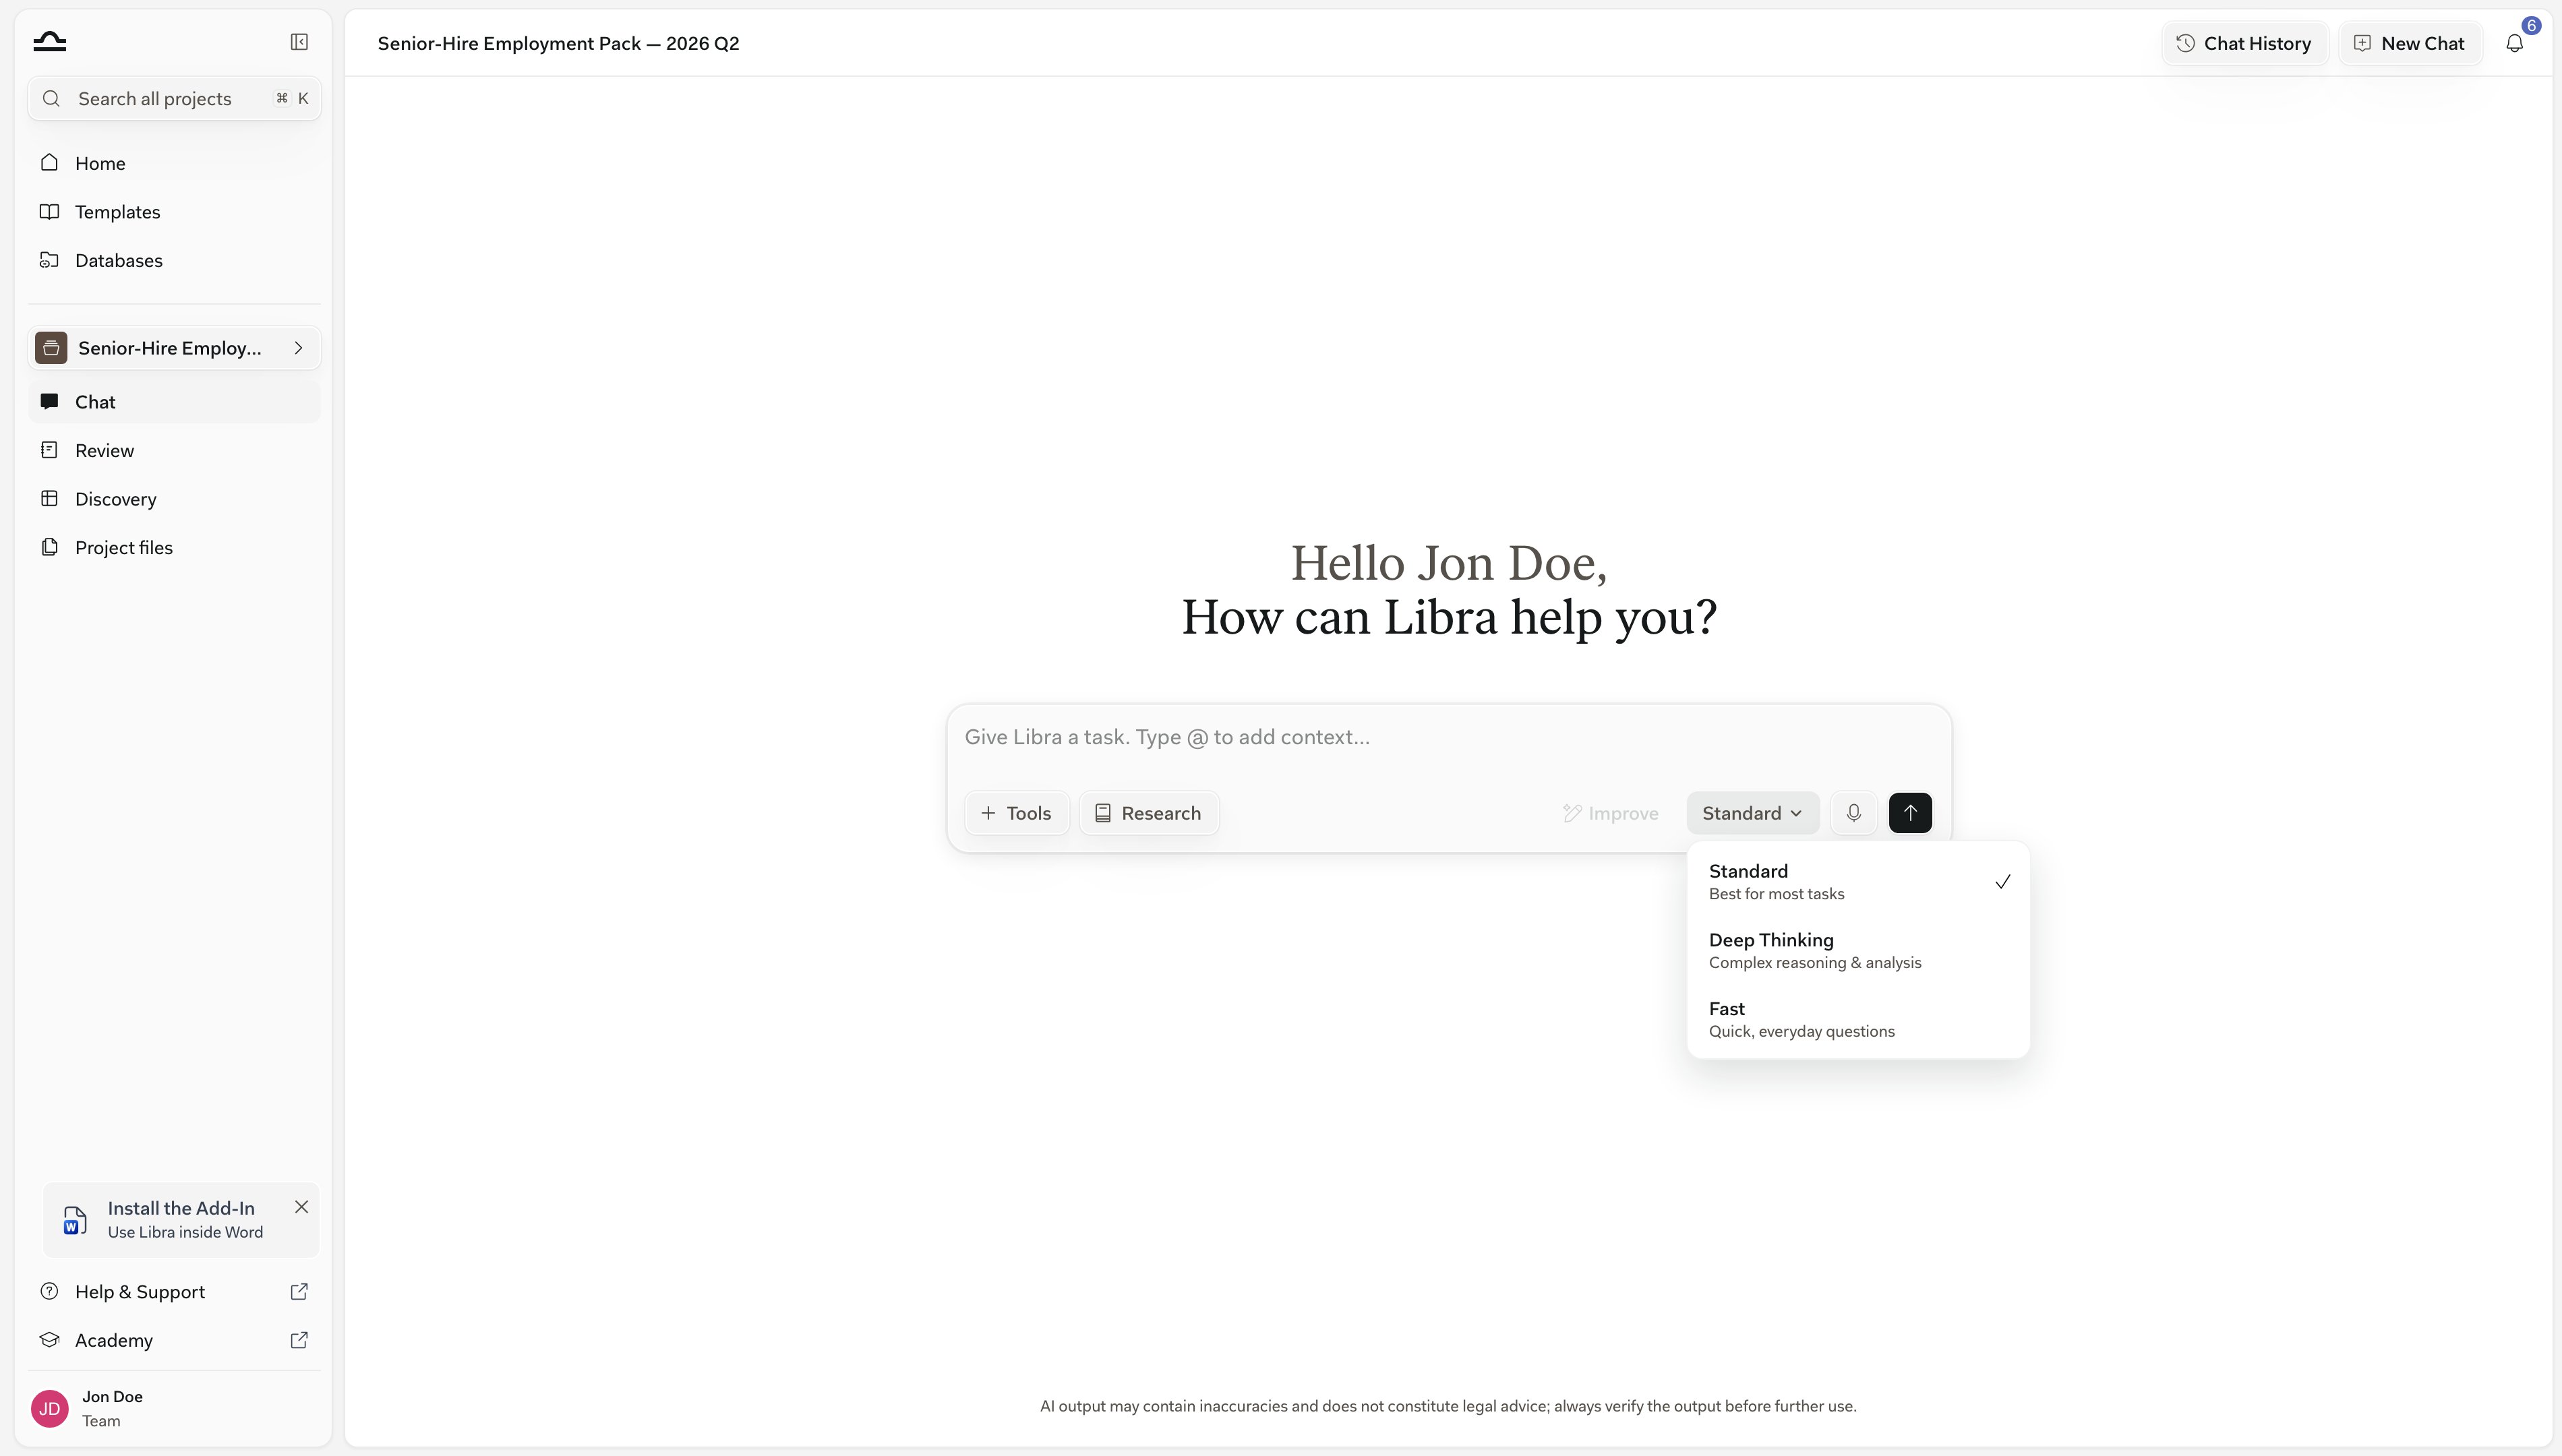
The mode button under the message box sets how hard Libra thinks before it answers — translating a single clause doesn’t need the same effort as testing a non-compete across two jurisdictions.1
Click the current mode
2
Pick the mode you want
The button label updates, and the mode applies to the message you send next. It is not stored with the chat: reload the page and the chat comes back in Standard.
3
Read the heading above the answer
Deep Thinking and Fast answers are headed with the mode name in front of the assistant’s name; a Standard answer shows the assistant’s name alone. A heading that names a model instead means the answer ran on a named model, outside the three modes.
The mode button is hidden while an Assistant or a Workflow is driving the chat. Those run on the model they were built with, so there is no mode to choose.
Every Deep Thinking message is held back by a Deep Thinking Mode dialog until you switch it off. Click Continue to send, or tick Don’t show this warning again first.The dialog puts complex queries at two to three minutes, Deep Thinking plus Research at five minutes or more, and reminds you that you can stop a running request at any time.
Working with responses
Each answer carries a row of actions for what you do next: keep the text, ask for another attempt, or get the answer out of Libra and into a matter file or an email. The row and the timestamp appear when you hover the answer or reach it with the keyboard, and stay put on a touch screen. Only the Cited Sources pill is visible at rest.
Your own prompt sits in a bubble above the answer, with the same hover-revealed row — Copy, Edit, Delete — and its timestamp. A prompt over 15 lines clamps behind Show more; Show less folds it back.
While Libra is thinking
Above the answer sits a tray showing what Libra did to get there — the searches it ran, the sources it read, the sub-questions it worked through. It reports Analyzing… while that is happening and settles into Thought for 7 seconds once the answer starts.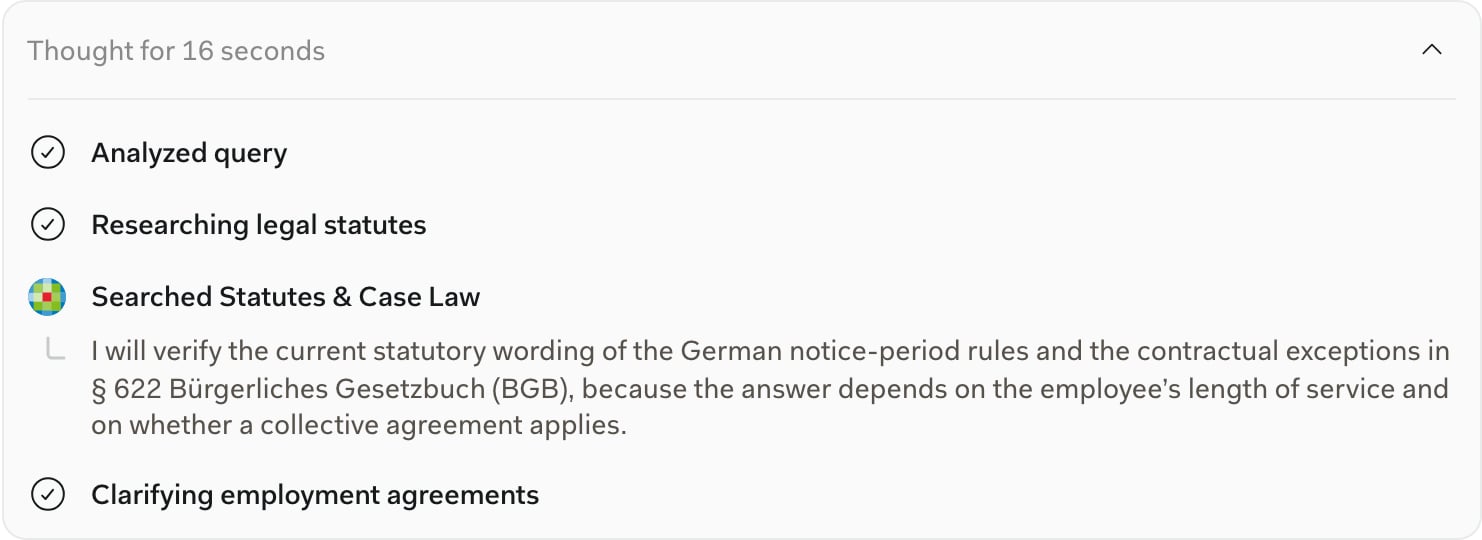
Quote part of an answer and ask a follow-up
Select a passage and a toolbar appears with Ask Libra and Copy plain text. Ask Libra turns the excerpt into a quote chip above the message box, so Libra sees the exact wording you highlighted; clear it with the ✕. A quote never carries into another chat. The same action works in the Word and Outlook add-ins.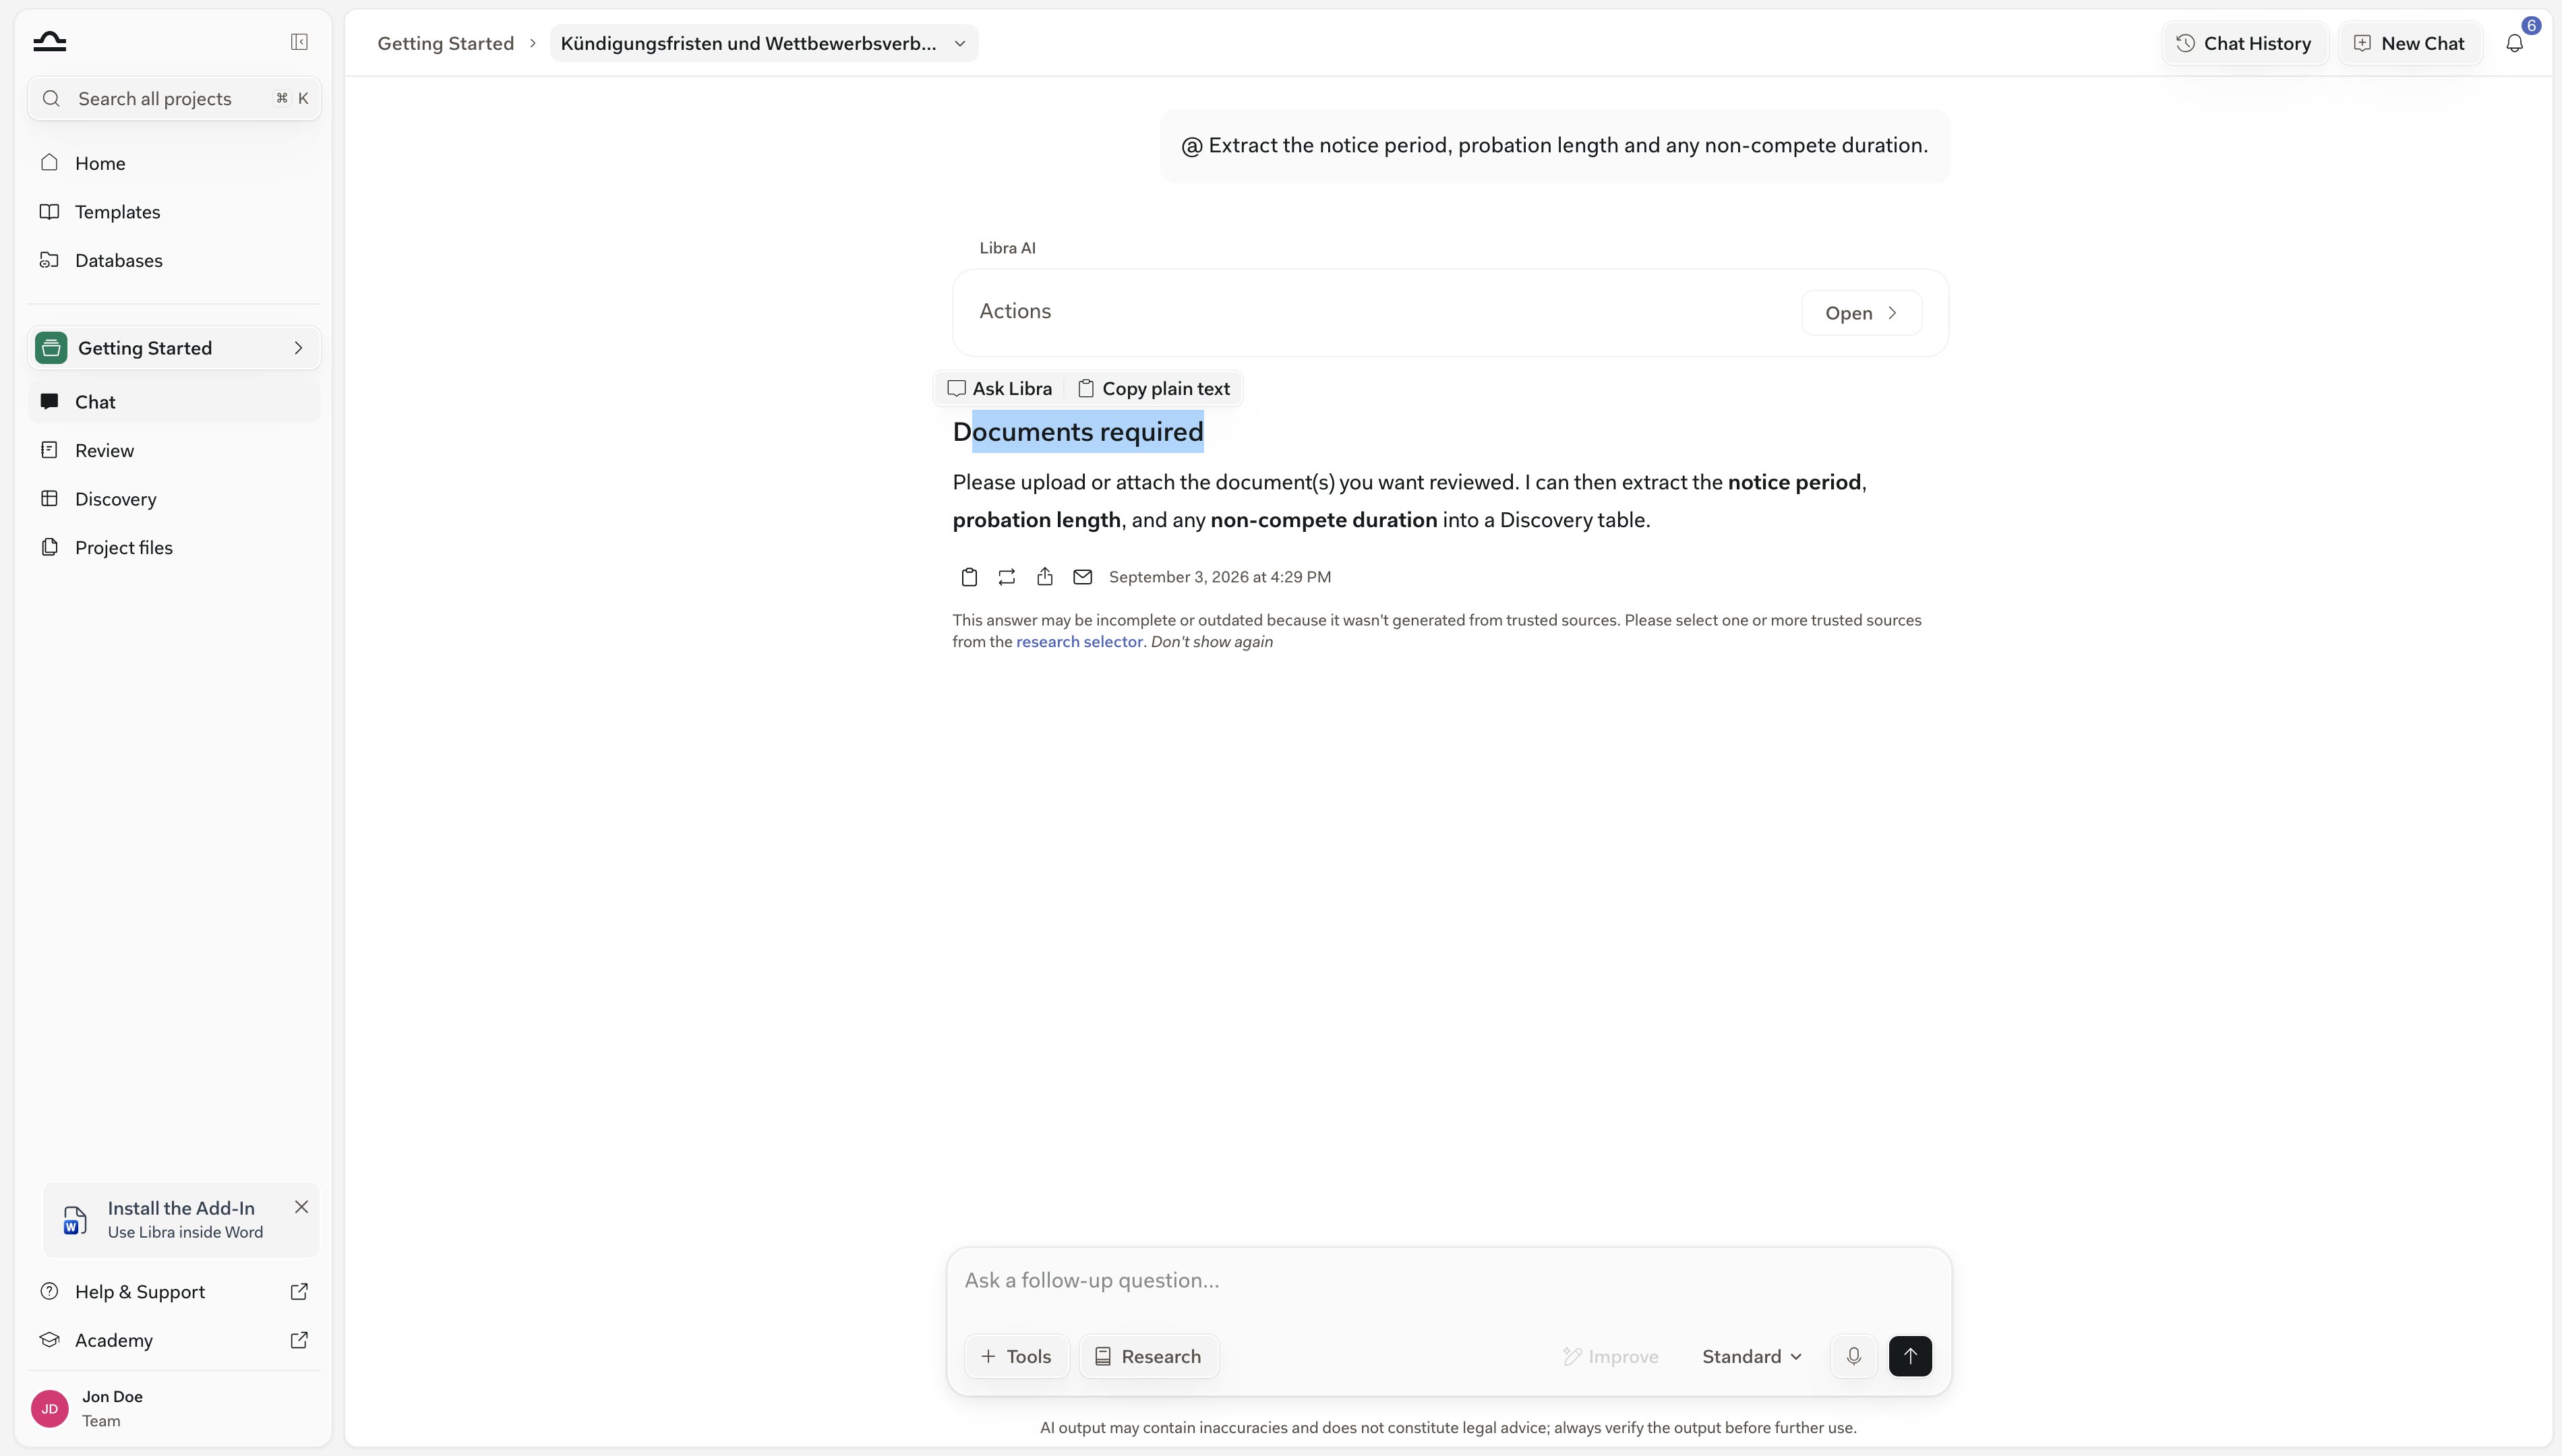
Long-running responses keep going in the background
Leave the chat and the answer keeps running — Deep Thinking and Research answers can take a minute or two, and Libra tells you when yours is done.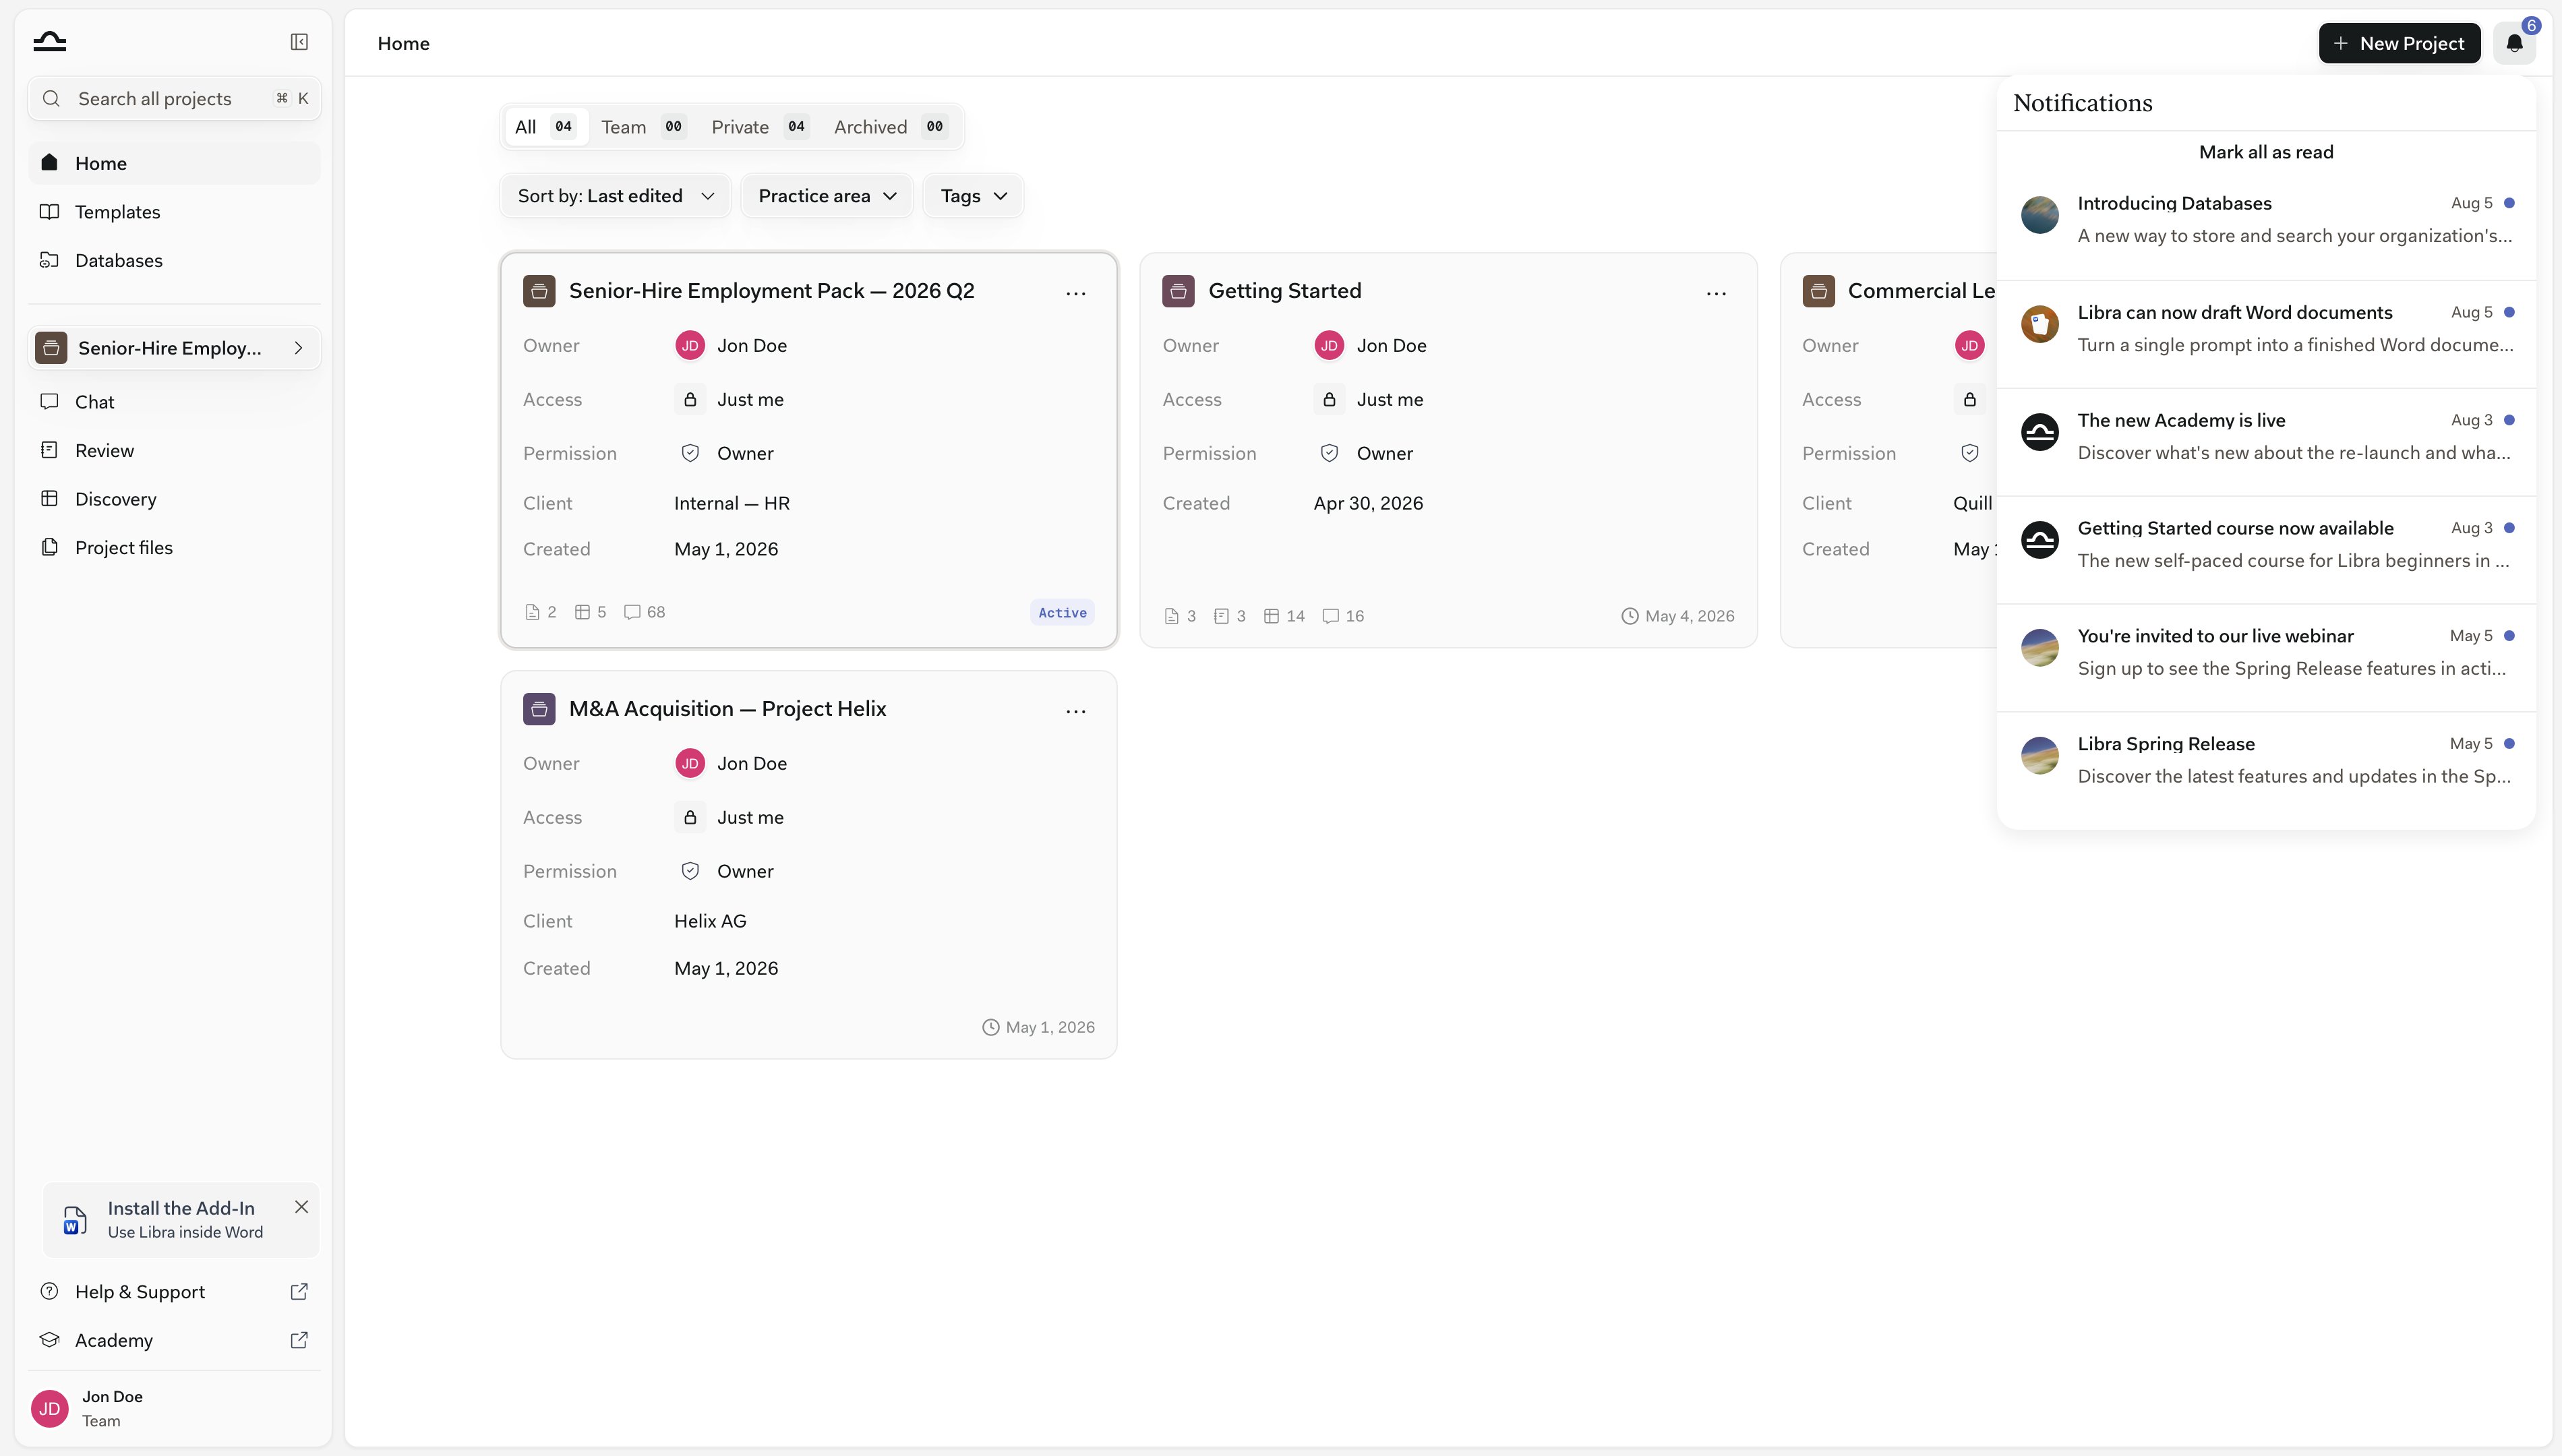
That entry is per-session and per-device — it lives in the browser tab that ran the chat, so a refresh or a sign-out clears it, while server-backed notifications like sharing survive reloads.

Send a long Research prompt, then jump to another project to keep working. The bell tells you when your answer is ready; click the row to jump straight back to the chat.
Finding a chat
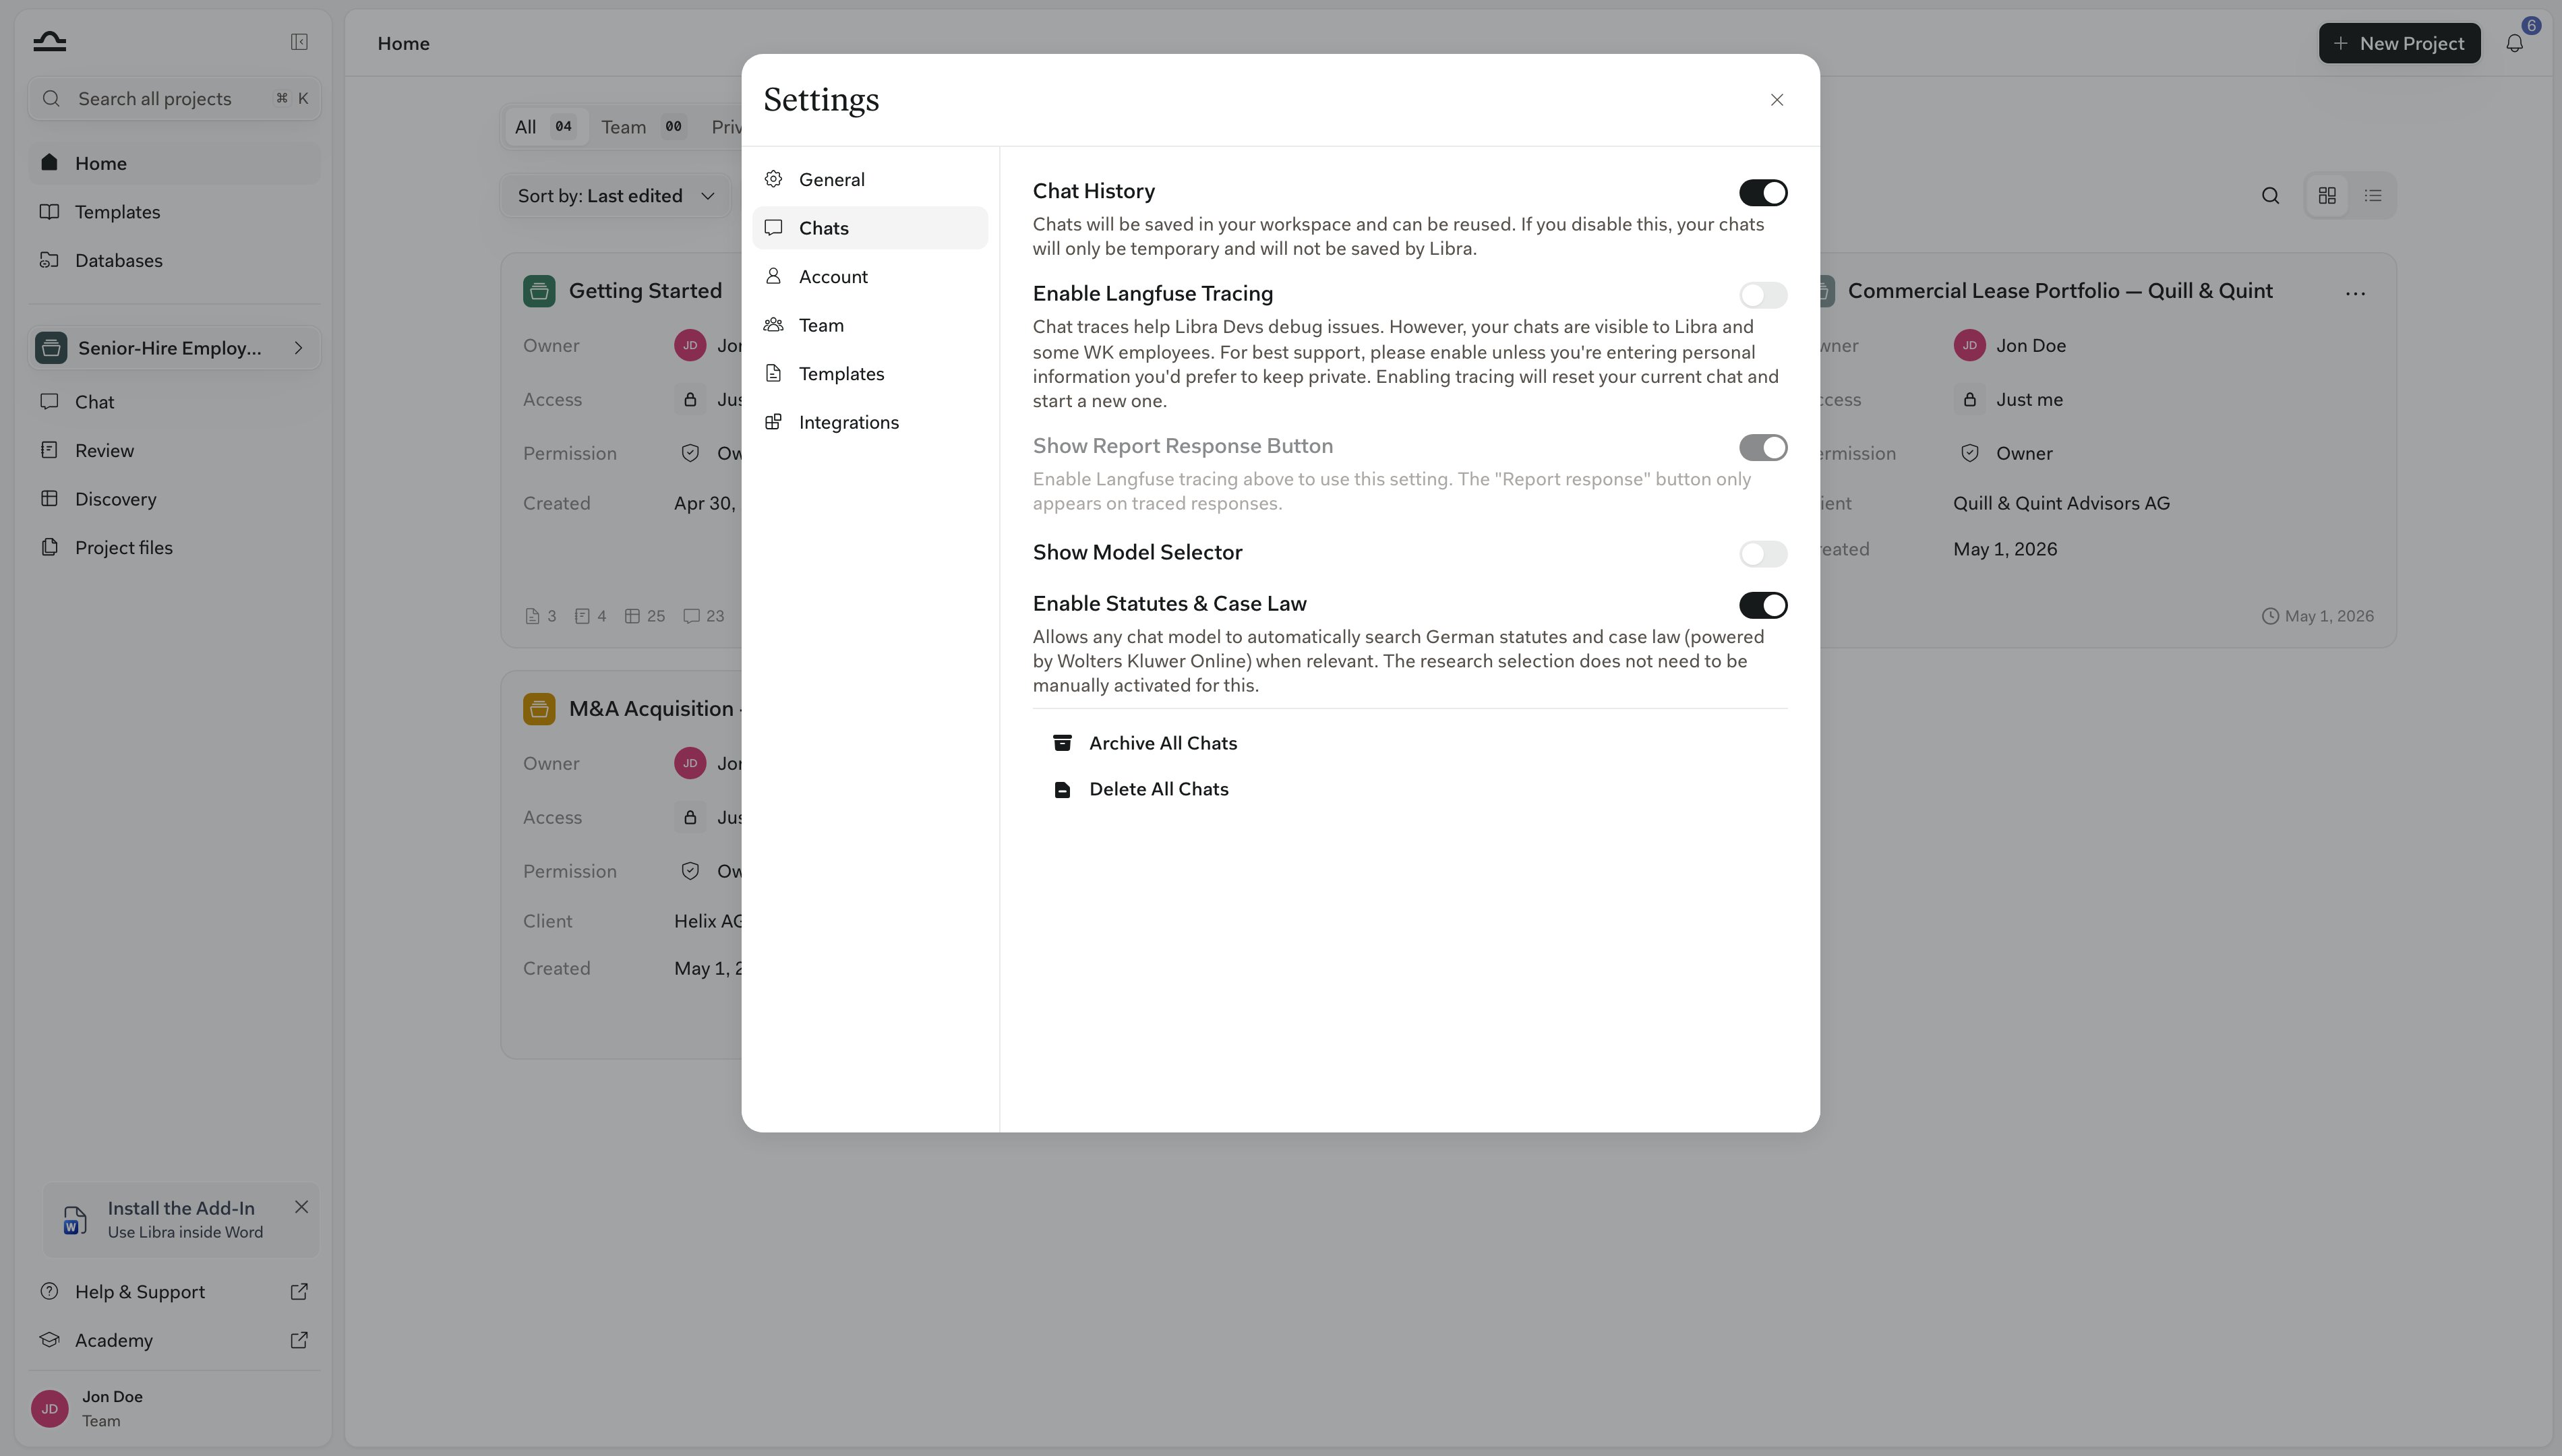
Every chat saves into the project you started it in, and you can move it later. Press Cmd+K (Mac) or Ctrl+K (Windows) to open Search from anywhere. It runs across every project you can reach, matching chat names and full message bodies — quote a phrase you remember and filter Type → Chats to see conversations only. Chat History, at the top right of a chat, opens that same picker with the current project and Chats already set. Because it is Search underneath, you can widen it any time: change the project chip or click Clear all filters. Chats from the Word and Outlook add-ins are listed too, and you can carry on with them here. Steps only the add-in can show collapse into one line, such as 2 actions performed in the Word add-in. The button is disabled while Chat History is switched off, since nothing is being saved to list.Chat History on the Chats tab in Settings is on by default.Turn it off and new chats are labelled Temporary Chat: nothing is saved, the Chat History button greys out, and you can’t create a Review, Playbook or Discovery from chat. That is the point of it — useful for a sensitive one-off question.Switching the toggle either way drops you into a fresh chat.
Managing a chat
Names are auto-generated from your first prompt; rename a chat with Edit Details. Open a chat and click the ⌄ next to its title for the Chat actions menu.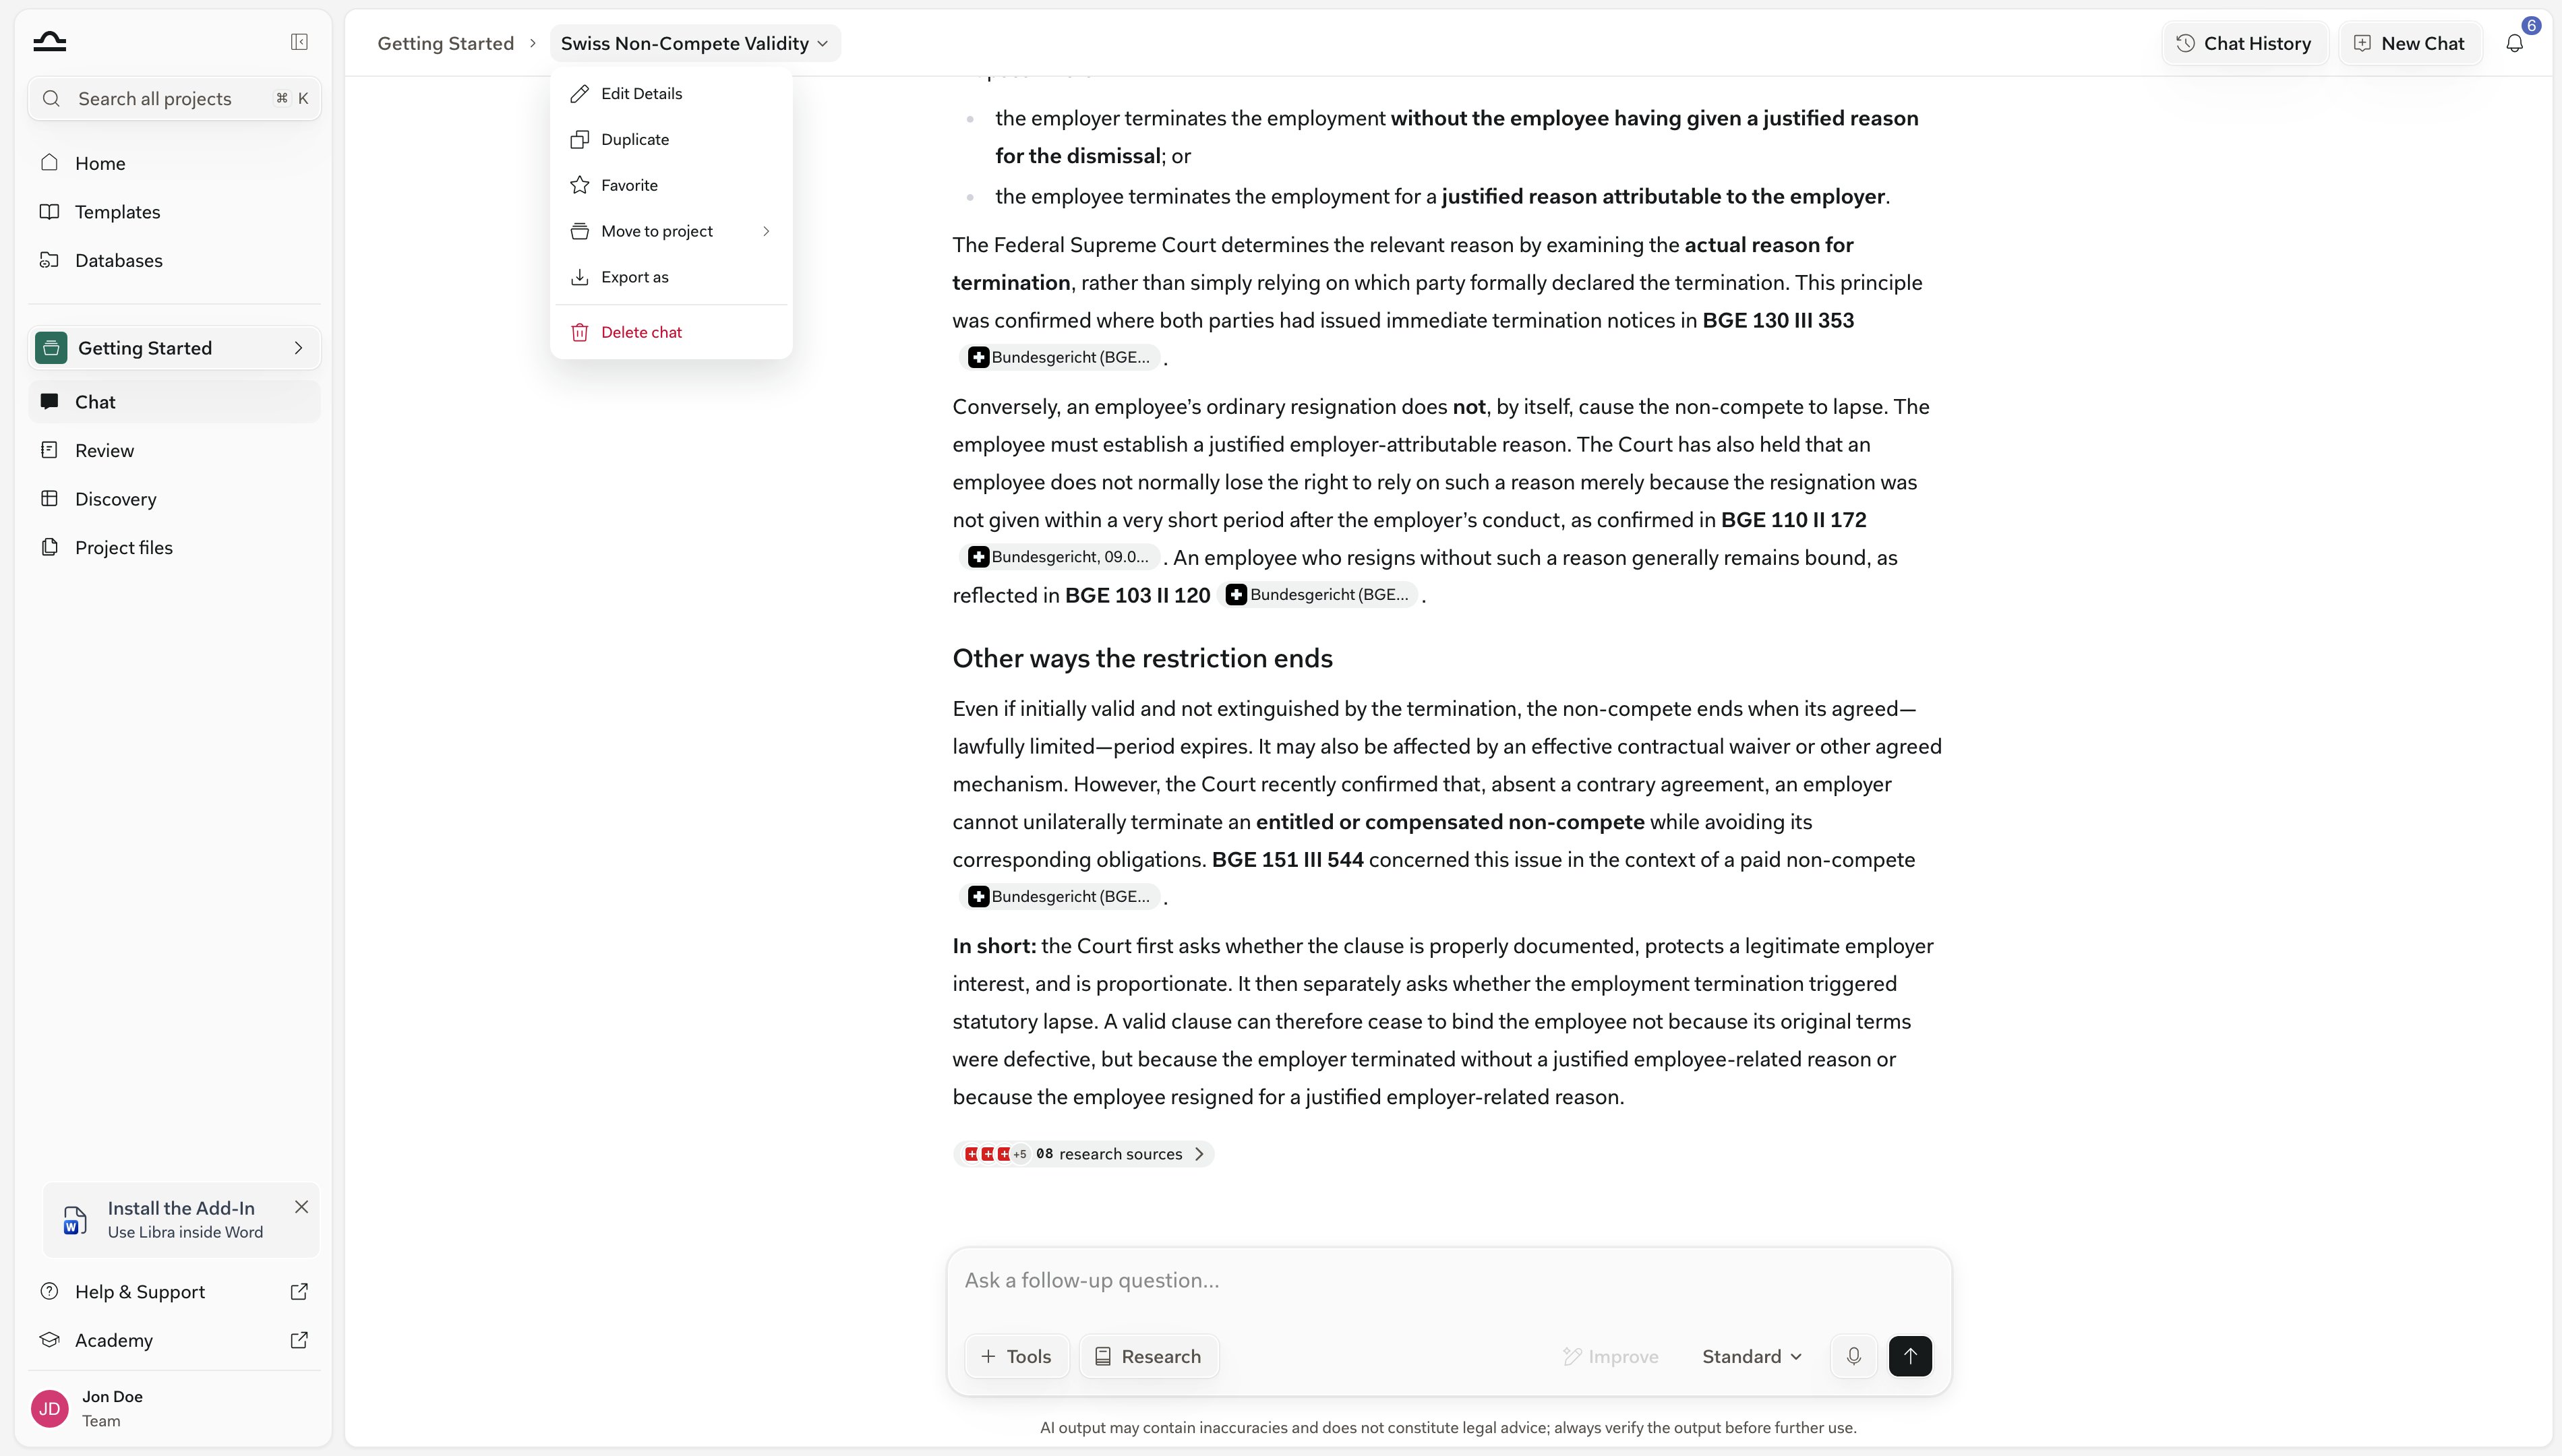
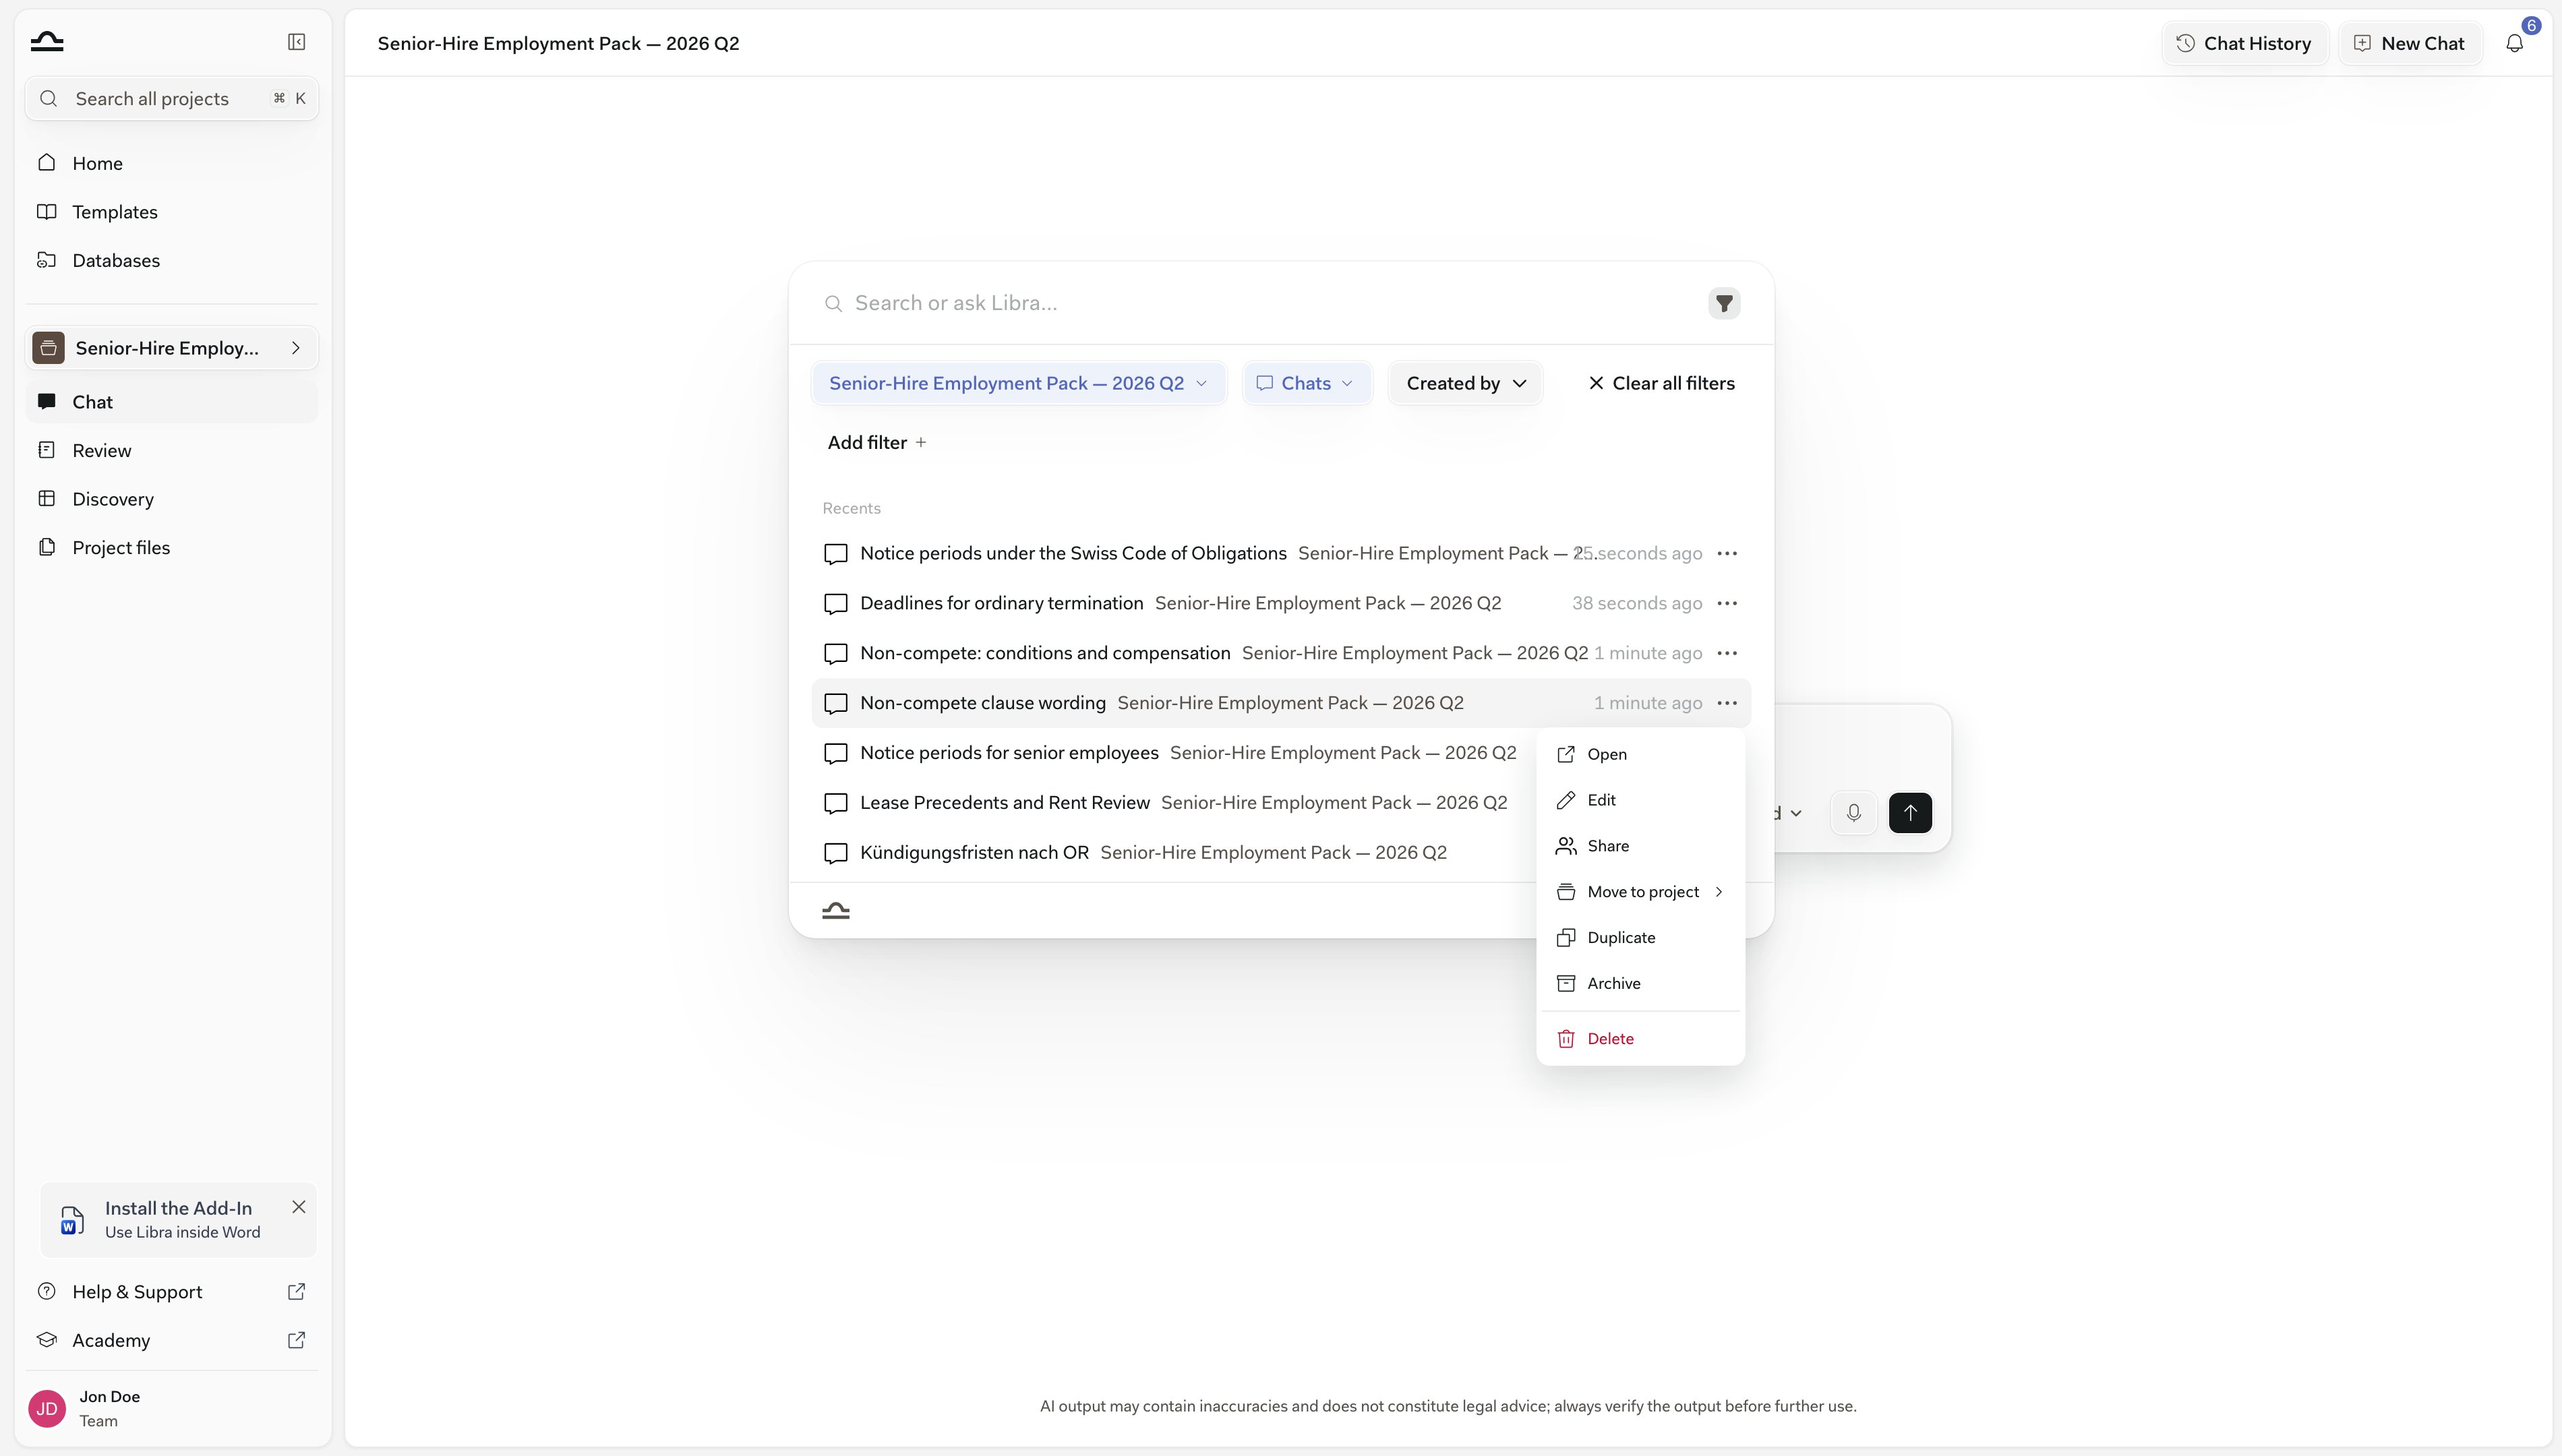
A chat you reach as a result — in Search, and therefore in Chat History, which is the same picker — carries its own ⋯ menu with a different set: Open, Edit, Share, Move to project, Duplicate, Archive and Delete. Archive is offered only there.
Archiving and restoring
Archiving takes a chat out of Search and Chat History without destroying it — the right move for a matter that has closed but could come back. It waits under profile → Archived Chats until you unarchive it.1
Archive a chat
2
Find archived chats
Click your profile icon at the bottom of the sidebar and choose Archived Chats.The list shows the archived chats you own in the current project, with a search box to narrow it by name — switch projects to see the others, or click Export to download every archived chat as JSON.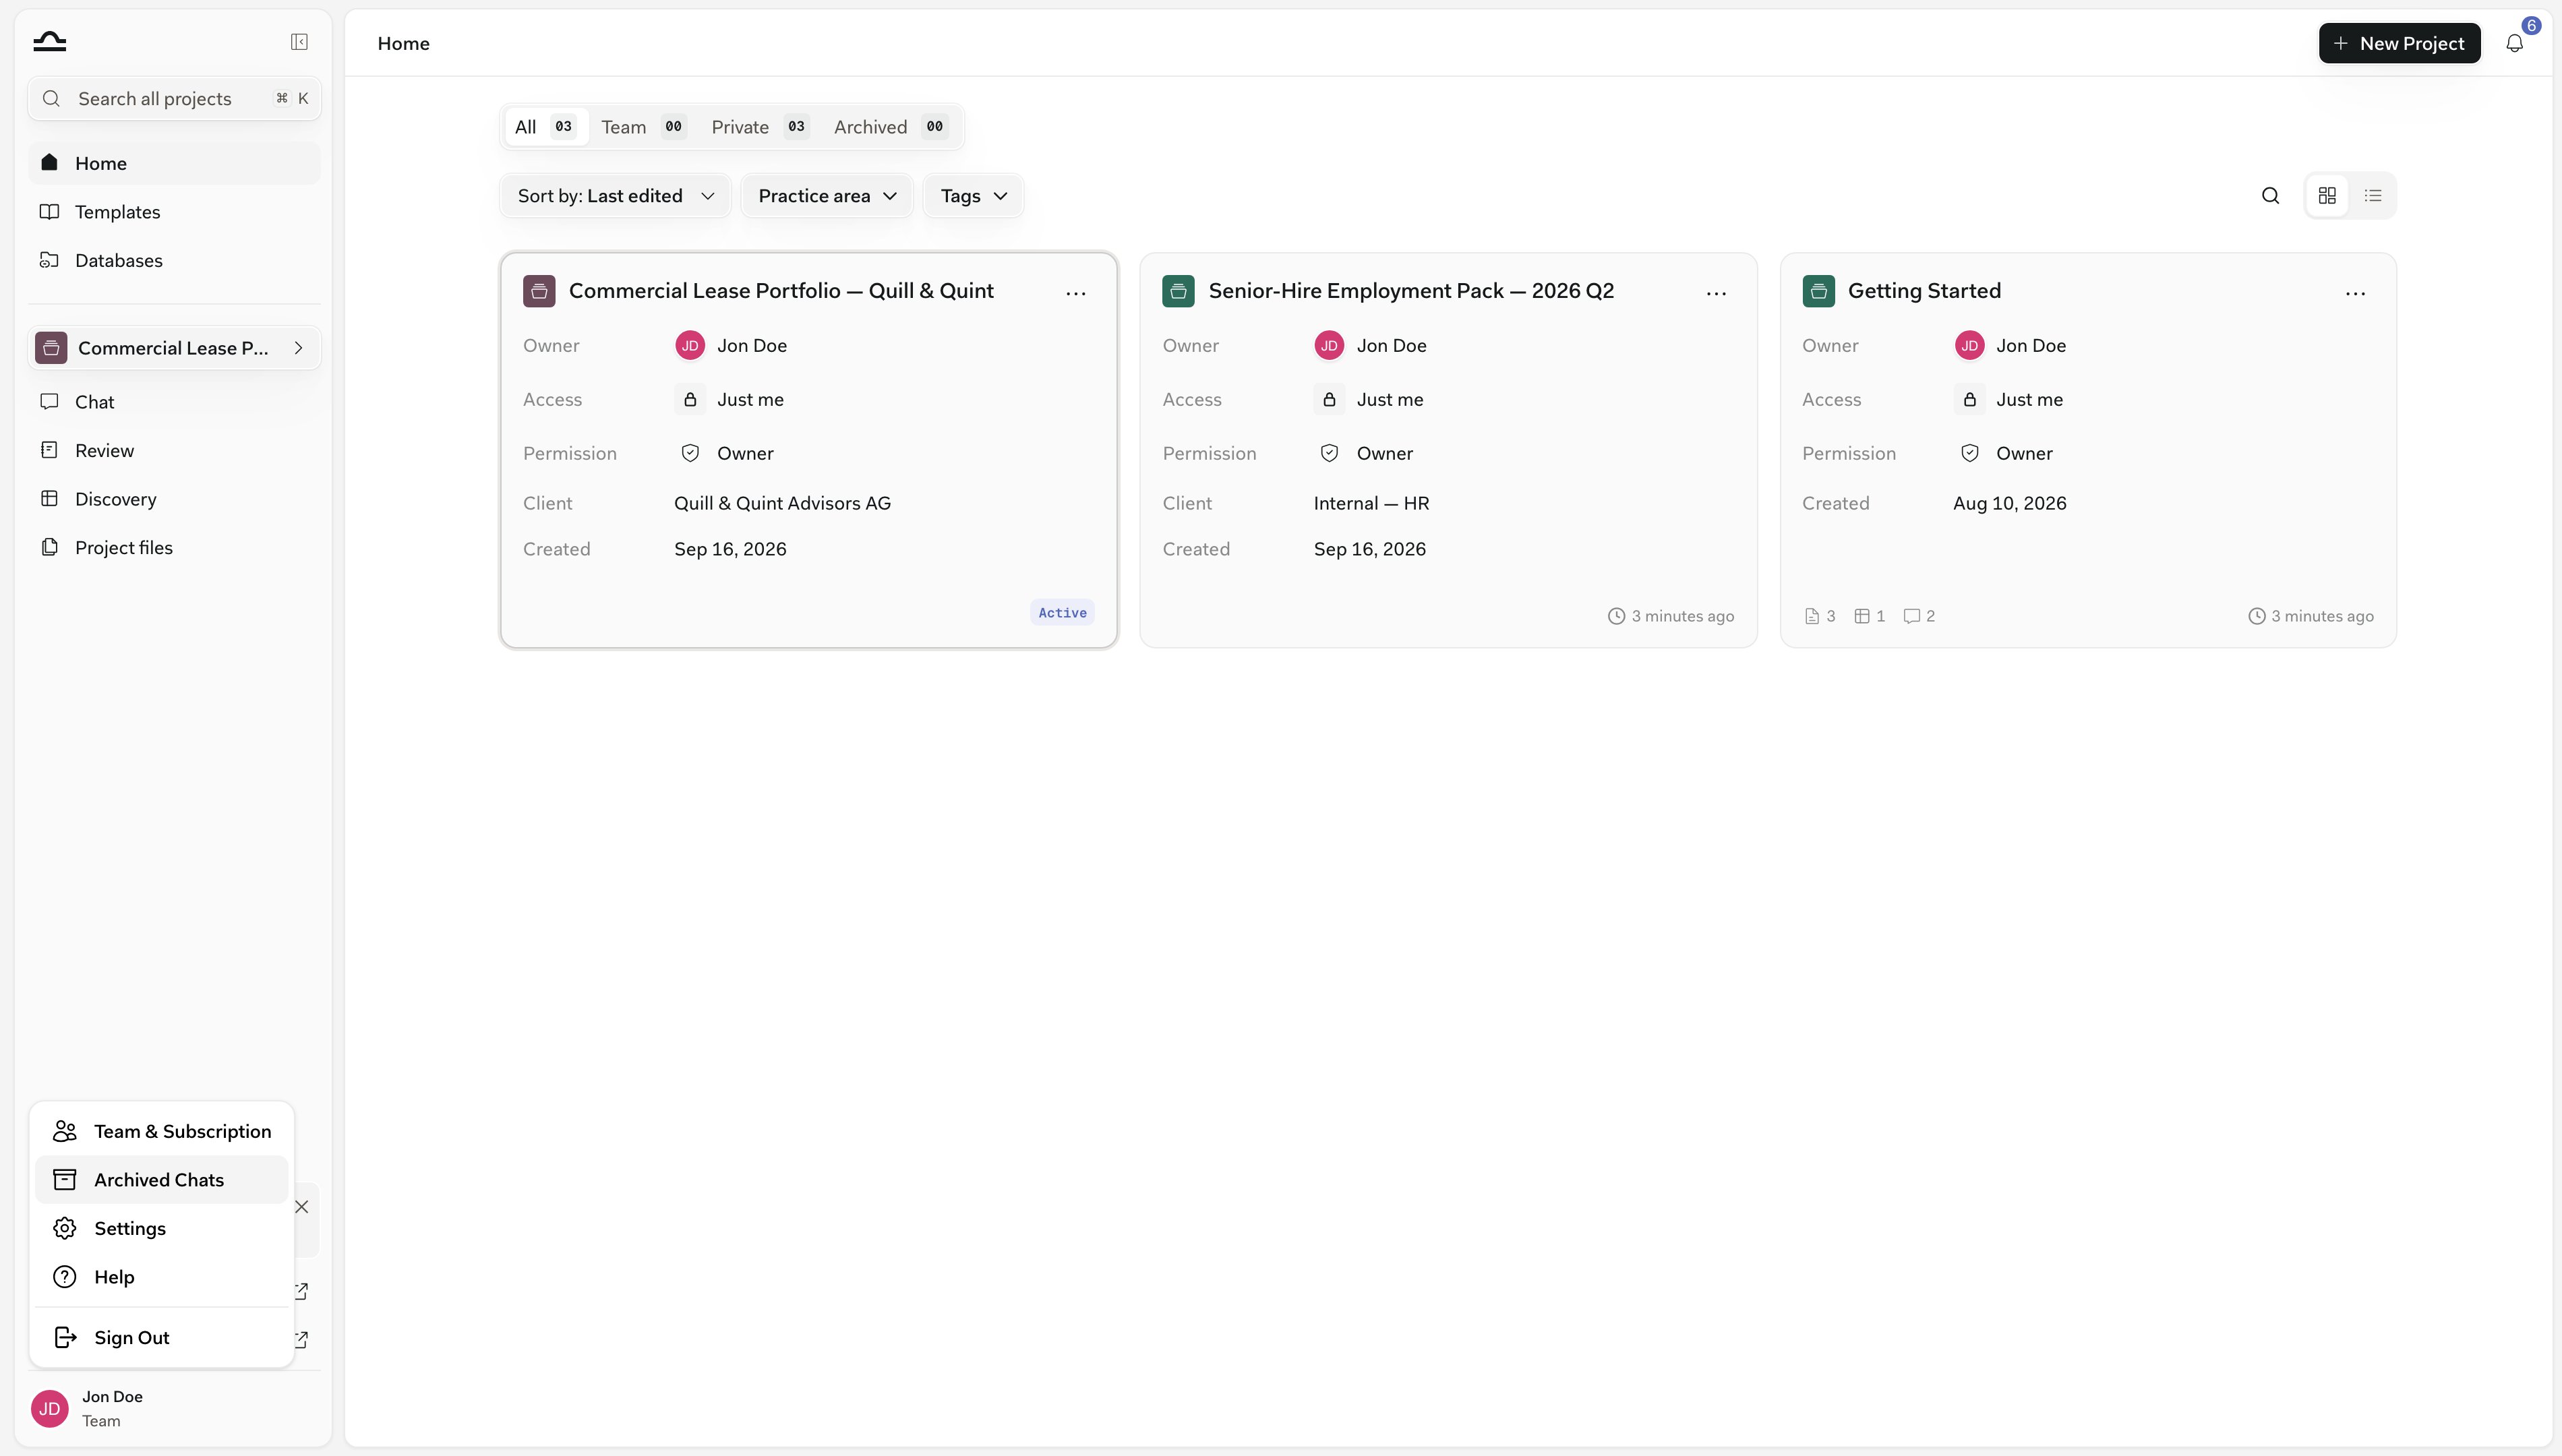
3
Restore
On the archived chat’s row, click the unarchive icon on the right (tooltipped Unarchive Chat) to bring it back. The bin icon next to it is Delete Chat, and it deletes for good — including for anyone the chat was shared with.
Archive All Chats on the Chats tab in Settings does the whole history at once — every chat leaves the sidebar and Search. It asks Are you sure? first, and you can restore chats one at a time from profile picture → Archived Chats.
Sharing a chat
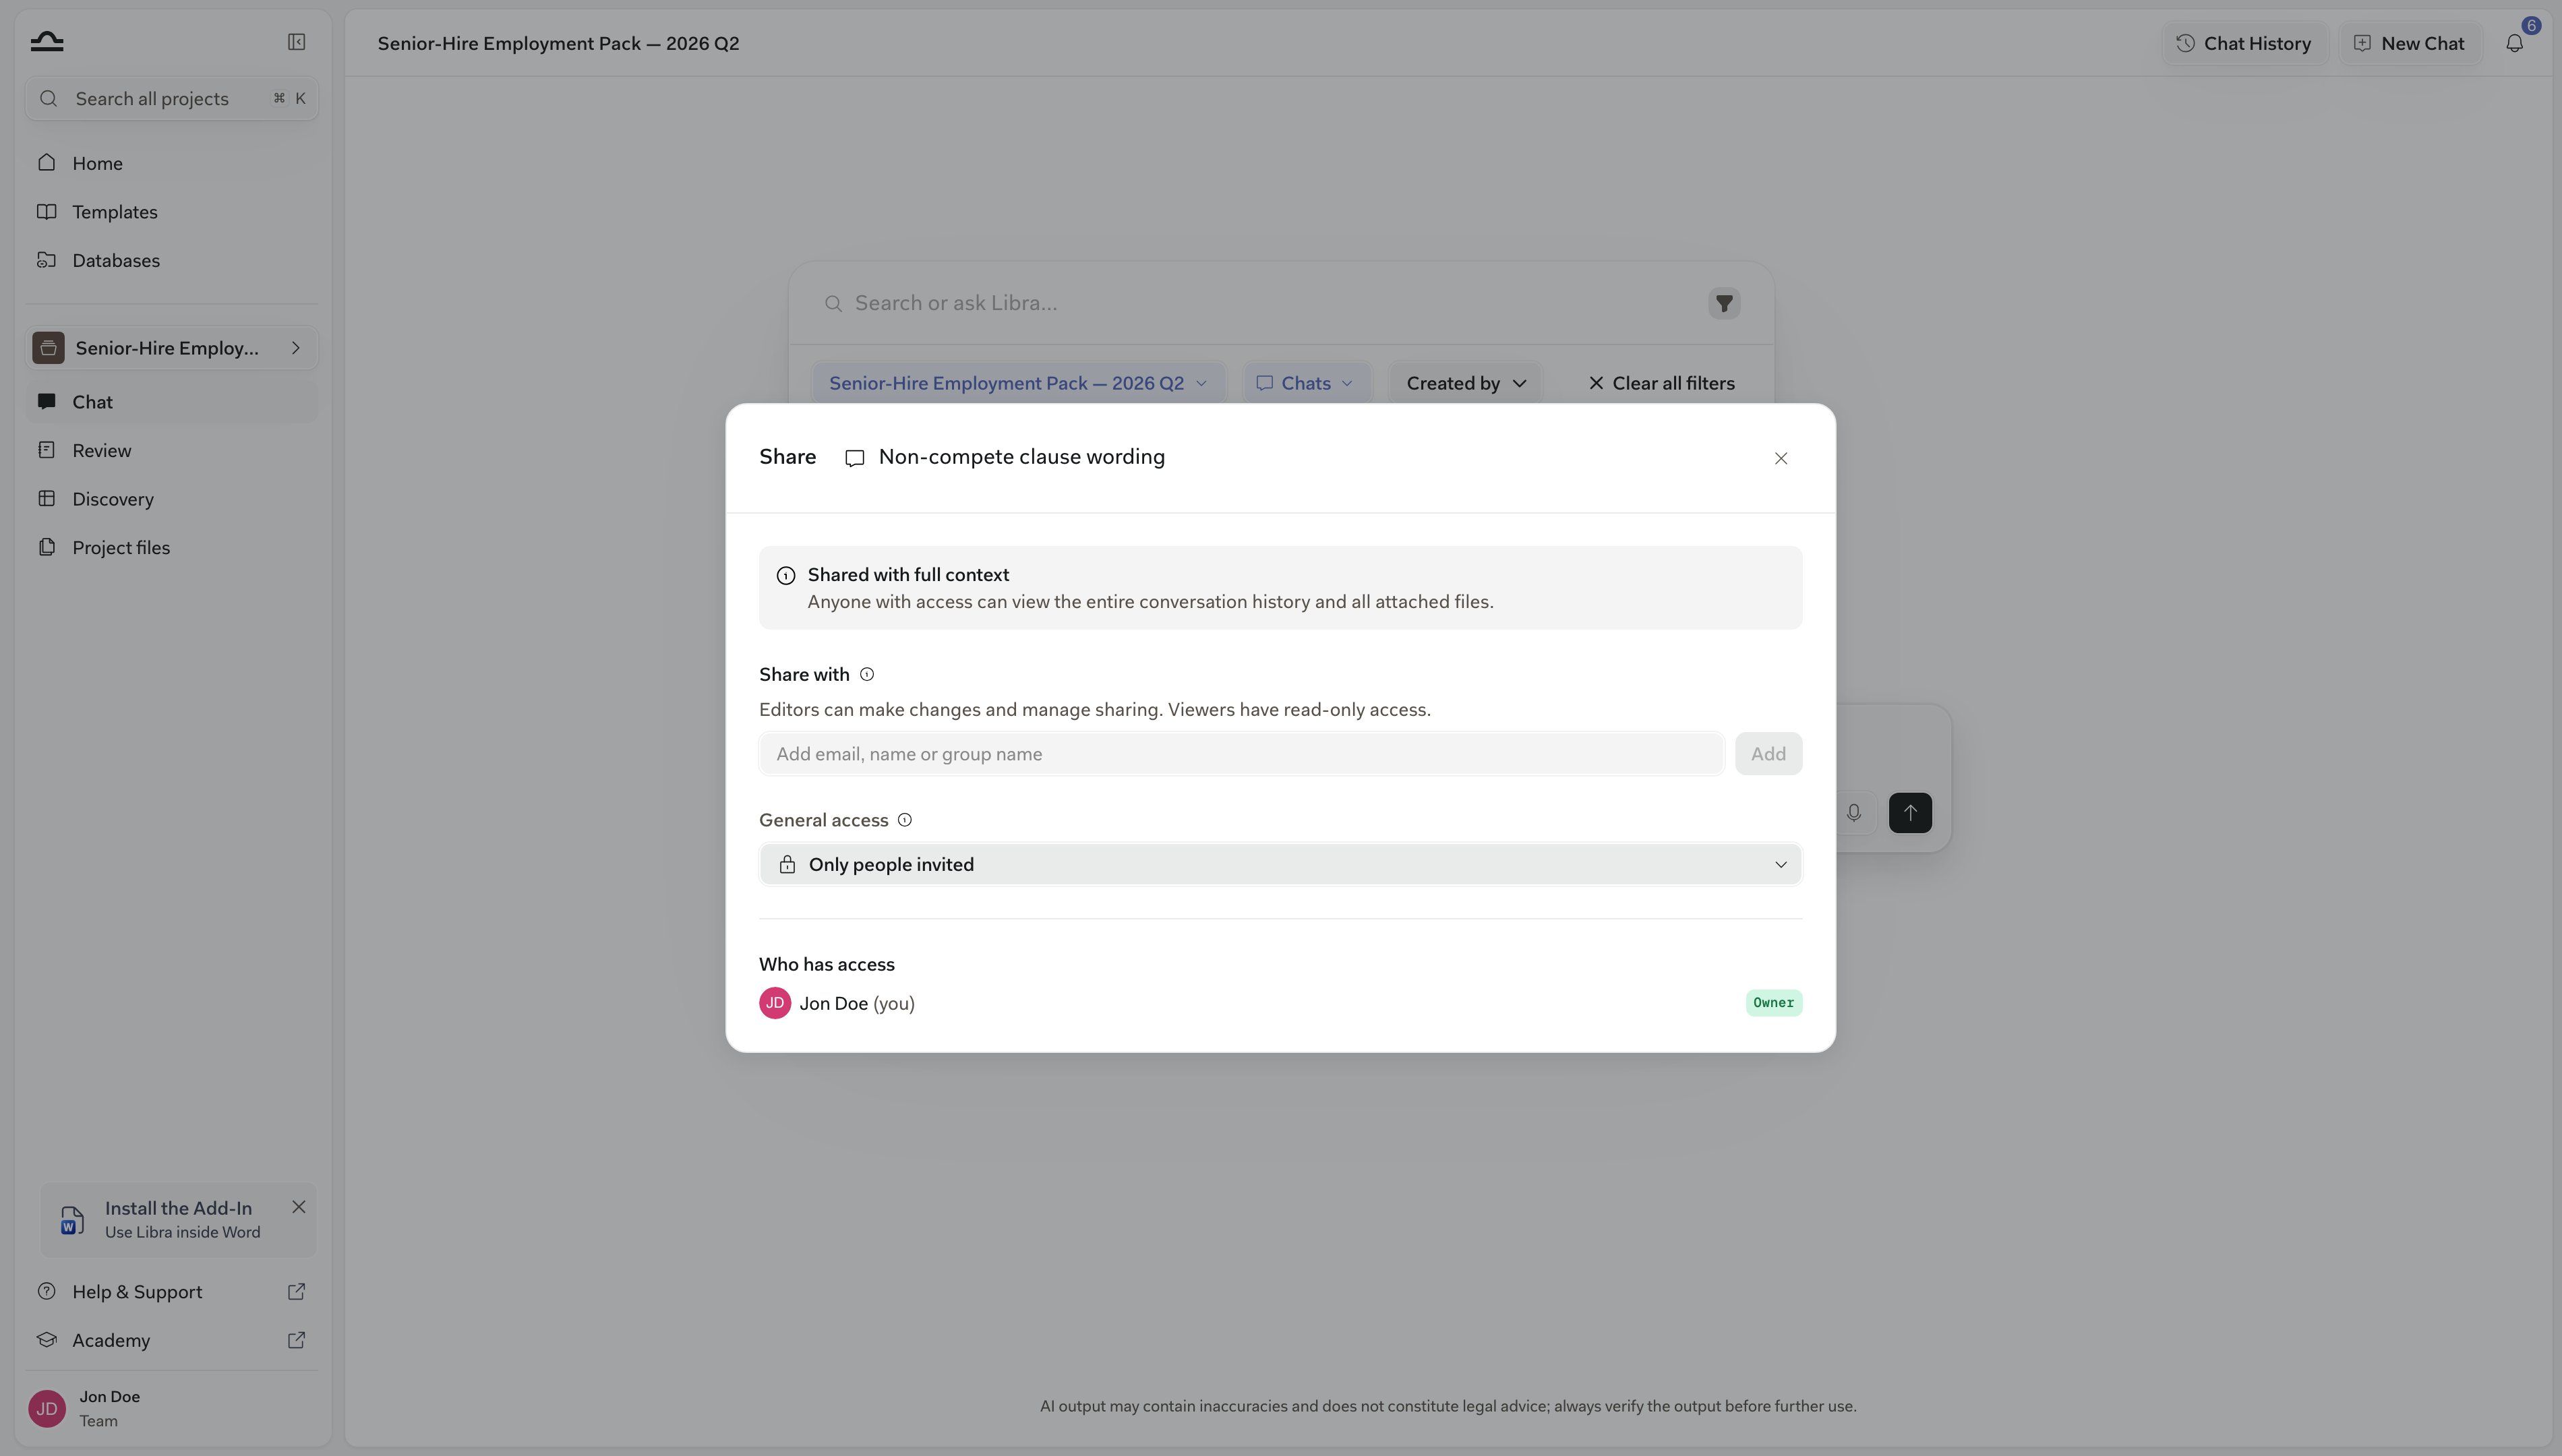
Chats are private by default, even in a shared project.1
Add people or groups
2
Check who has access
The dialog lists everyone the chat is shared with and their level. There’s no Save button — each add applies immediately, as does a permission change. Close with the X.
Sharing a chat shares the documents in it. Whoever you share with can open an attachment even when it sits in a project or database they cannot otherwise reach, and revoking the share takes that access back.This covers documents attached since early September 2026. Older chats are not backfilled — re-attach the file if a recipient cannot open it.
Chats belong to a project, so a colleague needs access to that project too.If they don’t have it, Libra offers to grant view access as part of the share — confirm Grant project access and share and they receive the chat at the permission you picked.If you can’t manage the project’s sharing, Libra asks you to contact the project owner or an editor instead.
Exporting a chat
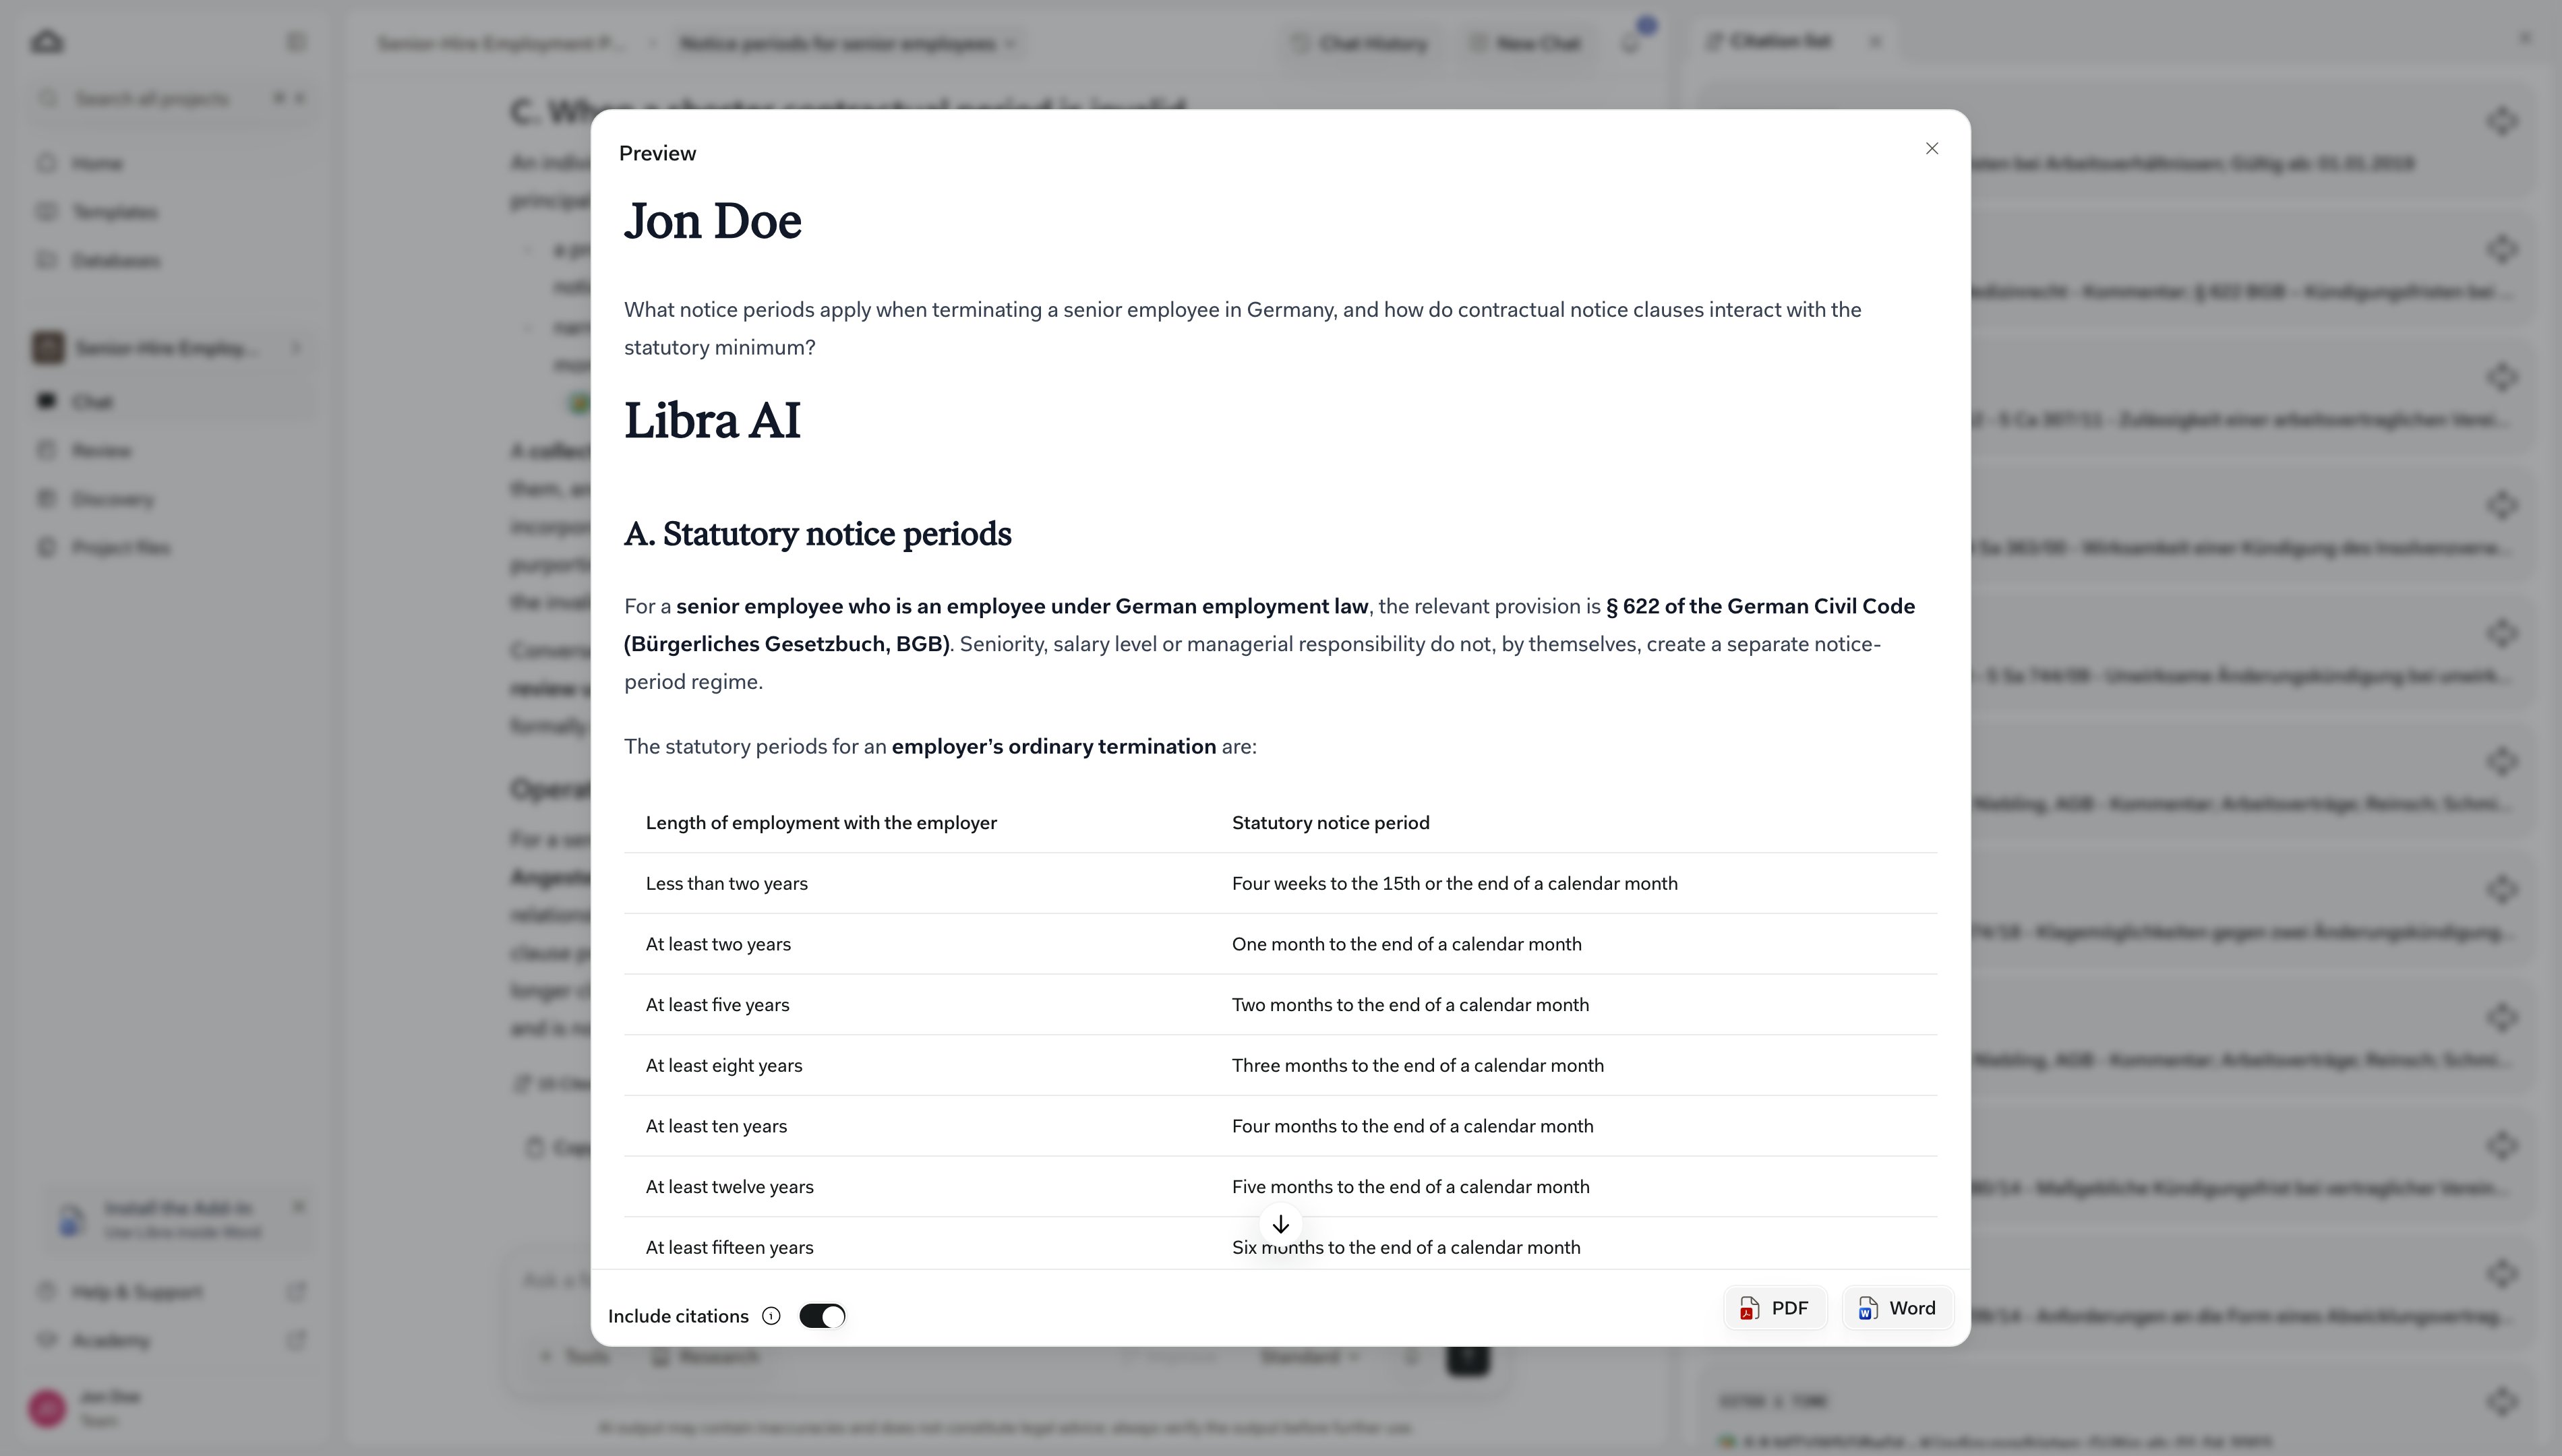
Export is how a whole conversation leaves Libra — into the matter file, or across to a client. The dialog shows you the finished conversation before you choose PDF or Word.1
Choose Export as and check the preview
2
Pick a format
Click PDF or Word to download.
Administrators get two more actions on the Chats tab in Settings: Export Chats downloads all of your chats as one JSON file, Import Chats reads such a file back in. They appear only for accounts that also see Admin Settings.
Tips for getting good answers

Tired of asking for the same tone every time? Settings → General holds a standing brief — who you are, and how you want Libra to write — applied to every message in every chat. See how to set your writing style.
Be specific
Be specific
“Review the contract” is too vague. “Review the contract for non-compete clauses that may be unenforceable under California law” is something Libra can act on. Treat each prompt like a brief to a junior associate: context, scope, outcome.
State the jurisdiction
State the jurisdiction
“Under German employment law”, “per New York state contract law”, “in a Swiss commercial context” — these phrases narrow the answer dramatically.
Ask for the format you want
Ask for the format you want
“Provide your analysis as a numbered list of issues”, “Format as a comparison table with columns Risk, Clause, Recommendation”, “Draft this as a partner-facing memo”. Format requests almost always pay for themselves.
Iterate
Iterate
Don’t try to nail it in one prompt. Start broad, then narrow: “Now focus specifically on Section 4.2”, “Give me a more formal version”, “Explain the reasoning behind your third point.”
Verify the citations
Verify the citations
Treat citations the way you’d treat a junior’s case cite: open the source and confirm it says what’s claimed. Verified citations (clickable, linked to a database) are more reliable than unverified ones (plain text). See Citations & sources.
Next steps
Tools
Attach files and start a Playbook, Review or Discovery from the chat.

Research mode
Sourced research from legal databases.
Citations & sources
Read the Cited Sources panel and verify Libra’s references.
Search
Cross-project search by chat name and message content.