

Kleos appears only for Libra teams registered in Germany, the Netherlands, Belgium or Italy. If your team is registered elsewhere, the integration won’t show up anywhere in Libra, whatever your Kleos subscription.It also requires a Kleos Advanced or Advanced+ subscription. If your firm is on a different Kleos package, the integration won’t be available — check with your firm administrator.Finally, your firm must assign permission to use Libra in Kleos. In Kleos, go to Settings → Licences, select a user, then assign the Libra licence. For the official requirements, see the Kleos Libra FAQ.

A linked file is a window onto Kleos, not a copy. Open it next week and you see next week’s version of the SPA — no re-importing.
What the integration does
Picking a Kleos document links it: Libra keeps a reference to the file, and Kleos keeps the file itself.How to link documents
Connect once, then pick documents from a case in the same file picker Libra uses everywhere else.1
Connect Kleos (first time only)
Go to Settings → Integrations and open the Kleos row. The panel repeats the two prerequisites — an Advanced or Advanced+ Kleos subscription, and the Libra licence assigned to your user in Kleos under Settings → Licences — then offers Connect with Kleos. Sign in with your usual Kleos credentials in the window that opens. Libra remembers the connection, so later links skip this step.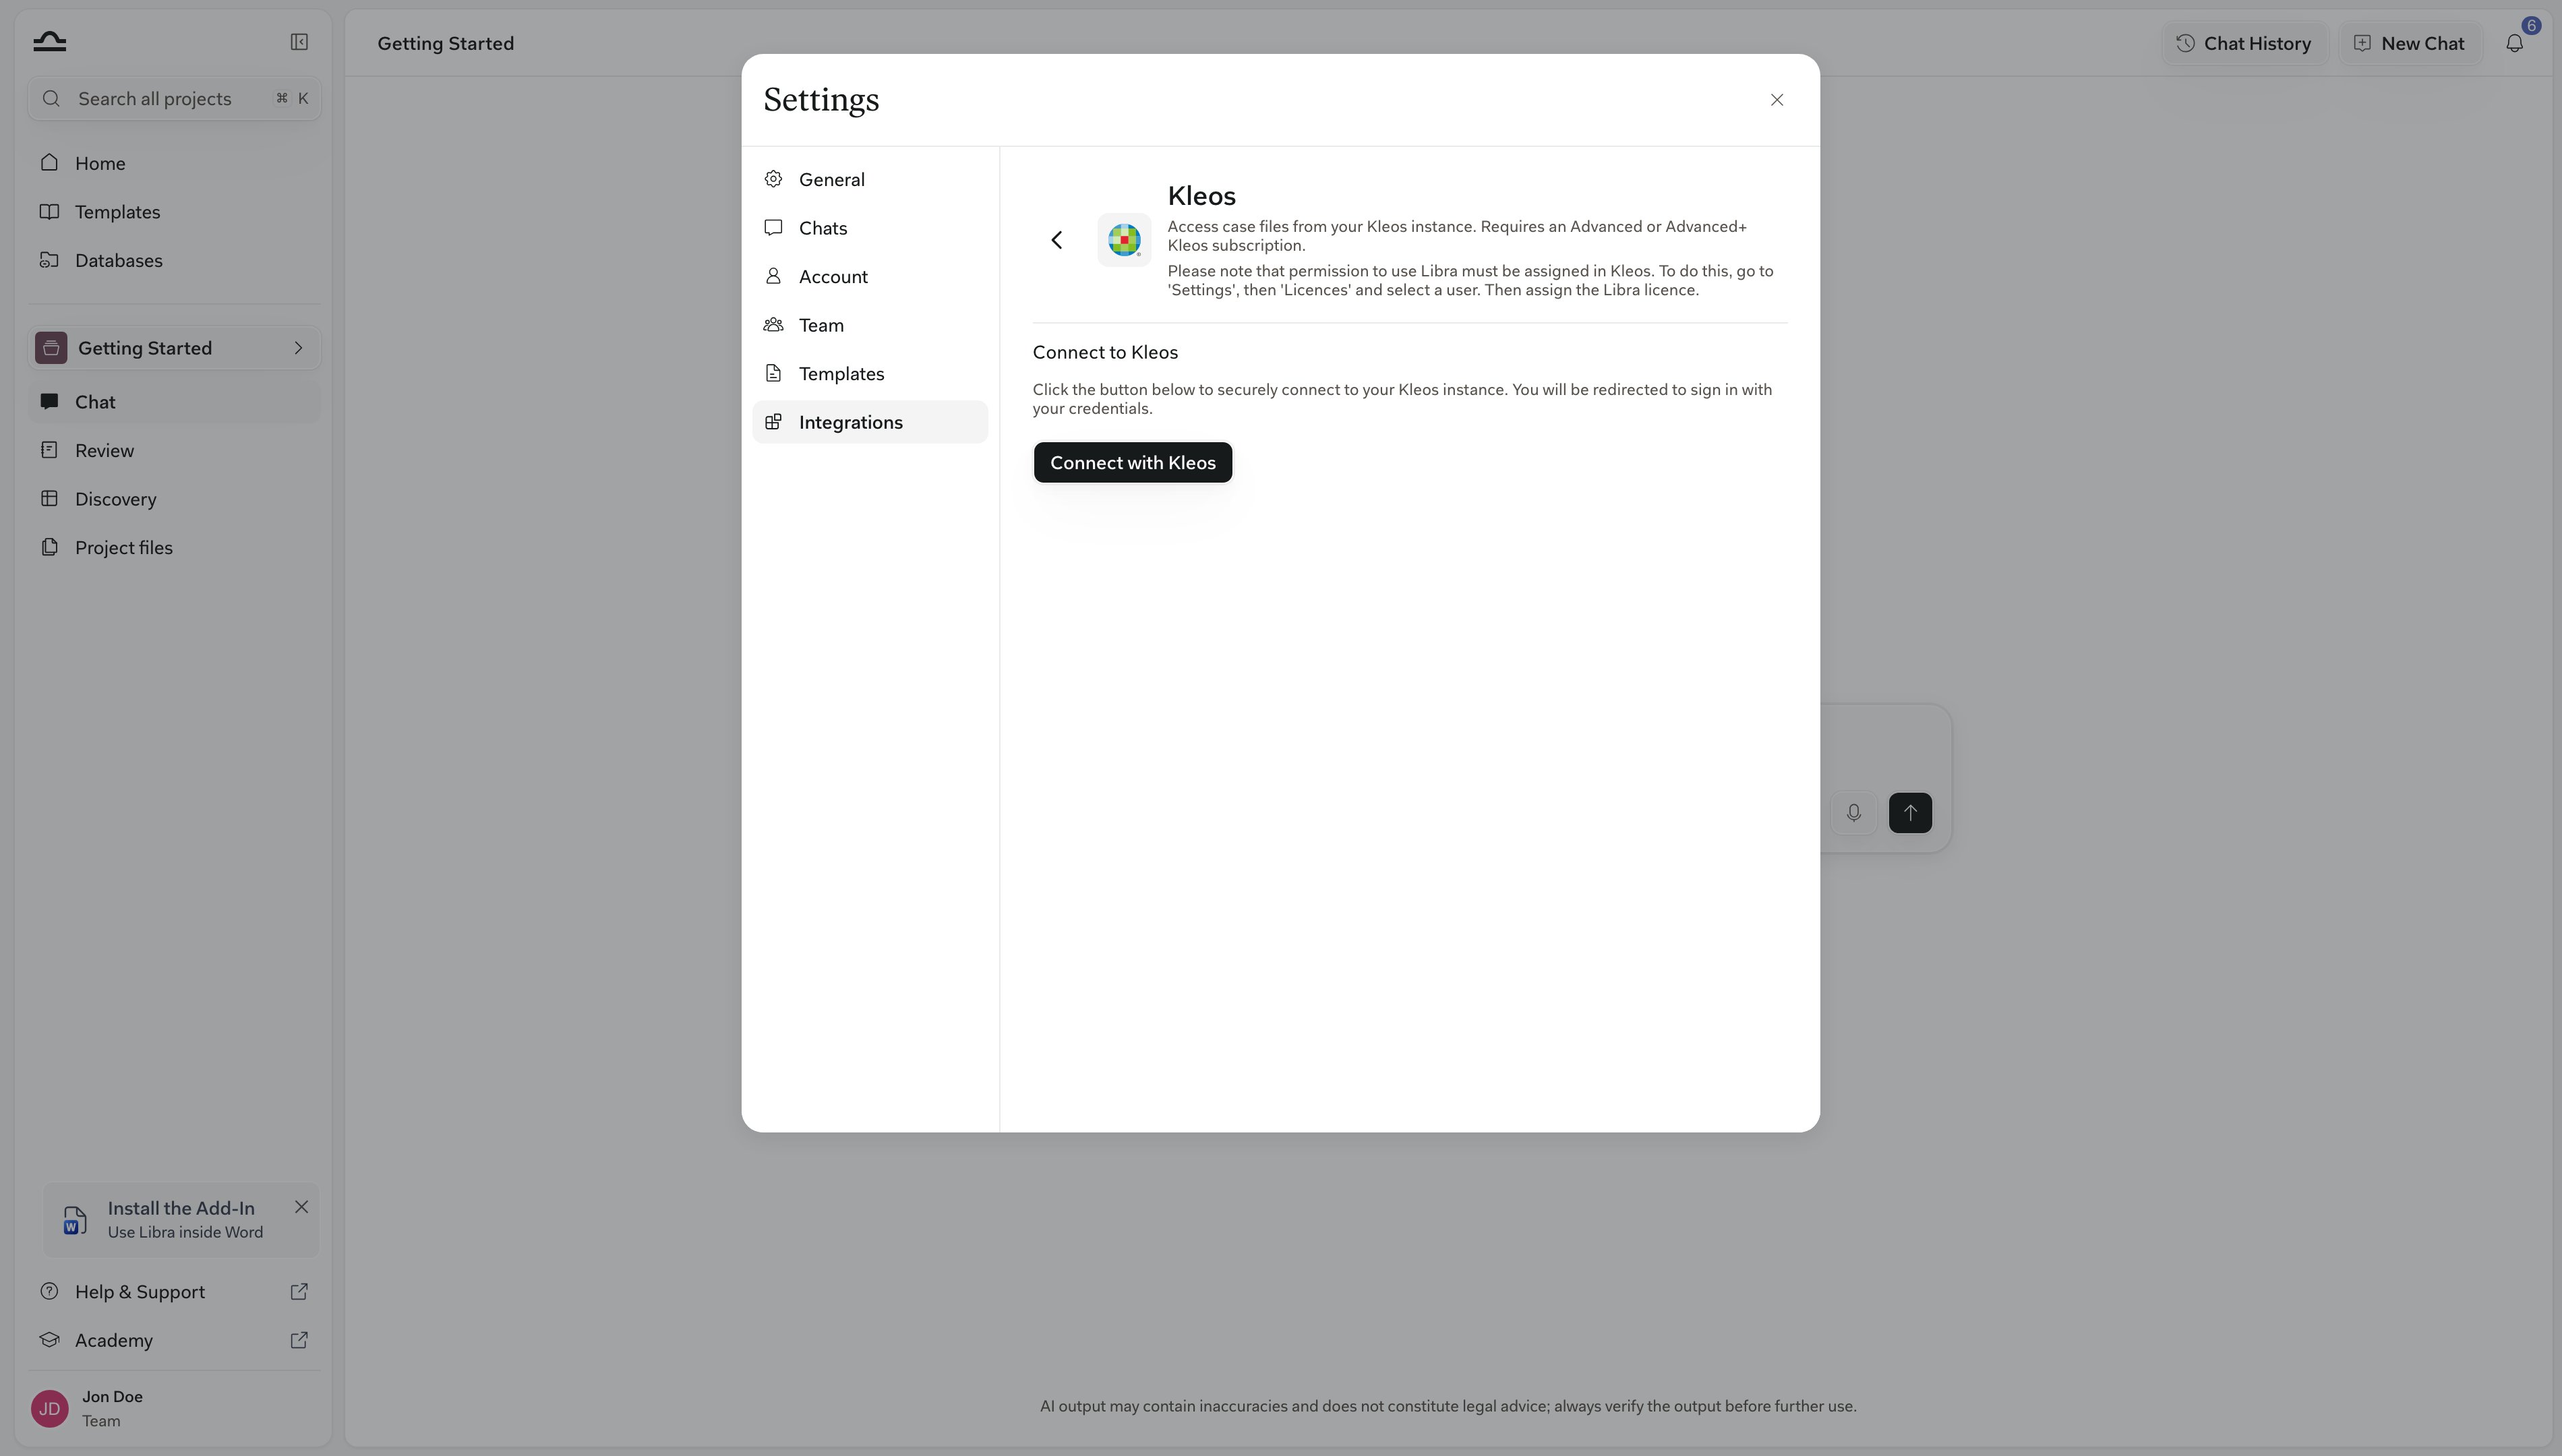
2
Open the Project files panel
In any project you can edit, click Project files in the sidebar.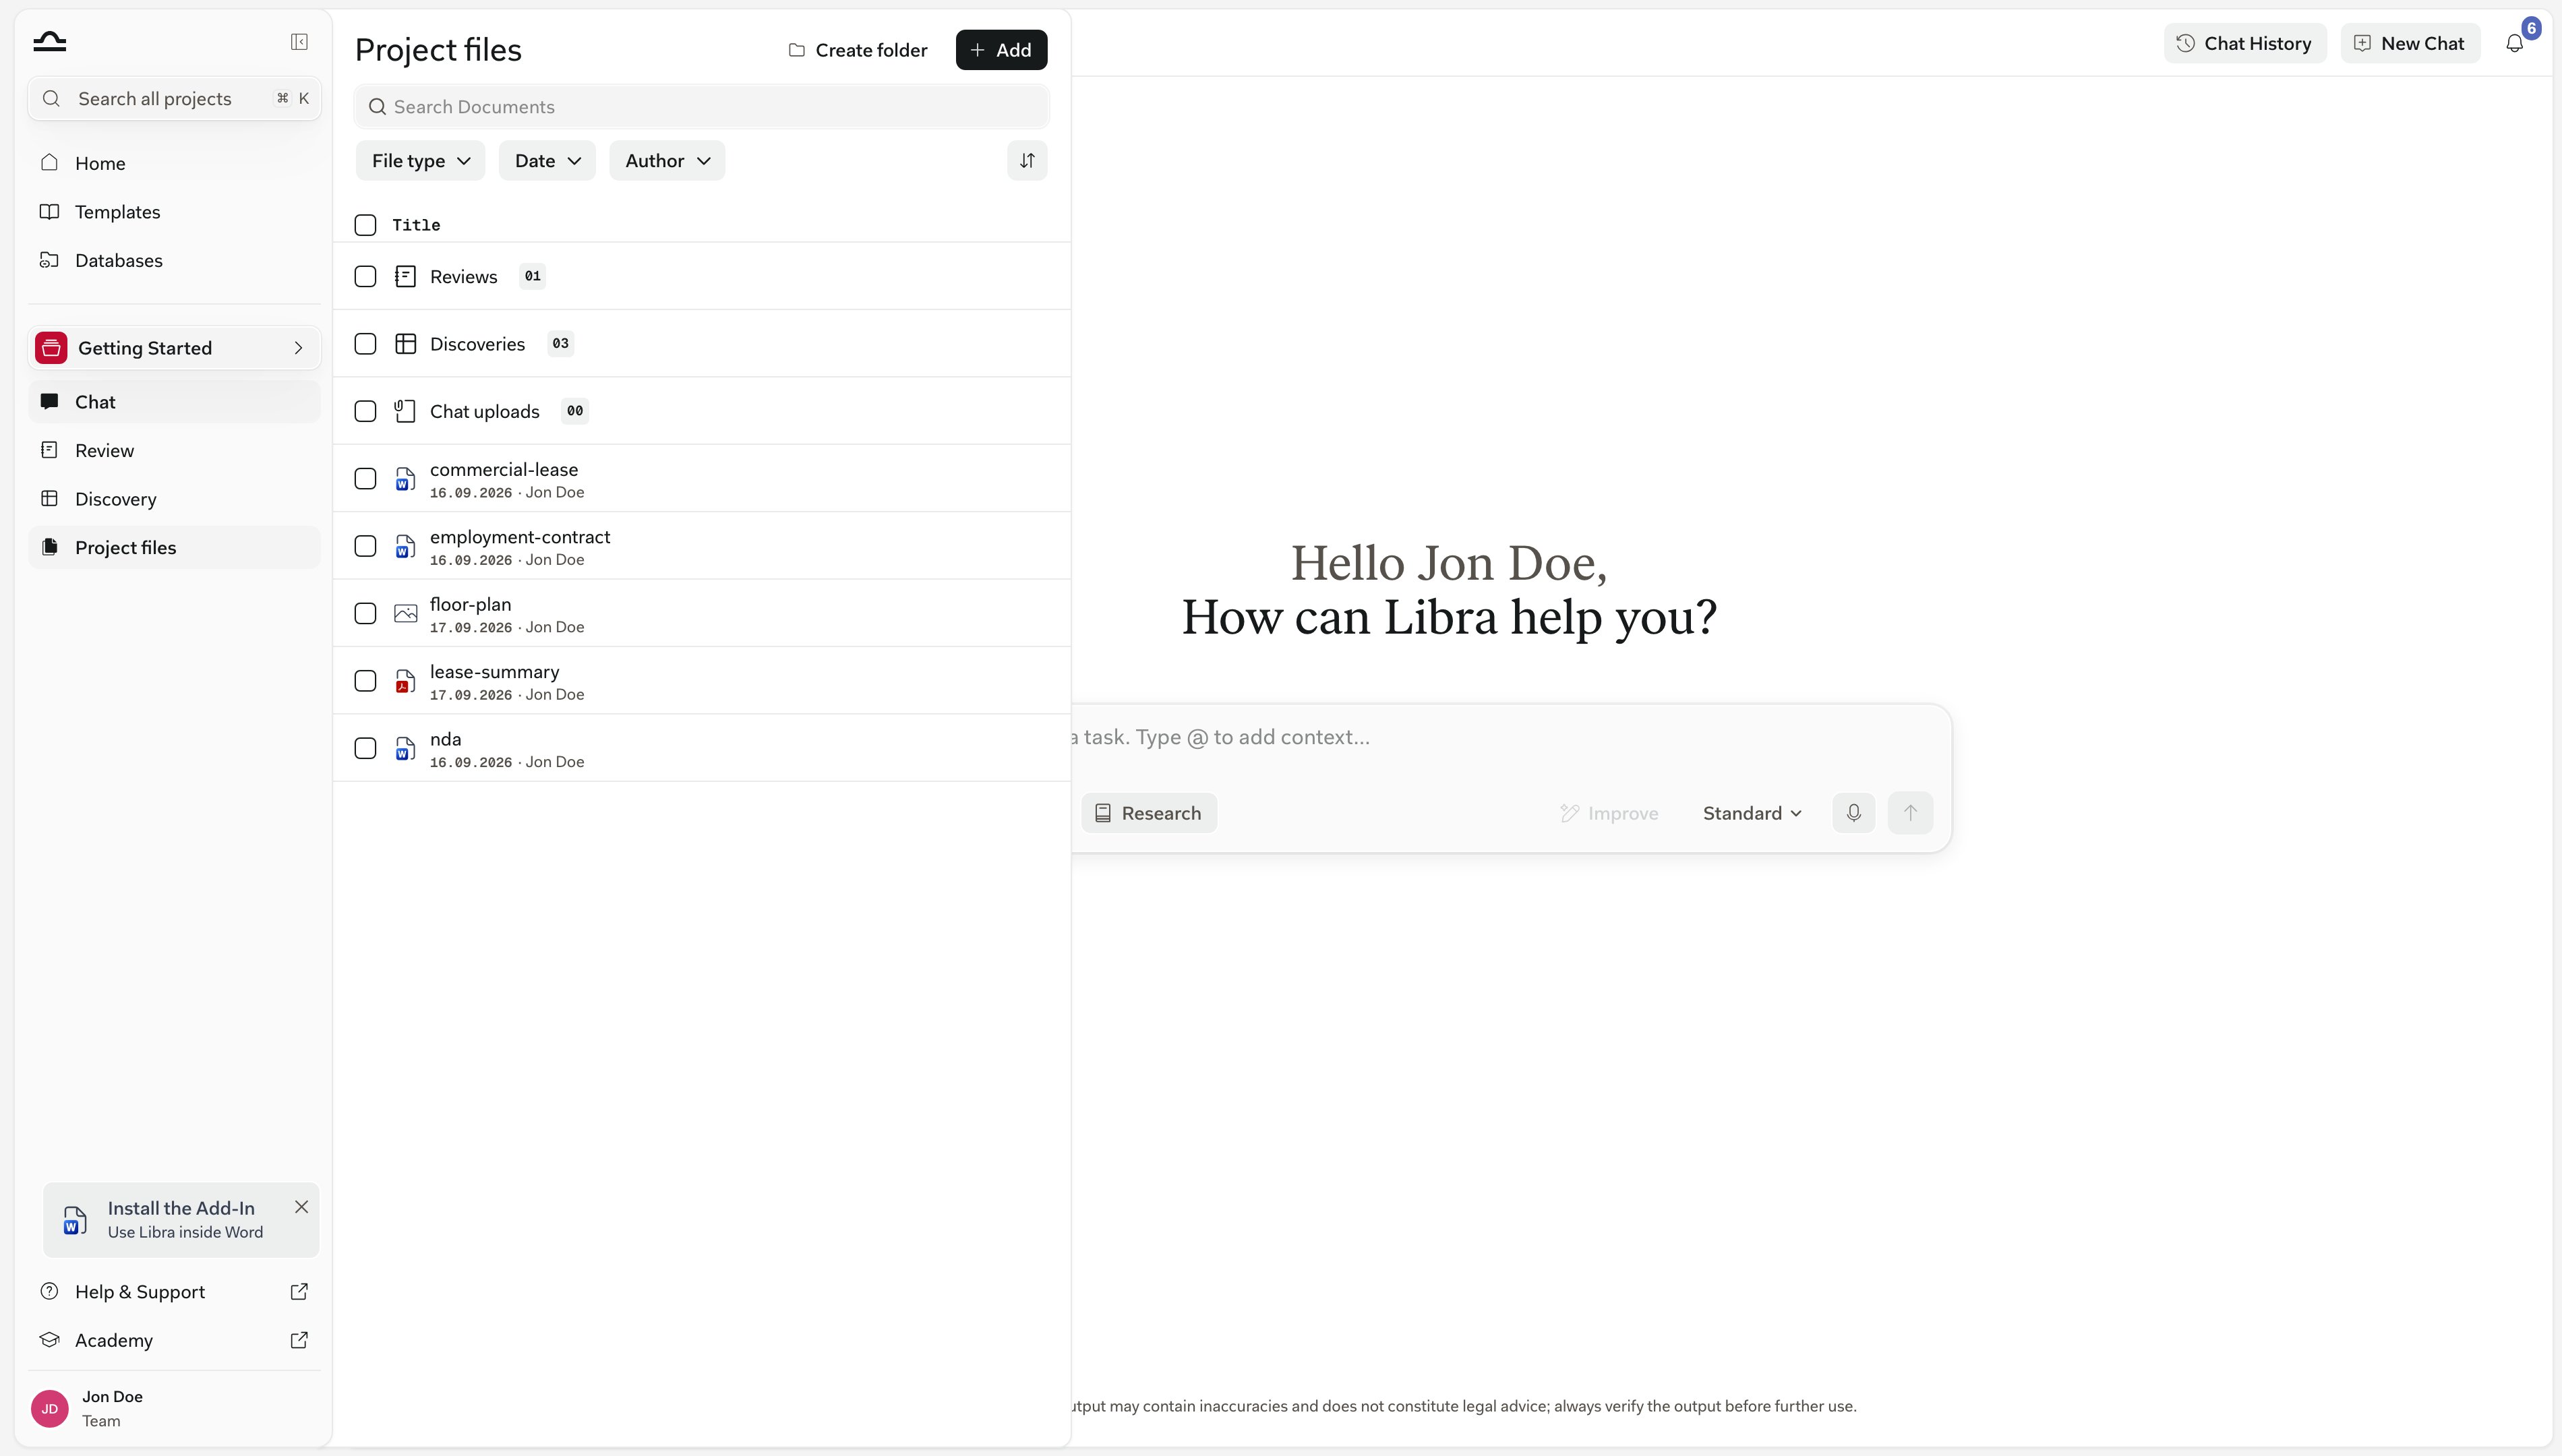
3
Click Add → Select files
In the Project files toolbar, click Add and choose Select files. The file picker opens; choose Kleos under Integrations on the left.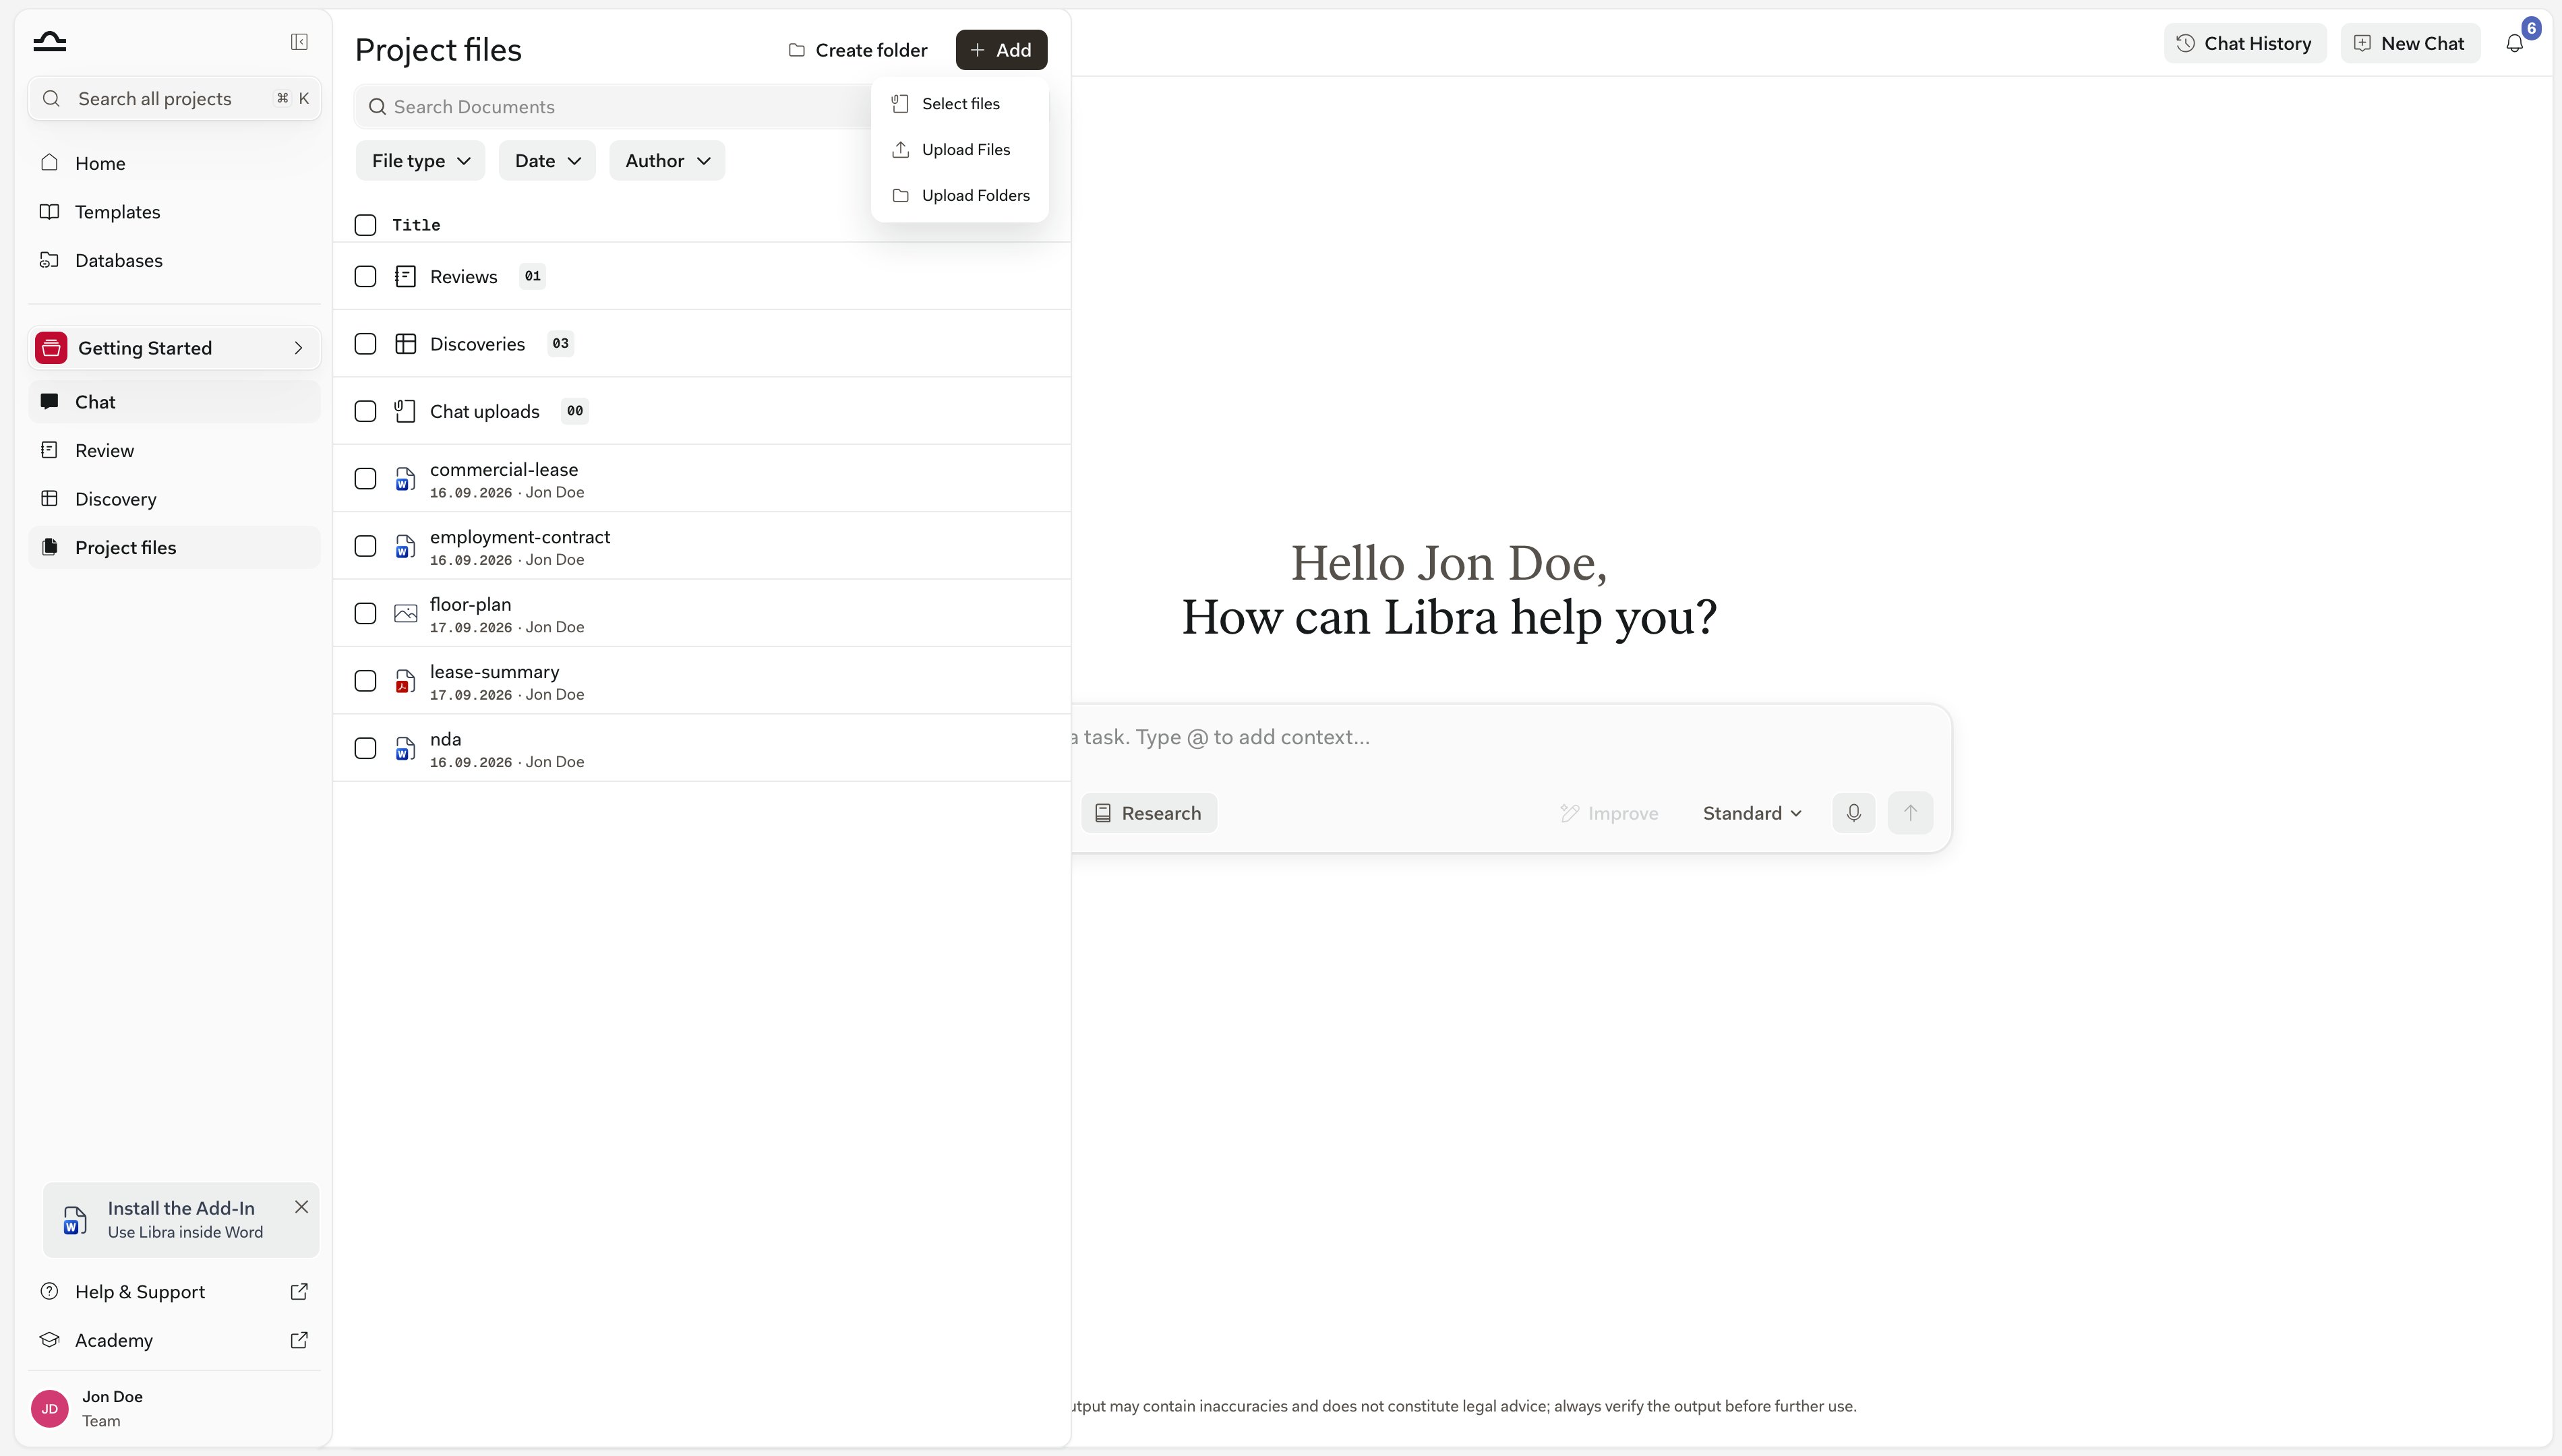
4
Pick a case
Kleos opens on your Cases, not on a file tree. Search by case name or number, or page through the list, then open the case you’re working on.
5
Select the documents
Inside the case you get its folders and documents. Expand a folder to load its contents; where a folder holds more than one page of documents, a Load more button fetches the next batch. Tick as many documents as you need — file types Libra can’t work with are greyed out and can’t be selected.
6
Click Add to project
Each document appears in Project files as a linked row, with Linked from Kleos where the author would be. A spinner shows while Kleos prepares it for Libra.
Working with linked files
A linked file sits in the tree alongside your uploads, and most of what you do with a document works on it too.
Files can be attached while Kleos is still preparing them. The message waits until they are ready, and Libra tells you so if you press send too early.
If a file can’t get ready, Libra takes it off the message: “Lease 2024.pdf” was removed because it is not ready yet.
If a file is still spinning after about 90 seconds, its checkbox is switched off and the row suggests Check status. Run that from the row’s ⋯ menu; where the menu also offers Retry indexing, that asks Kleos to prepare the file again.
What a linked file can’t do
Linking is new, and a few parts of Libra still work only with documents stored in Libra itself.
Files you copied from Kleos before 24 September 2026 stay ordinary copies in Libra. To switch one to the live version, link the document again from Kleos and remove the old copy.
A file is still copied rather than linked when there is nowhere to link it: for instance, when you pick from Kleos in a chat and your current project is one you can only view.
Tips
Attach the files, not the project
Attach the files, not the project
Chat only reads linked files you attach one by one. Attaching the whole project leaves them out, so pick the Kleos documents you want Libra to use.
Ask about a passage, not the whole file
Ask about a passage, not the whole file
Libra answers from what Kleos’s search finds for your question. “What does clause 9 say about termination for cause?” lands better than “Summarise this 200-page agreement.”
Kleos stays the system of record
Kleos stays the system of record
Kleos is your firm’s practice-management source of truth, and a linked file is only a view of it. File, rename and version documents in Kleos; use Libra to analyse and research them.
Troubleshooting
Kleos isn't in the picker
Kleos isn't in the picker
Three things have to line up: your Libra team is registered in Germany, the Netherlands, Belgium or Italy; your firm has a Kleos Advanced or Advanced+ subscription; and your user has been assigned the Libra licence in Kleos. Your firm administrator can confirm the last two.On the Starter plan the Kleos section stays on the connect prompt even once you’ve signed in. If there’s no Add button or no Select files entry at all, you have view-only access to this project, or your team has document uploads switched off.
Sign-in fails
Sign-in fails
Confirm your Kleos credentials work directly on the Kleos website. Also allow pop-ups for Libra — the Kleos sign-in opens in a pop-up window and Libra can’t complete the connection if the browser blocks it. If your credentials work but the connection still fails, your firm may have SSO restrictions that need an administrator’s help.
Libra says your Kleos session has expired
Libra says your Kleos session has expired
Kleos sessions don’t last forever. Linked rows show Reconnect instead of Preview; click it, or go to Settings → Integrations → Kleos and click Reconnect. Your linked files are unaffected.
A linked file says No access in Kleos
A linked file says No access in Kleos
Libra opens Kleos as you, so it follows your Kleos permissions. A colleague may be able to open a file you can’t. Access is managed in Kleos — ask your Kleos administrator or the document’s owner.
A file was moved or deleted in Kleos
A file was moved or deleted in Kleos
Moving it within Kleos doesn’t matter; the link keeps working. If it was deleted, or you can no longer see it, the row stays in Libra but can’t be opened or used in chat. Remove it from the row’s ⋯ menu.
Some files can't be selected
Some files can't be selected
Permissions in Kleos carry over: you only see the cases and documents you can already read there. Files in formats Libra can’t work with are visible in the picker but greyed out.
Next steps
Project files
Organise linked files alongside your uploads.
SharePoint
The other document-source integration.