

Create a database
A database needs a name, an optional description, and a decision about who else may use it. All three can be changed later.1
Databases → New database → New Libra database
New database, top right of the Databases page, offers New Libra database or Add Sharepoint folder. Choose the first.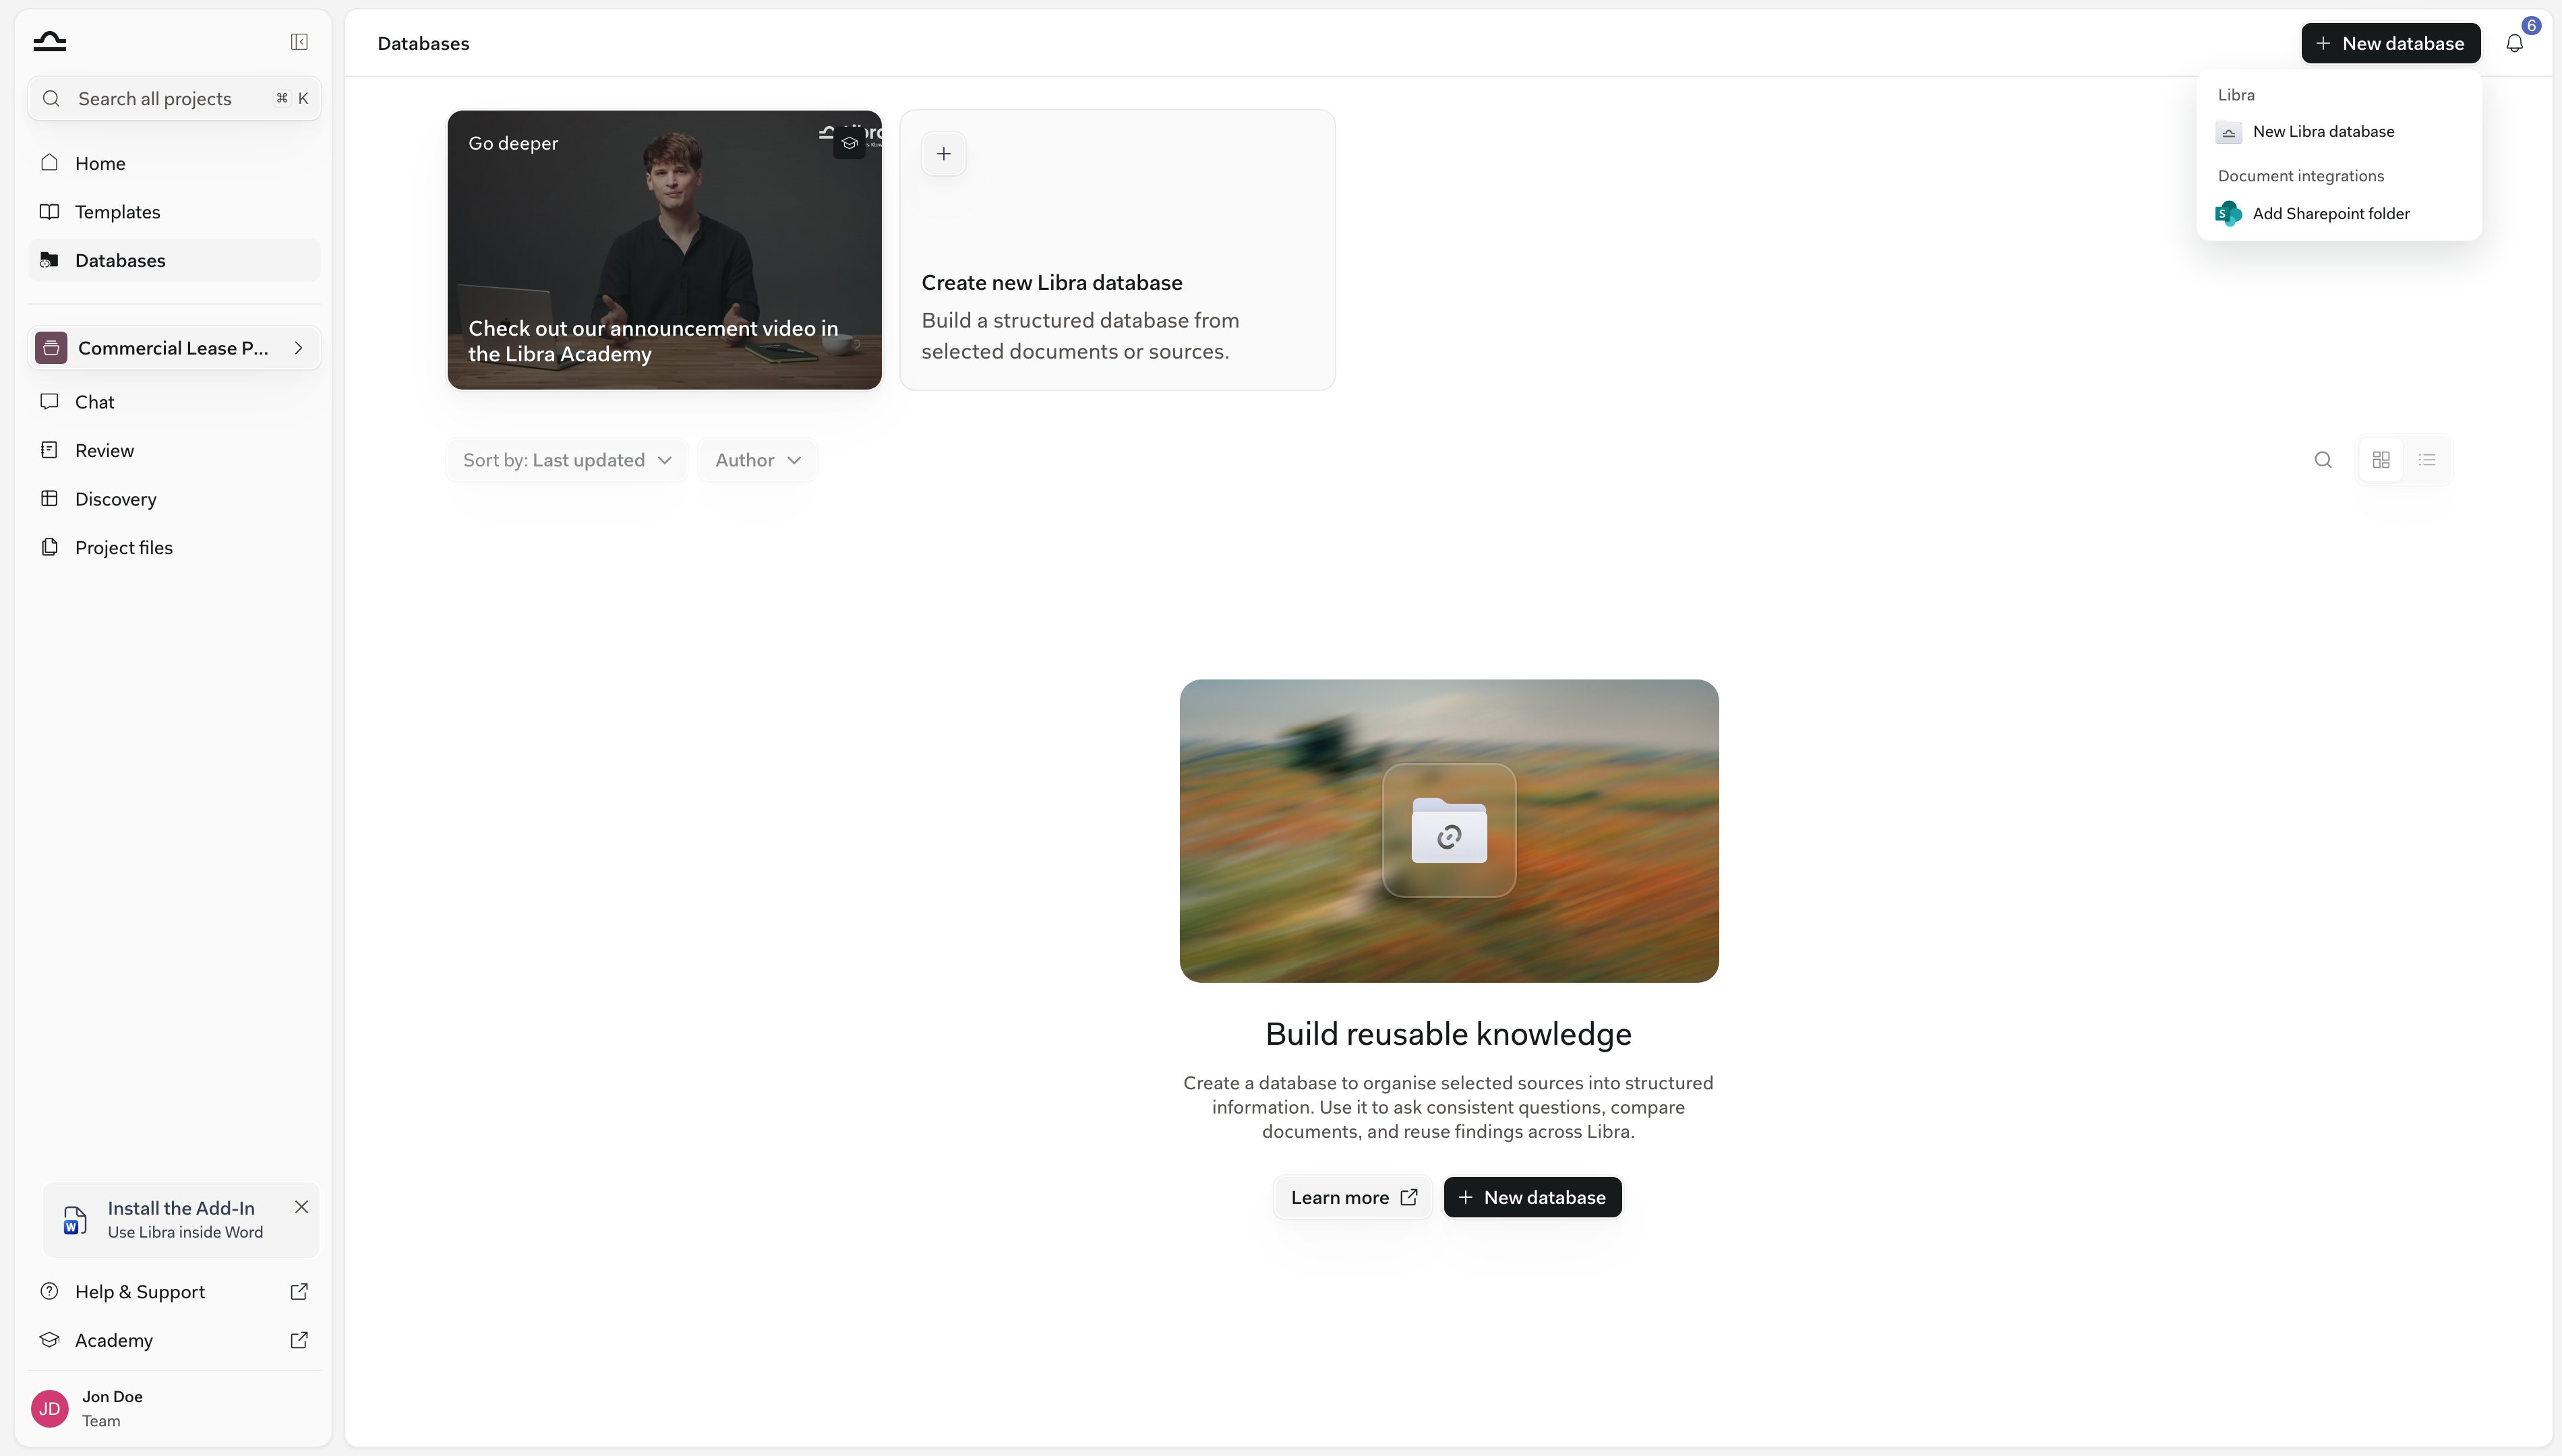
2
Name and describe it
Enter a Database name and a one-line Description of what belongs inside.
3
Decide who in the team may use it
The sharing block in the same dialog offers Everyone in the team or Only people invited, plus named people or groups, each with a role. Skip it if you’re unsure: the database stays private to you until you share it (the team’s Owner and Admins can’t see it either), and you can share it later from its ⋯ menu. Roles are explained under Share a database.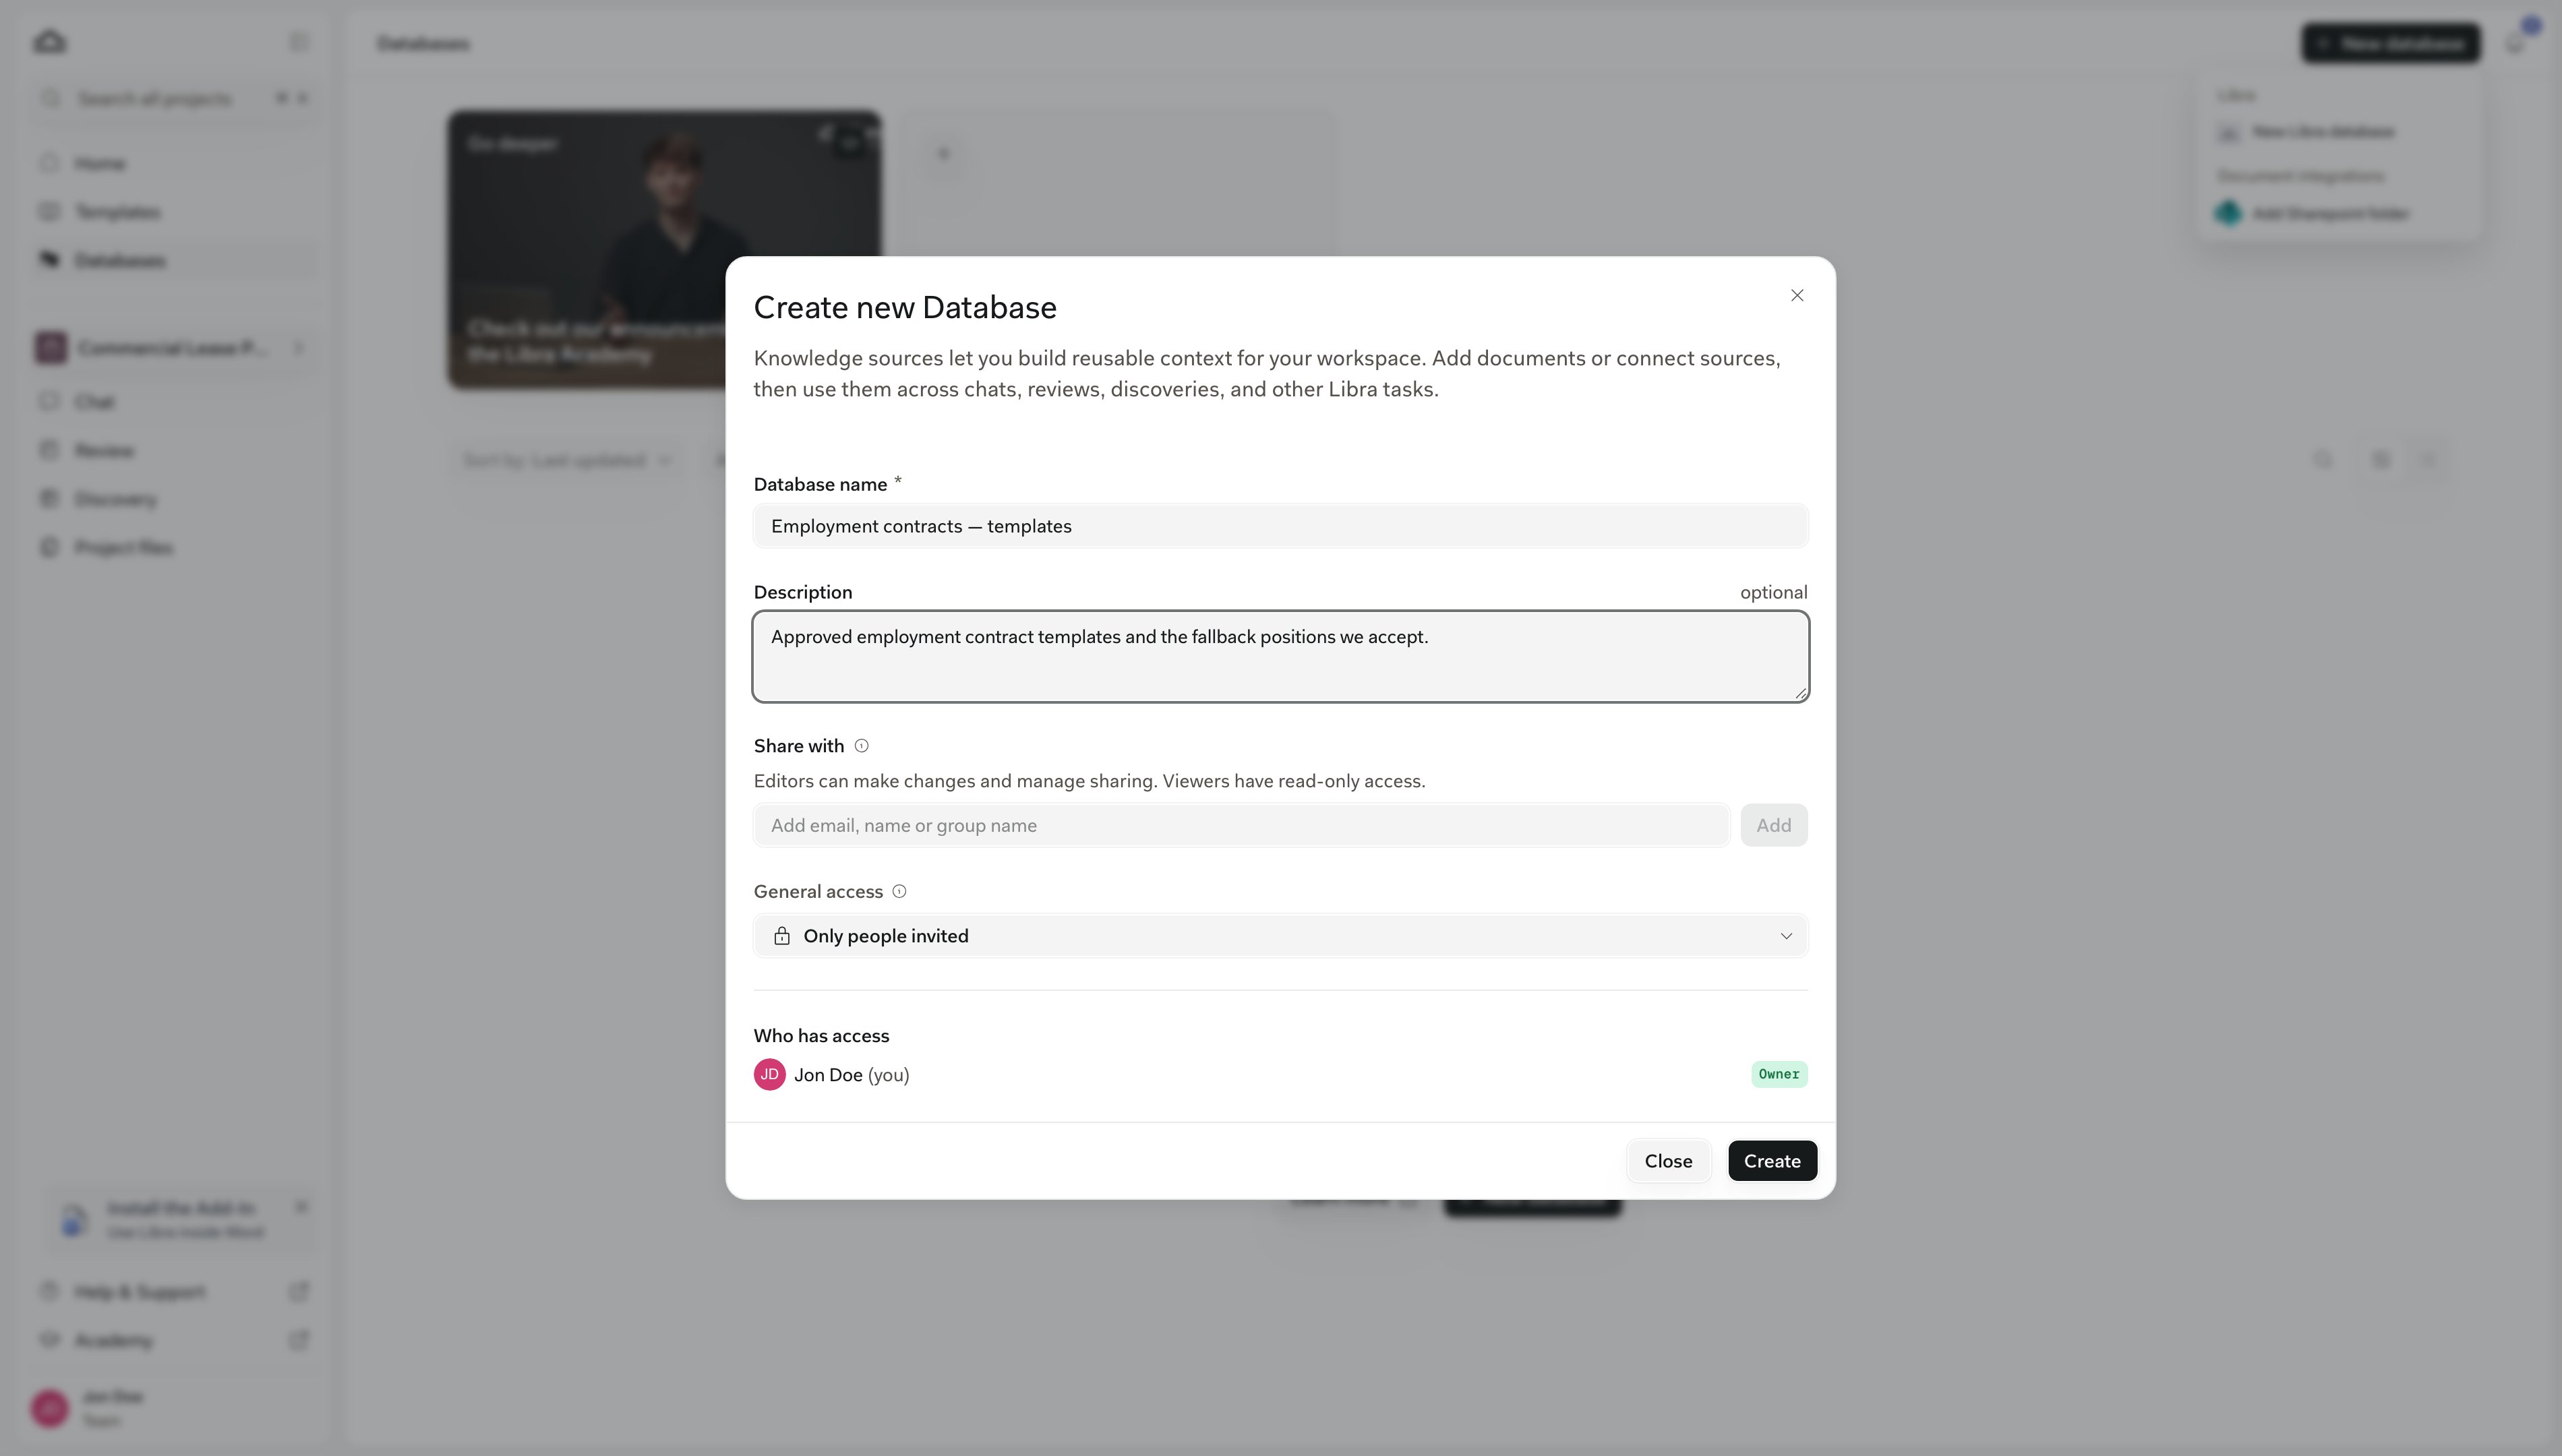
4
Create, then open it
You land back on the list with the new database near the top, below any favourites. Click it to open the empty browser.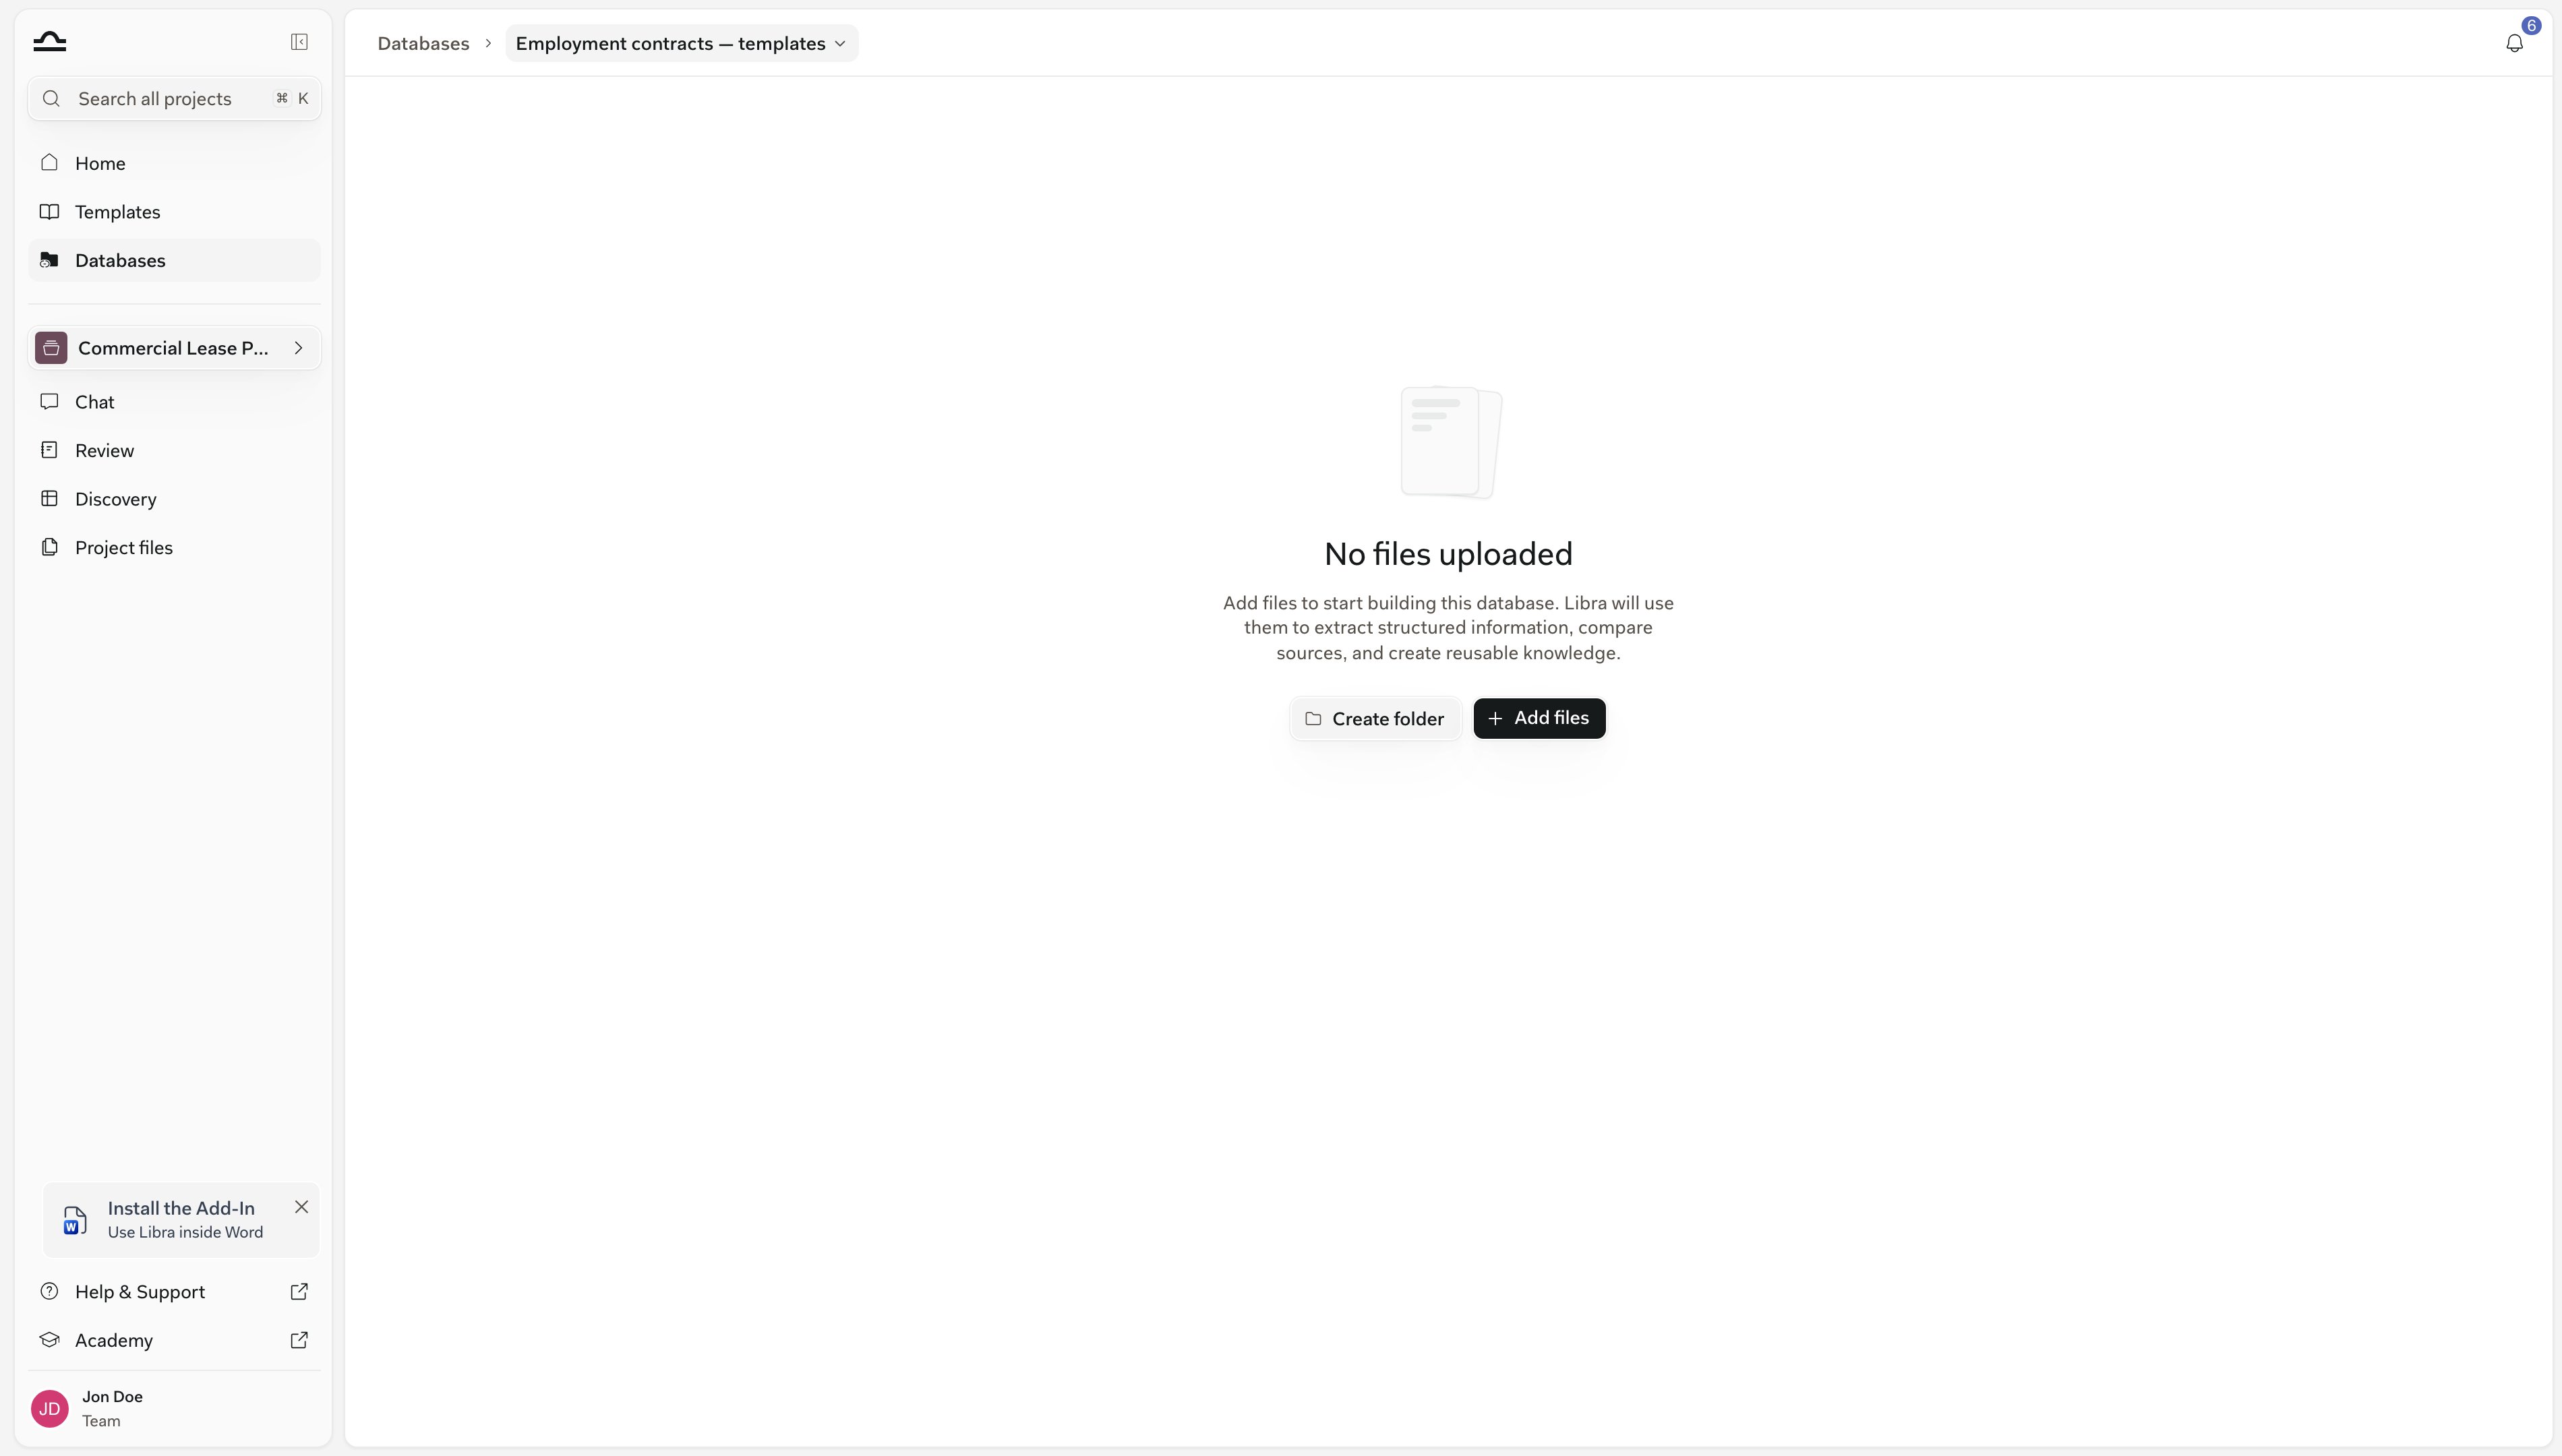

Choose a name that tells a colleague what is inside without opening it, for example Employment contracts – templates. Keep each database to one subject. A chat can search up to ten databases at once, and smaller, clearly named databases make it easy to pick the right ones for a question.
Upload from your computer
This is the usual way to fill a new database: point Libra at the files or folders you already keep on disk.1
Add → Upload Files or Upload Folders
On an empty database the button is Add files; once it has content, Add in the toolbar. Upload Folders takes a whole folder and recreates its structure, subfolders included. Dragging files or a folder onto the list does the same; drop onto a folder’s row to land them inside it.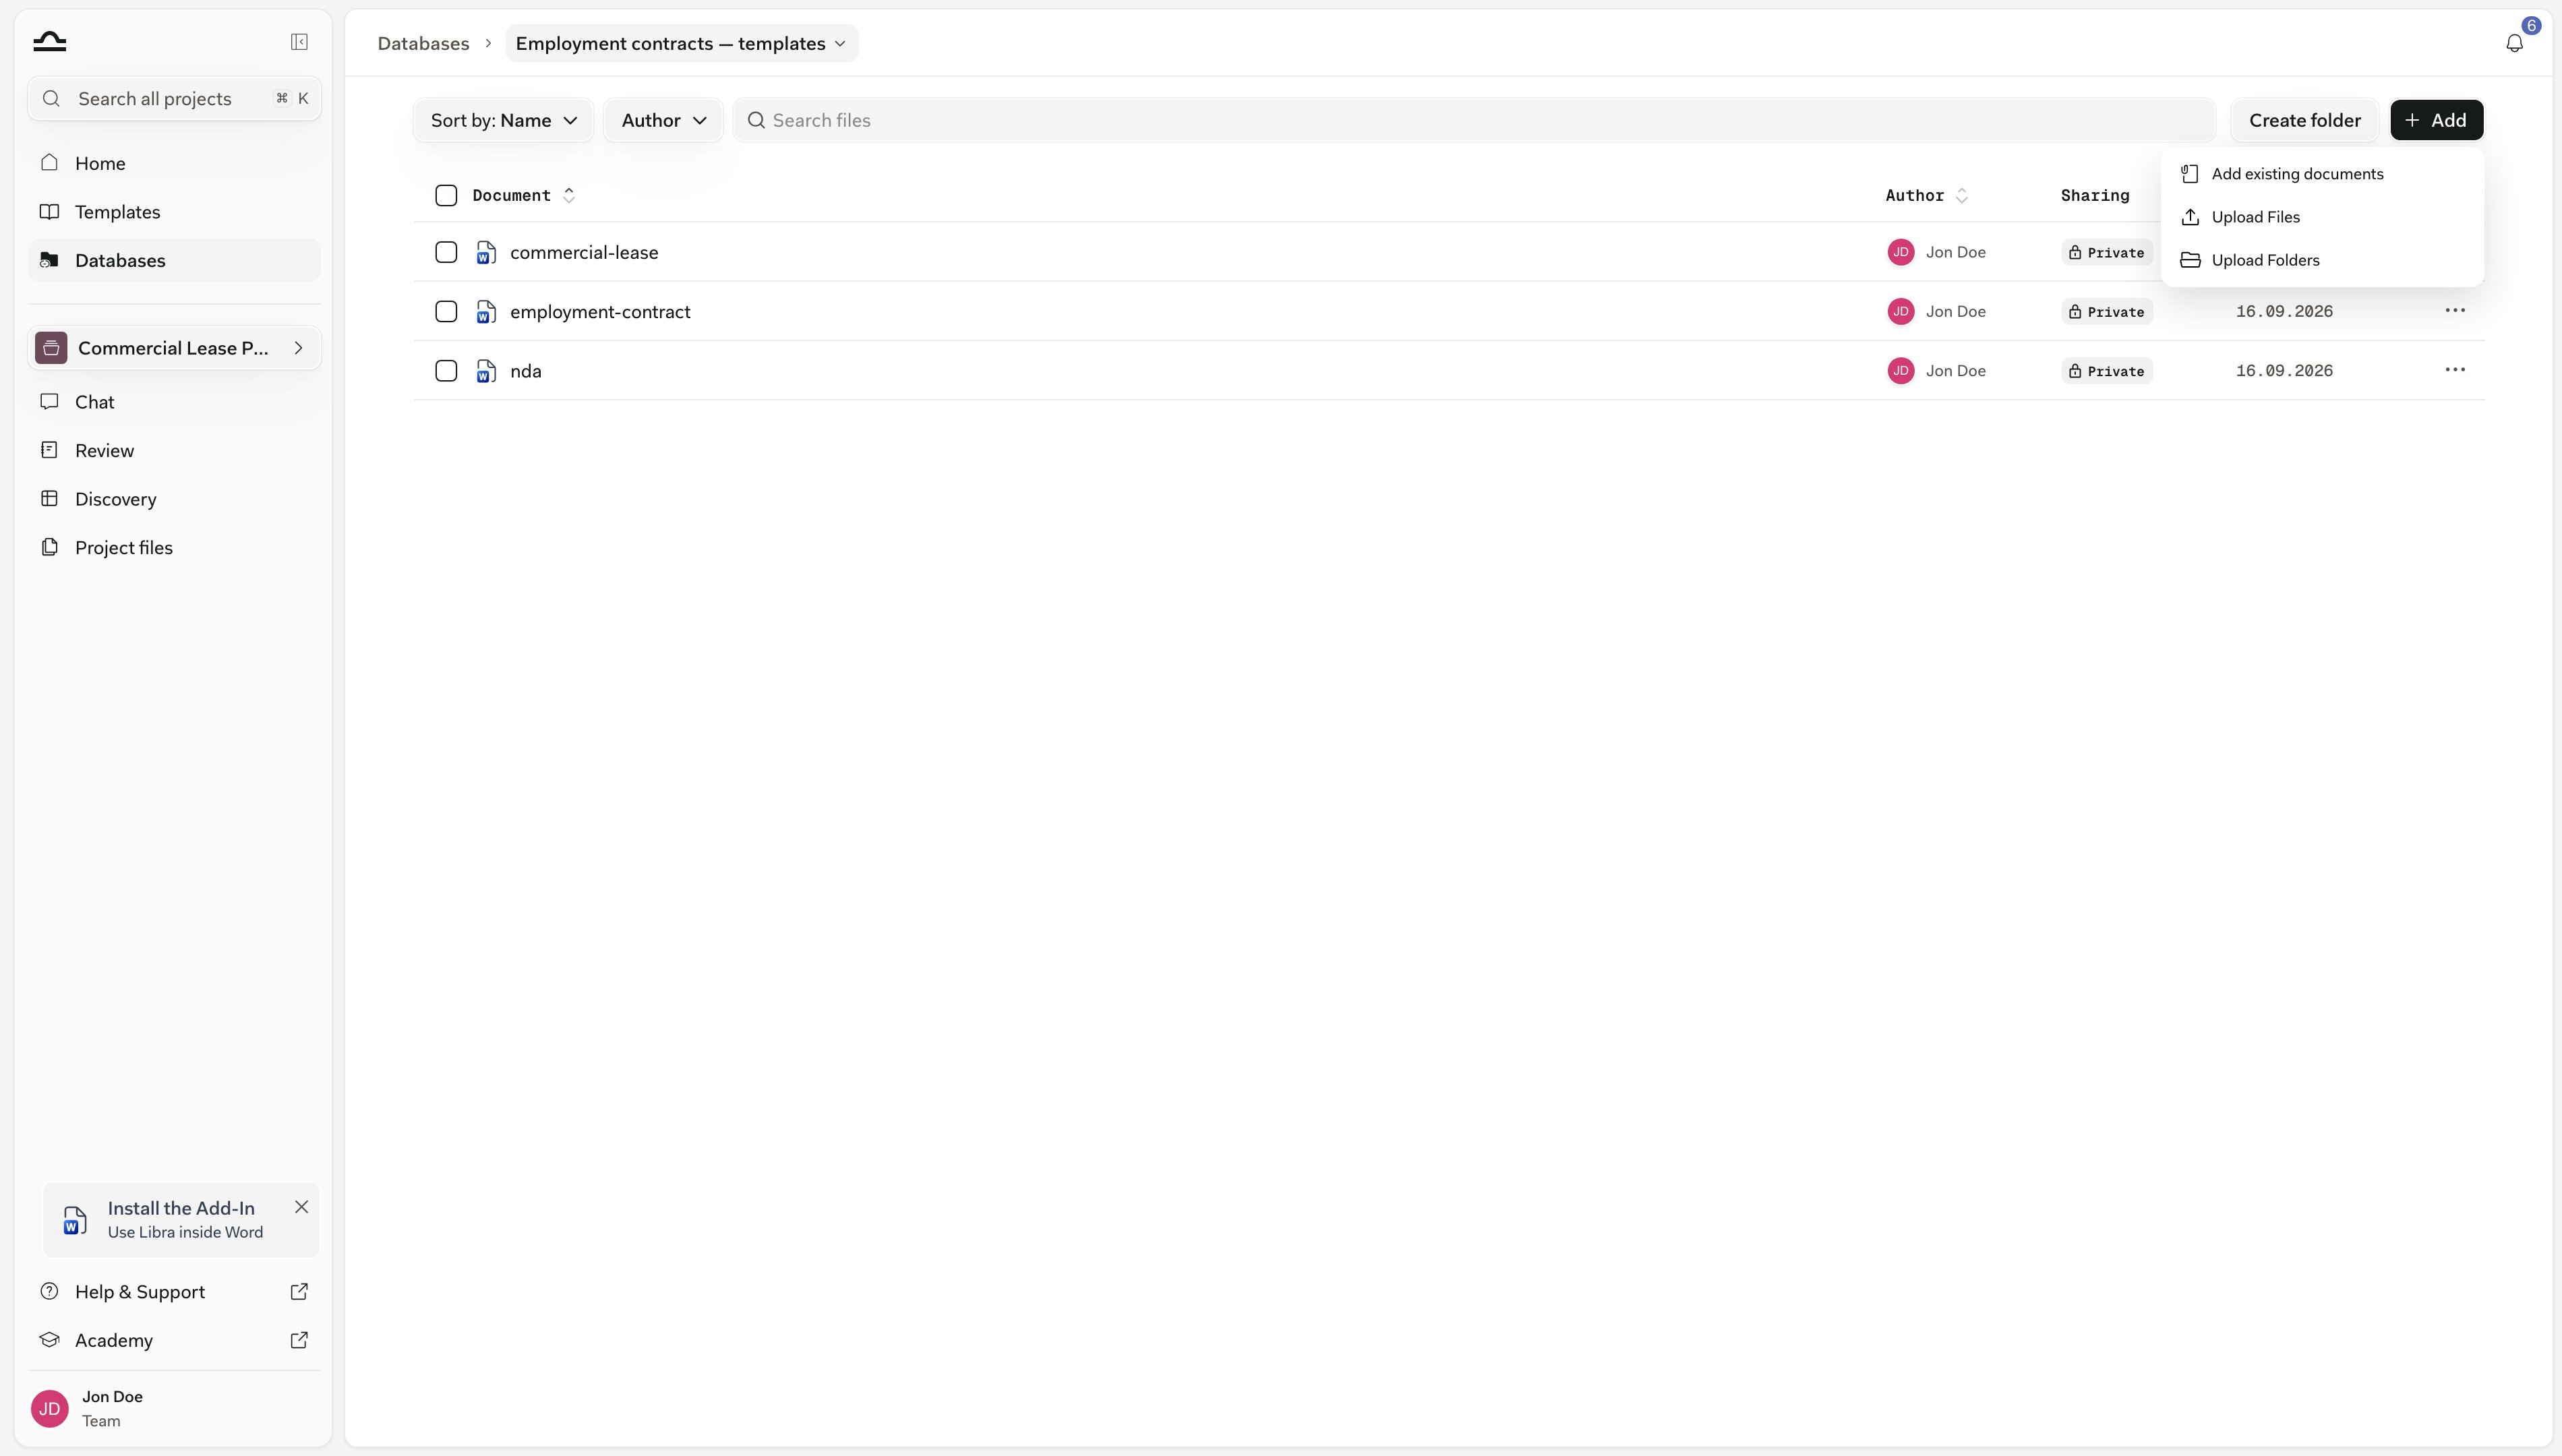
2
Let them process
Each new document shows a spinner while Libra reads it, and a Processing Documents panel counts the batch off. You can keep adding meanwhile.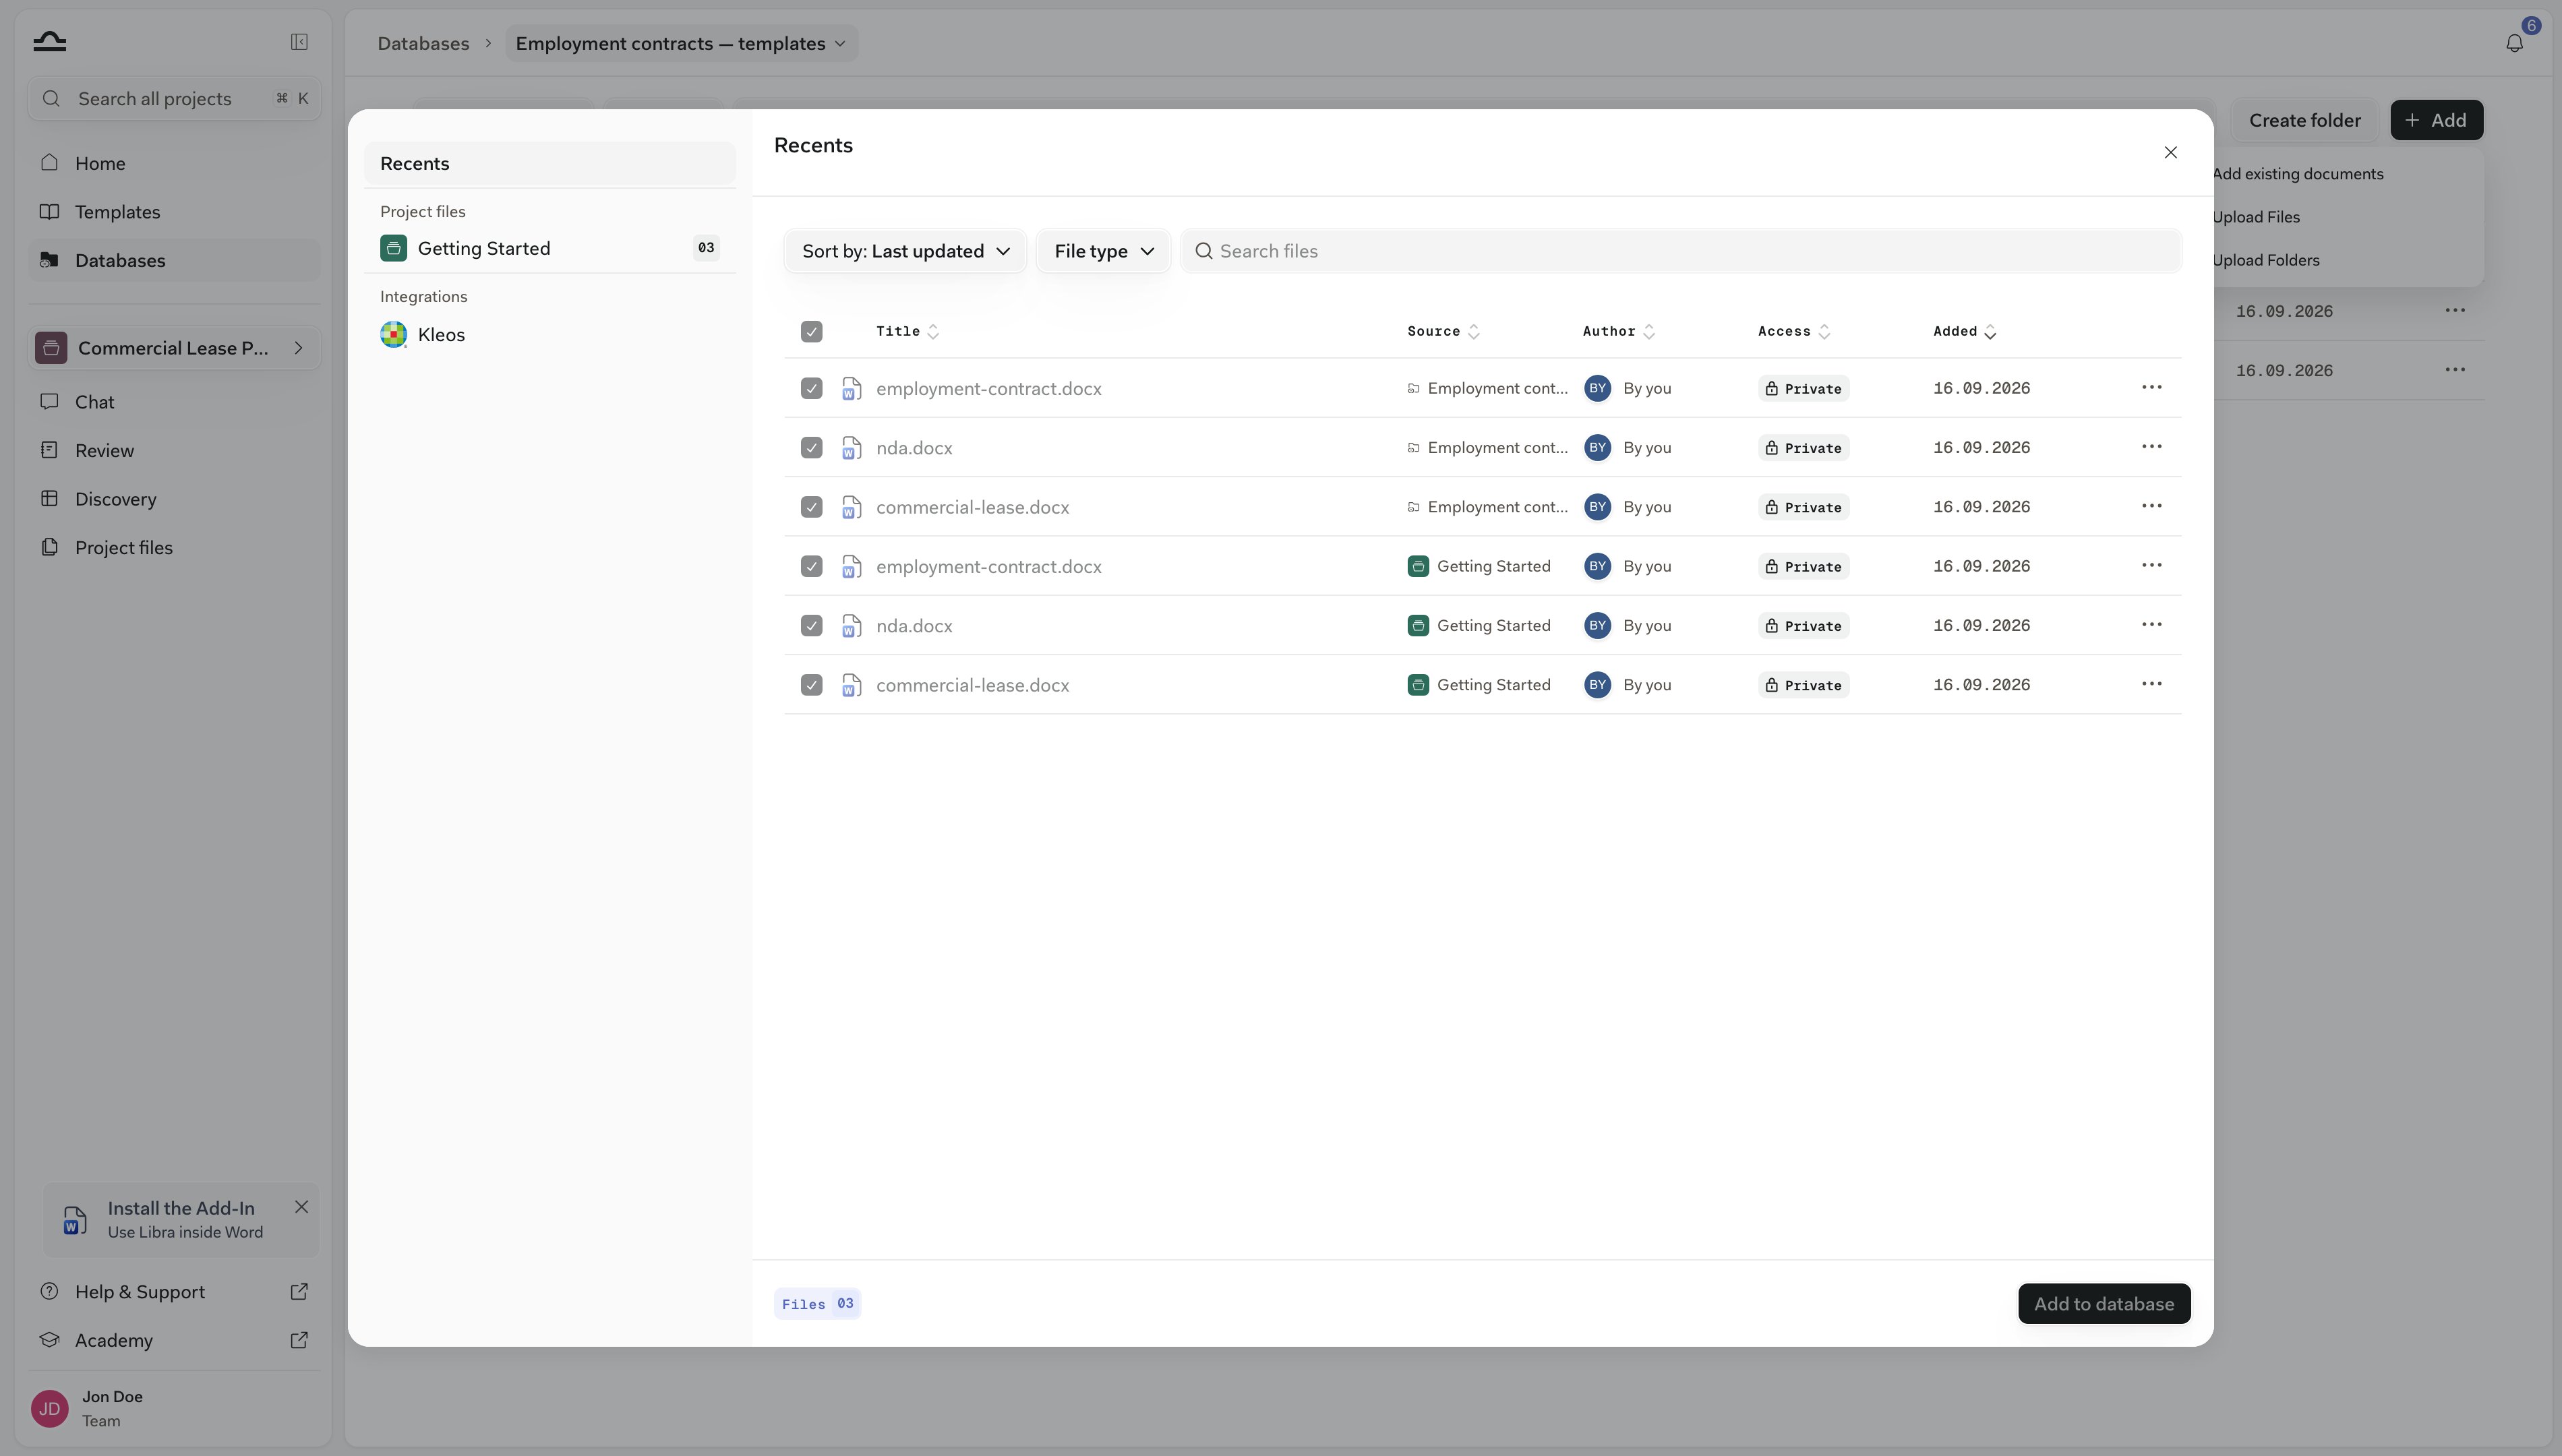
3
Retry anything that failed
A document that failed shows a retry icon in place of its file icon; click it. Files over 500 MB are refused with a message naming them, and files you drag in that Libra can’t read are skipped the same way; the accepted formats are in File types & previews.
Folders are for people browsing; chat search, Ask Libra and content search always look across the whole database. Create folder in the toolbar adds one, and dropping files onto a folder’s row uploads straight into it. To add folders or move documents later, see Organise the documents.
Reuse documents already in Libra
A document that is already in a project doesn’t need uploading again. Adding it to a database reuses the stored file, and the project’s own entry stays where it is.1
Add → Add existing documents
The file picker opens with your sources down the left: Recents, Project files (every project you can open that has documents), Databases (your other databases) and Integrations.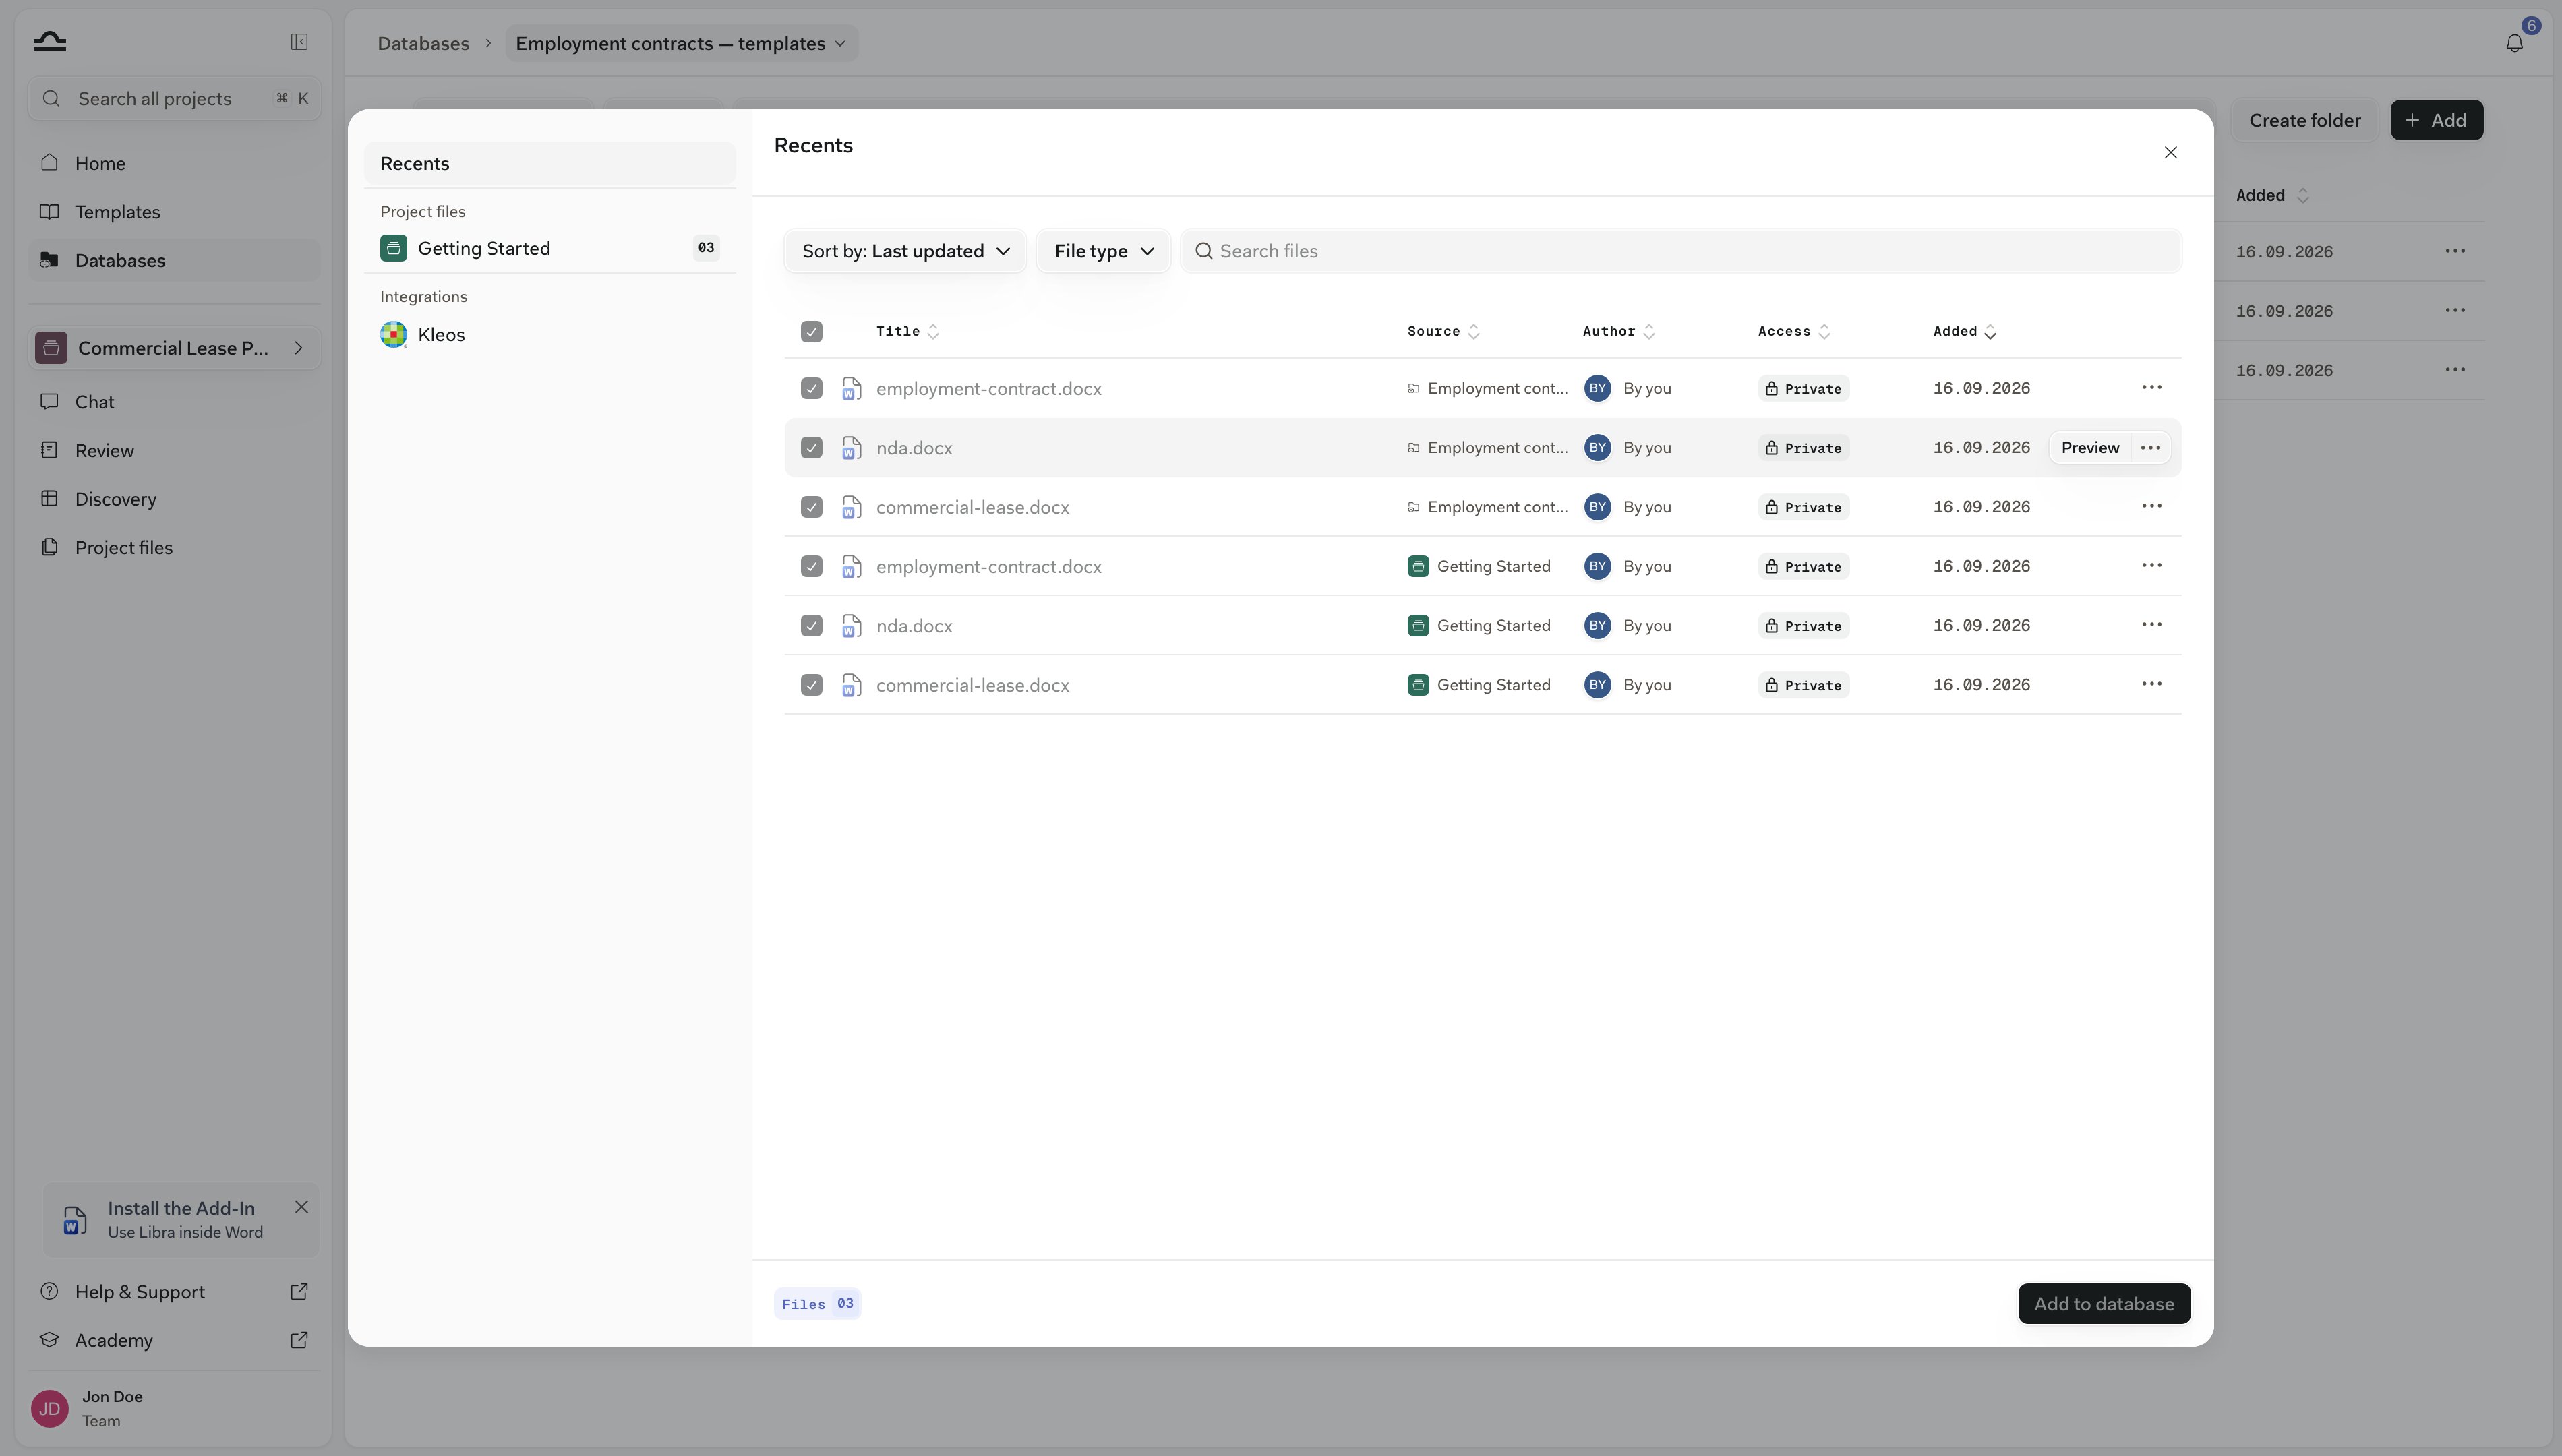
2
Tick the documents
Open a project or database and tick what you want. Rows already in this database show greyed and ticked, so nothing gets added twice.
3
Add to database
Nothing is uploaded or processed again: Libra places the stored document in the database, and it stays in its project as well. This is the route for a contract that was uploaded into a matter and turns out to be a keeper.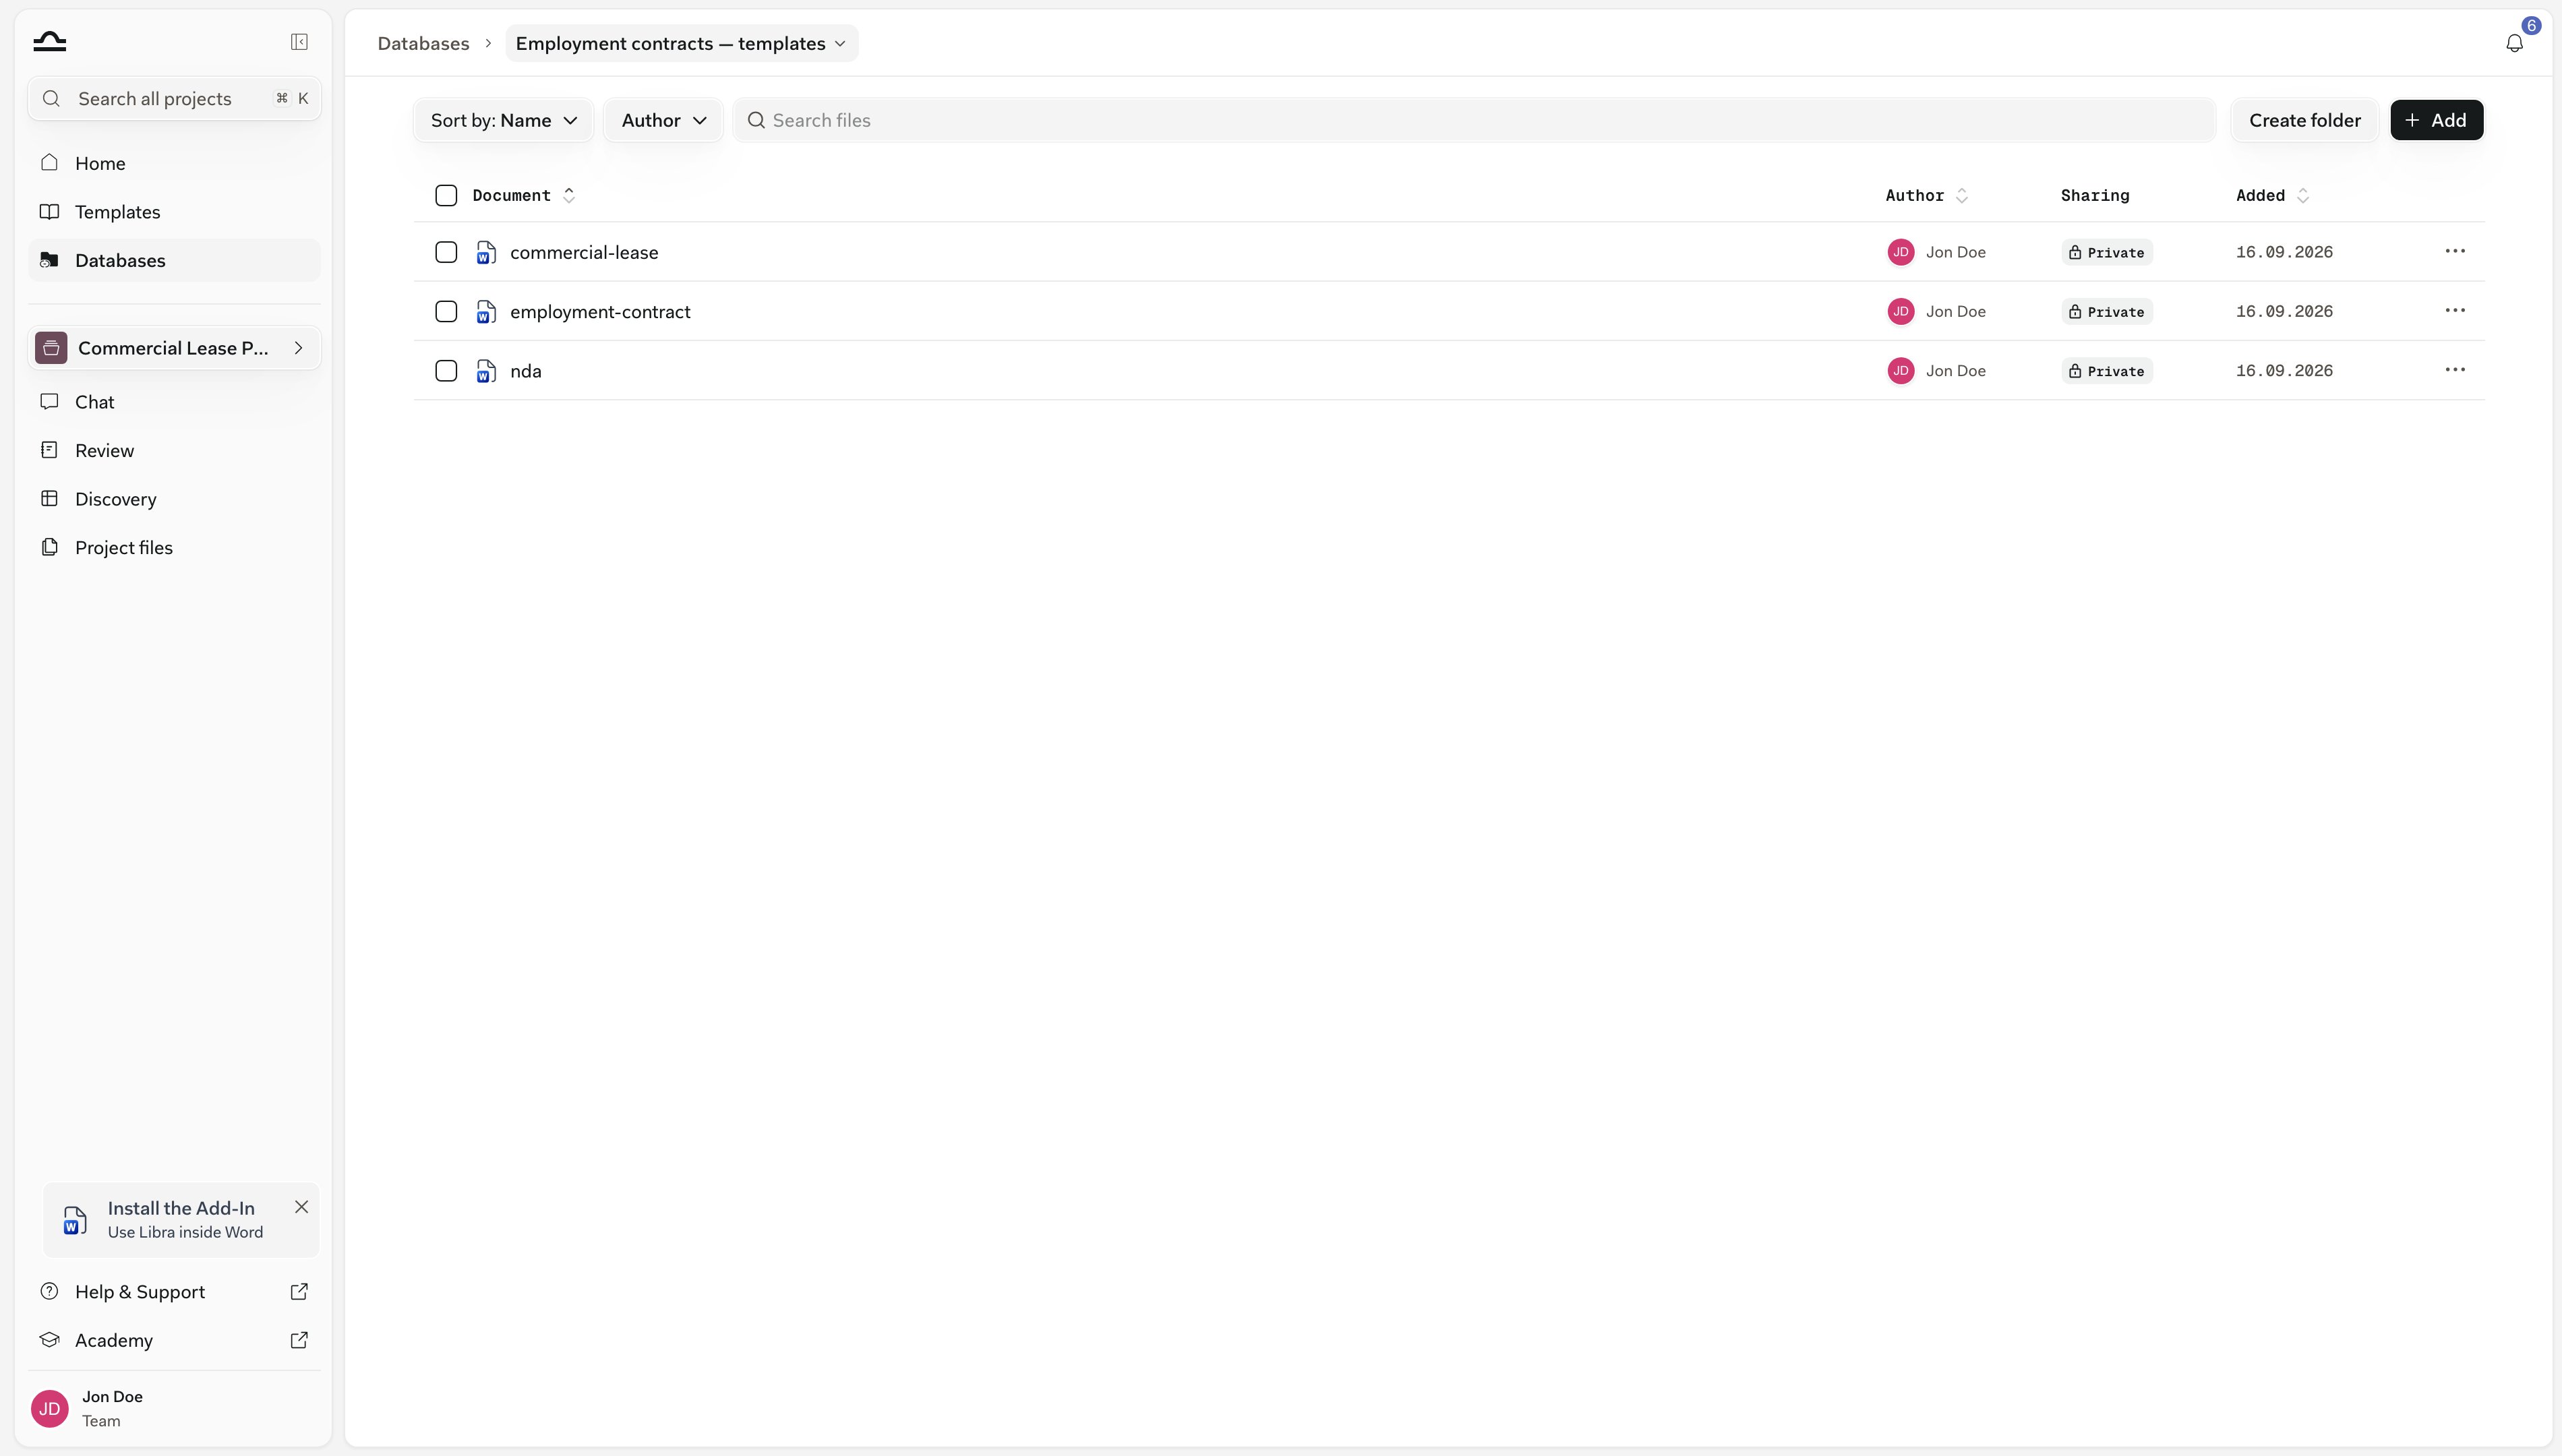
4
Or pick from a connected app
SharePoint, Kleos and other connected sources sit under Integrations in the same picker. Pick the files and Add to database. SharePoint files are downloaded and stored in Libra as ordinary documents.Kleos documents are linked instead, so they stay in Kleos and always show their current version.A source you haven’t connected yet shows a Connect via Settings prompt instead.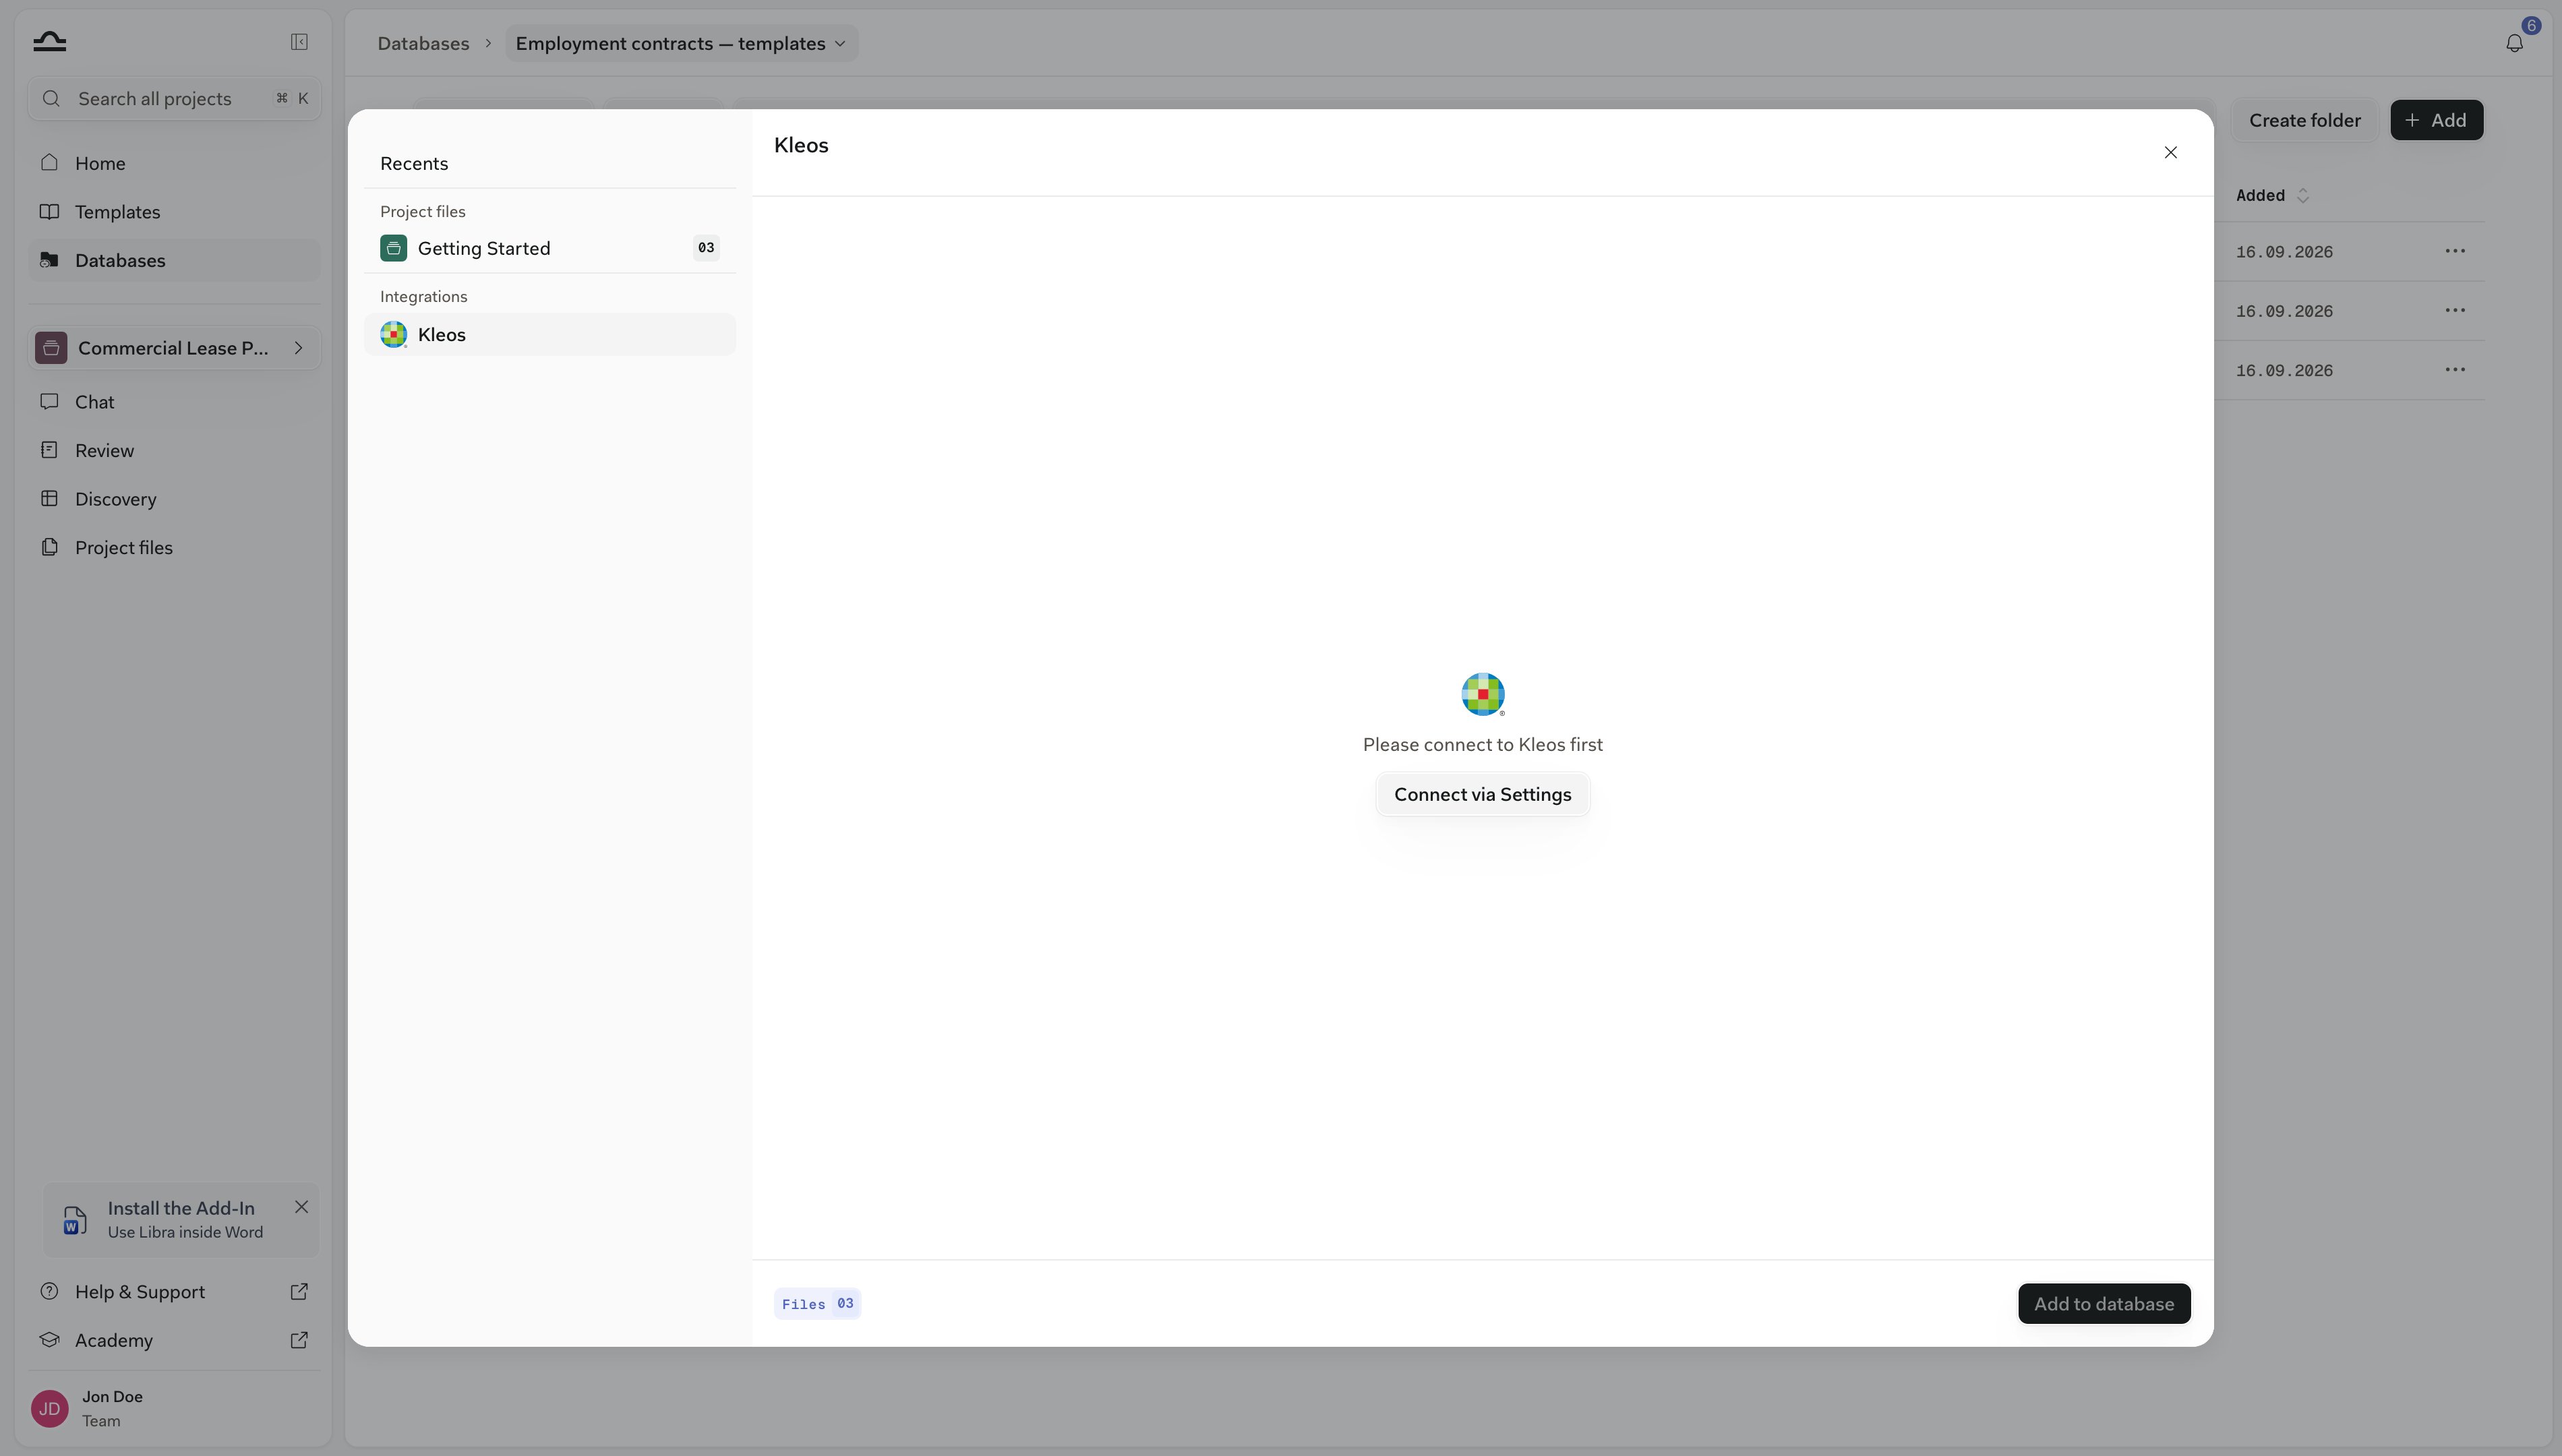
SharePoint files added this way are copies: they won’t follow later changes in SharePoint, and they count towards the page allowance. Linked Kleos documents don’t count, because Libra doesn’t store them. To keep a SharePoint folder live and always current, make a SharePoint database instead.
Limits and small print
The page allowance
The page allowance
Uploads into a Libra database, including documents added from a project or a connected app, count against a team-wide allowance of 100,000 page-equivalents per billed licence; SharePoint databases don’t. How it is counted: Roles and limits.
Duplicates
Duplicates
A file identical to one already stored for your team is reused rather than processed again, but still appears as a new document. Uploading or adding a document that is already in the database doesn’t create a second row: Libra keeps the existing entry, and the picker shows such documents greyed and ticked. Moving a document into a folder that already holds one with the same name is refused with This file is already in that folder. The same document can sit in two different folders or two different databases.
Next steps
Usage
Add it to a chat, read the citations, share it, keep it in order.
SharePoint databases
Link a folder instead of uploading.