
Add a database to a chat
Any chat can draw on any database you can see, whichever project you happen to be working in.1
Tools → Select files
Under the message box, click Tools, then Select files. The picker opens with Recents, Project files, Databases and Integrations down the left. Choose your database under Databases (Libra databases only; SharePoint databases are attached with 
@ or Add to chat).2
Attach entire database, then Attach
Attach entire database sits above the document list. Click it, then Attach. A chip with the database’s name appears in the message box; it stays for the whole conversation, and its × removes it.
3
Ask
Which of our precedent NDAs allow assignment on a change of control, and on what terms? Libra searches the database for every question you ask from now on.
The
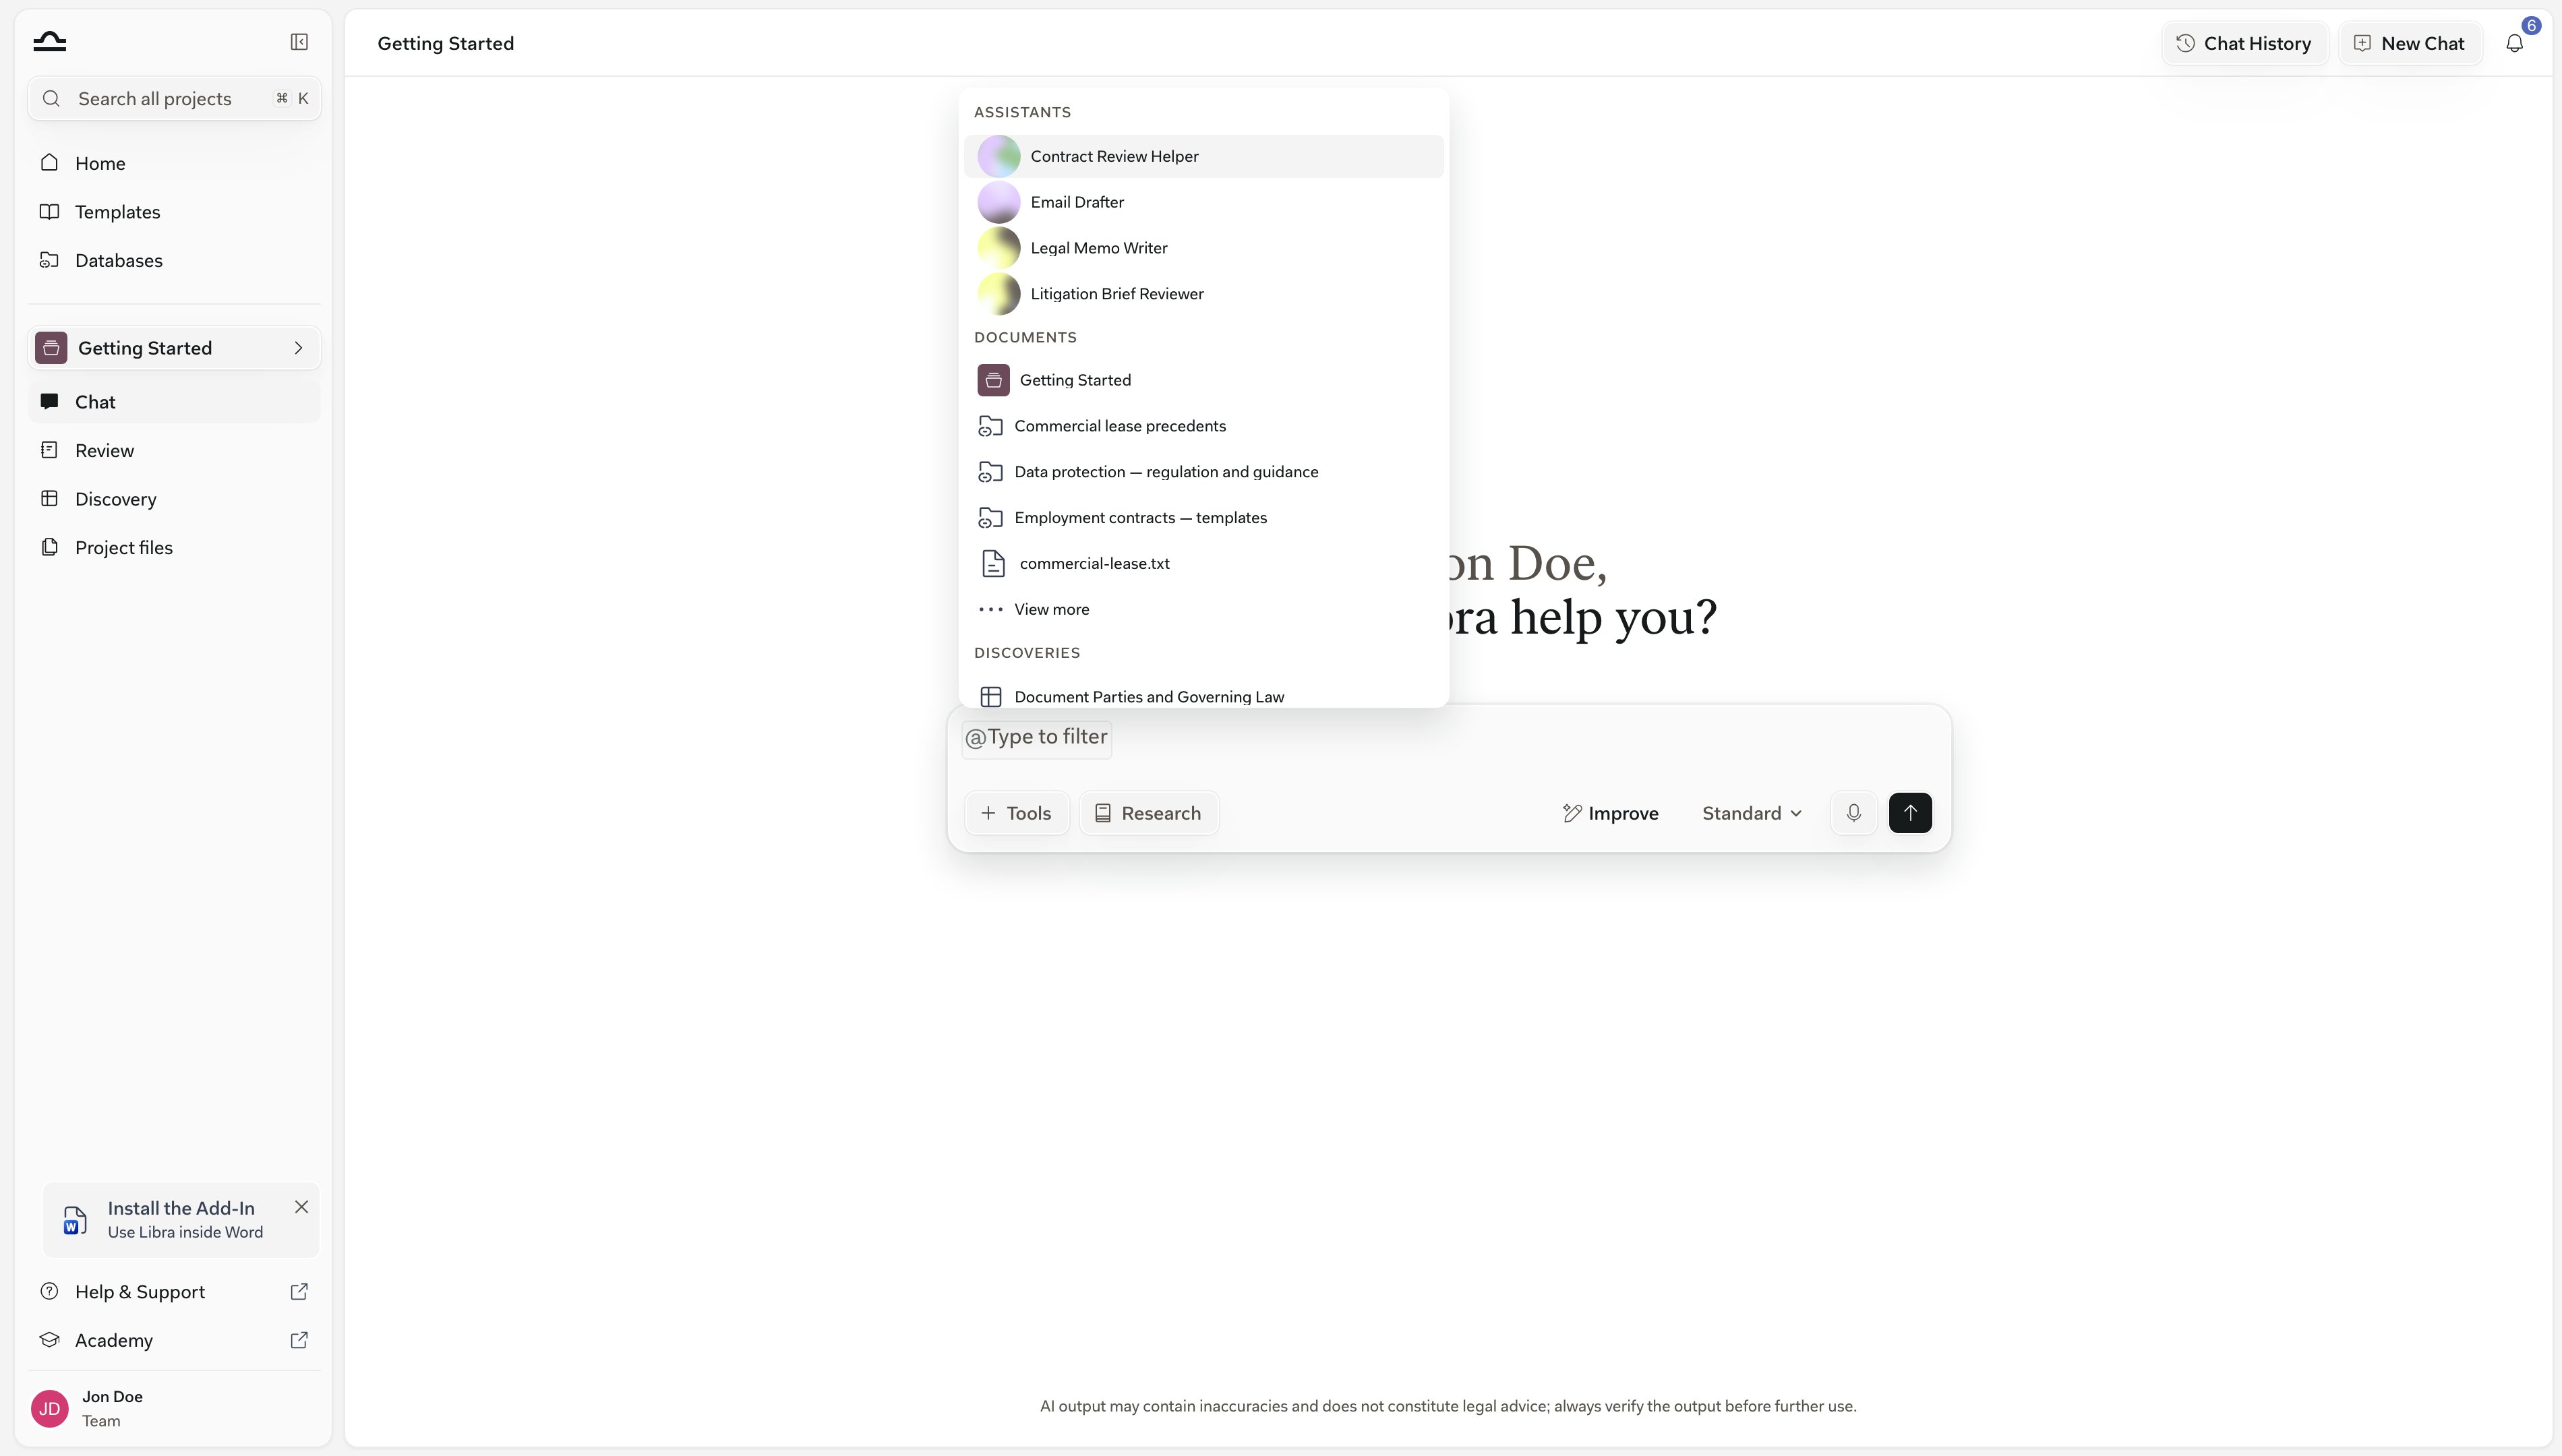
@ route is the fastest once you know the database’s name — it sits under Documents, beside your Assistants and Discoveries.


Attach only the databases a question needs. Searching many databases at once returns more near-matches and weaker answers. A chat can search up to ten sources at once, counting the current project and Attach entire SharePoint under Integrations in the picker.
Check the answer’s sources
An answer drawn from a database is cited like any other. Those citations are how you check it, so it is worth knowing what each one gives you.1
Watch the activity list
While Libra works, the activity strip above the answer shows Searching a database, then Searched a database. Open it to see which documents Libra read.Some databases could not be fully searched means Libra hit a search limit — a time-out, a failed index, or more sources than one search can cover — and skipped part of the scope.Treat that answer as possibly incomplete. Narrow the question, or attach fewer sources.
2
Click a citation
Each citation shows the passage Libra found. Click it and the document opens in the side panel with that passage highlighted.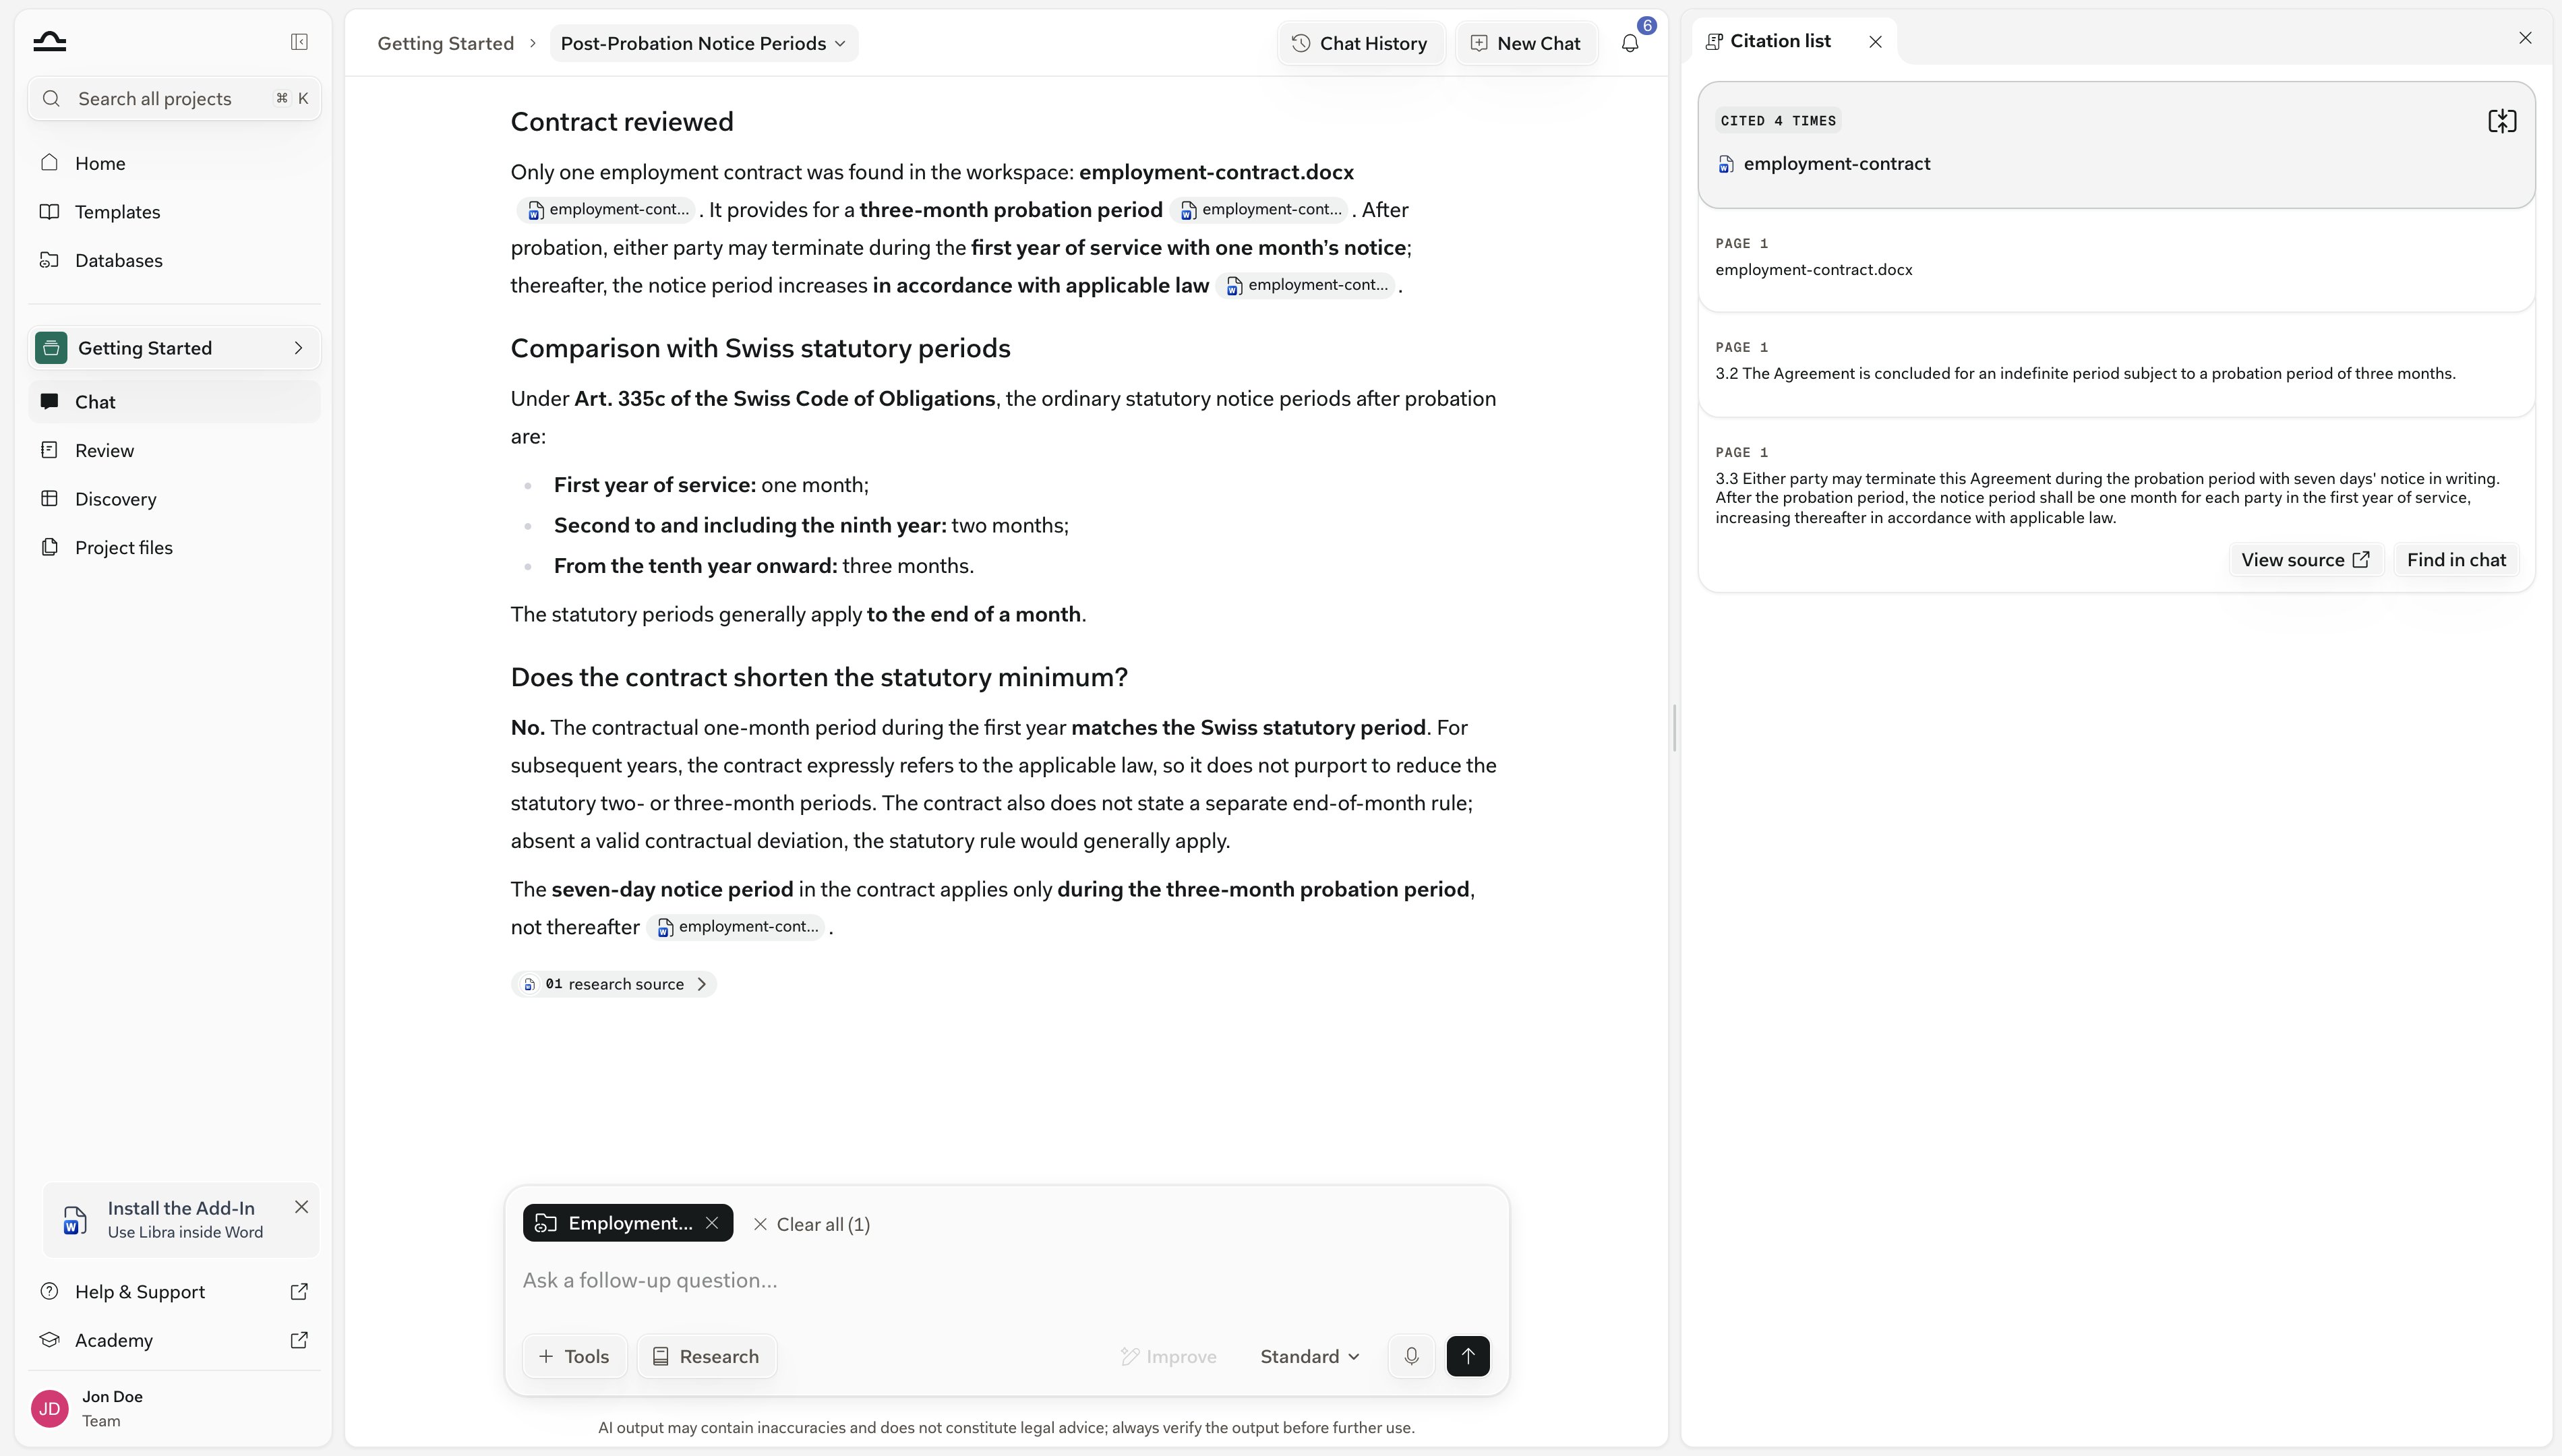
3
Open Cited Sources
The Cited Sources pill under the answer opens the Citation list panel: one card per document, so you see which documents carried the answer and how often each was cited. See Citations & sources.
Attach individual documents
When you already know which documents matter, put them in front of Libra in full rather than having it search the whole set.1
Tick documents in the picker
In Tools → Select files, open the database and tick the documents instead of clicking Attach entire database. Or, inside the database, use a row’s ⋯ → Add to chat, or tick several rows and use Add to chat in the bar that appears.
2
Ask
Each document is its own chip and Libra reads it whole. Compare the non-compete in these two agreements clause by clause.
Run a Review or Discovery
A Review and a Discovery both run on a defined set of documents, and both take them from a database through the same picker.1
Open the document picker
Run a Playbook and Select Documents to review opens; in a Discovery, click Add Documents.
2
Pick documents under Databases
Choose the database in the left rail and tick the documents. A Review takes up to ten — the footer counts them. A whole database can’t be reviewed or extracted in one go.
3
Confirm the copy into the project
Confirm the Copying & attaching N documents to “project” dialog.
4
Start Review, or add the documents
From here it is the normal flow. See Reviews and Create a Discovery.
A Review or Discovery belongs to a project, so Libra adds the chosen documents to that project’s files first. The copies take the project’s permissions; the originals stay in the database and nothing is uploaded again.
Organise the documents
Inside, a database behaves like a project’s file panel: sort or search to find a document, then use its ⋯ menu to move, rename or remove it.
1
Find the document
Sort by switches between Name, Author and Date added; Search files filters by name. After three characters, Search document content searches the text inside the documents instead and opens the match at its page.
2
Move it
⋯ → Move to folder, or drag the row onto a folder. Drag onto empty space to return it to the top level. Create folder and ⋯ → New Subfolder add structure; Delete Folder removes a folder and everything in it.
3
Rename it
⋯ → Rename opens Edit Document with two fields. Name Tag is the short label Libra uses when it cites the document, so keep it recognisable: Master NDA 2024 rather than final_v3_clean. Title is the full name shown in the list.
4
Remove it
⋯ → Delete, or tick several rows and More → Delete selected. Remove “name” from this database? means exactly that: a document that also lives in a project or another database stays there untouched.
Rename or favourite a database
Both actions live in the database’s own ⋯ menu, on the Databases page or in the breadcrumb inside it.1
⋯ → Edit Details
On the Databases page, or in the breadcrumb menu inside the database. Editors and owners only. Change the Name or Description, then Save.
2
⋯ → Favorite
Keeps the database at the top of the Databases page whatever the sort. In list view, click the star on the row instead. Unfavorite, or the star again, removes it.
Share a database
A database starts private to you. Sharing is what turns it into something the team can use, and each person’s role decides what they may change.1
Open Share
From the database’s ⋯ menu on the Databases page, from the breadcrumb menu inside it, or in the sharing block while creating it.
2
Set General access
Only people invited or Everyone in the team. A team-wide share starts everyone at Can view & chat; raise it with the dropdown beside it.
3
Add people or groups with a role
Under Share with, type a name or group, pick Can view & chat, Can edit or Full access, click Add. Who has access lists everyone with their level and is where you change or remove a share.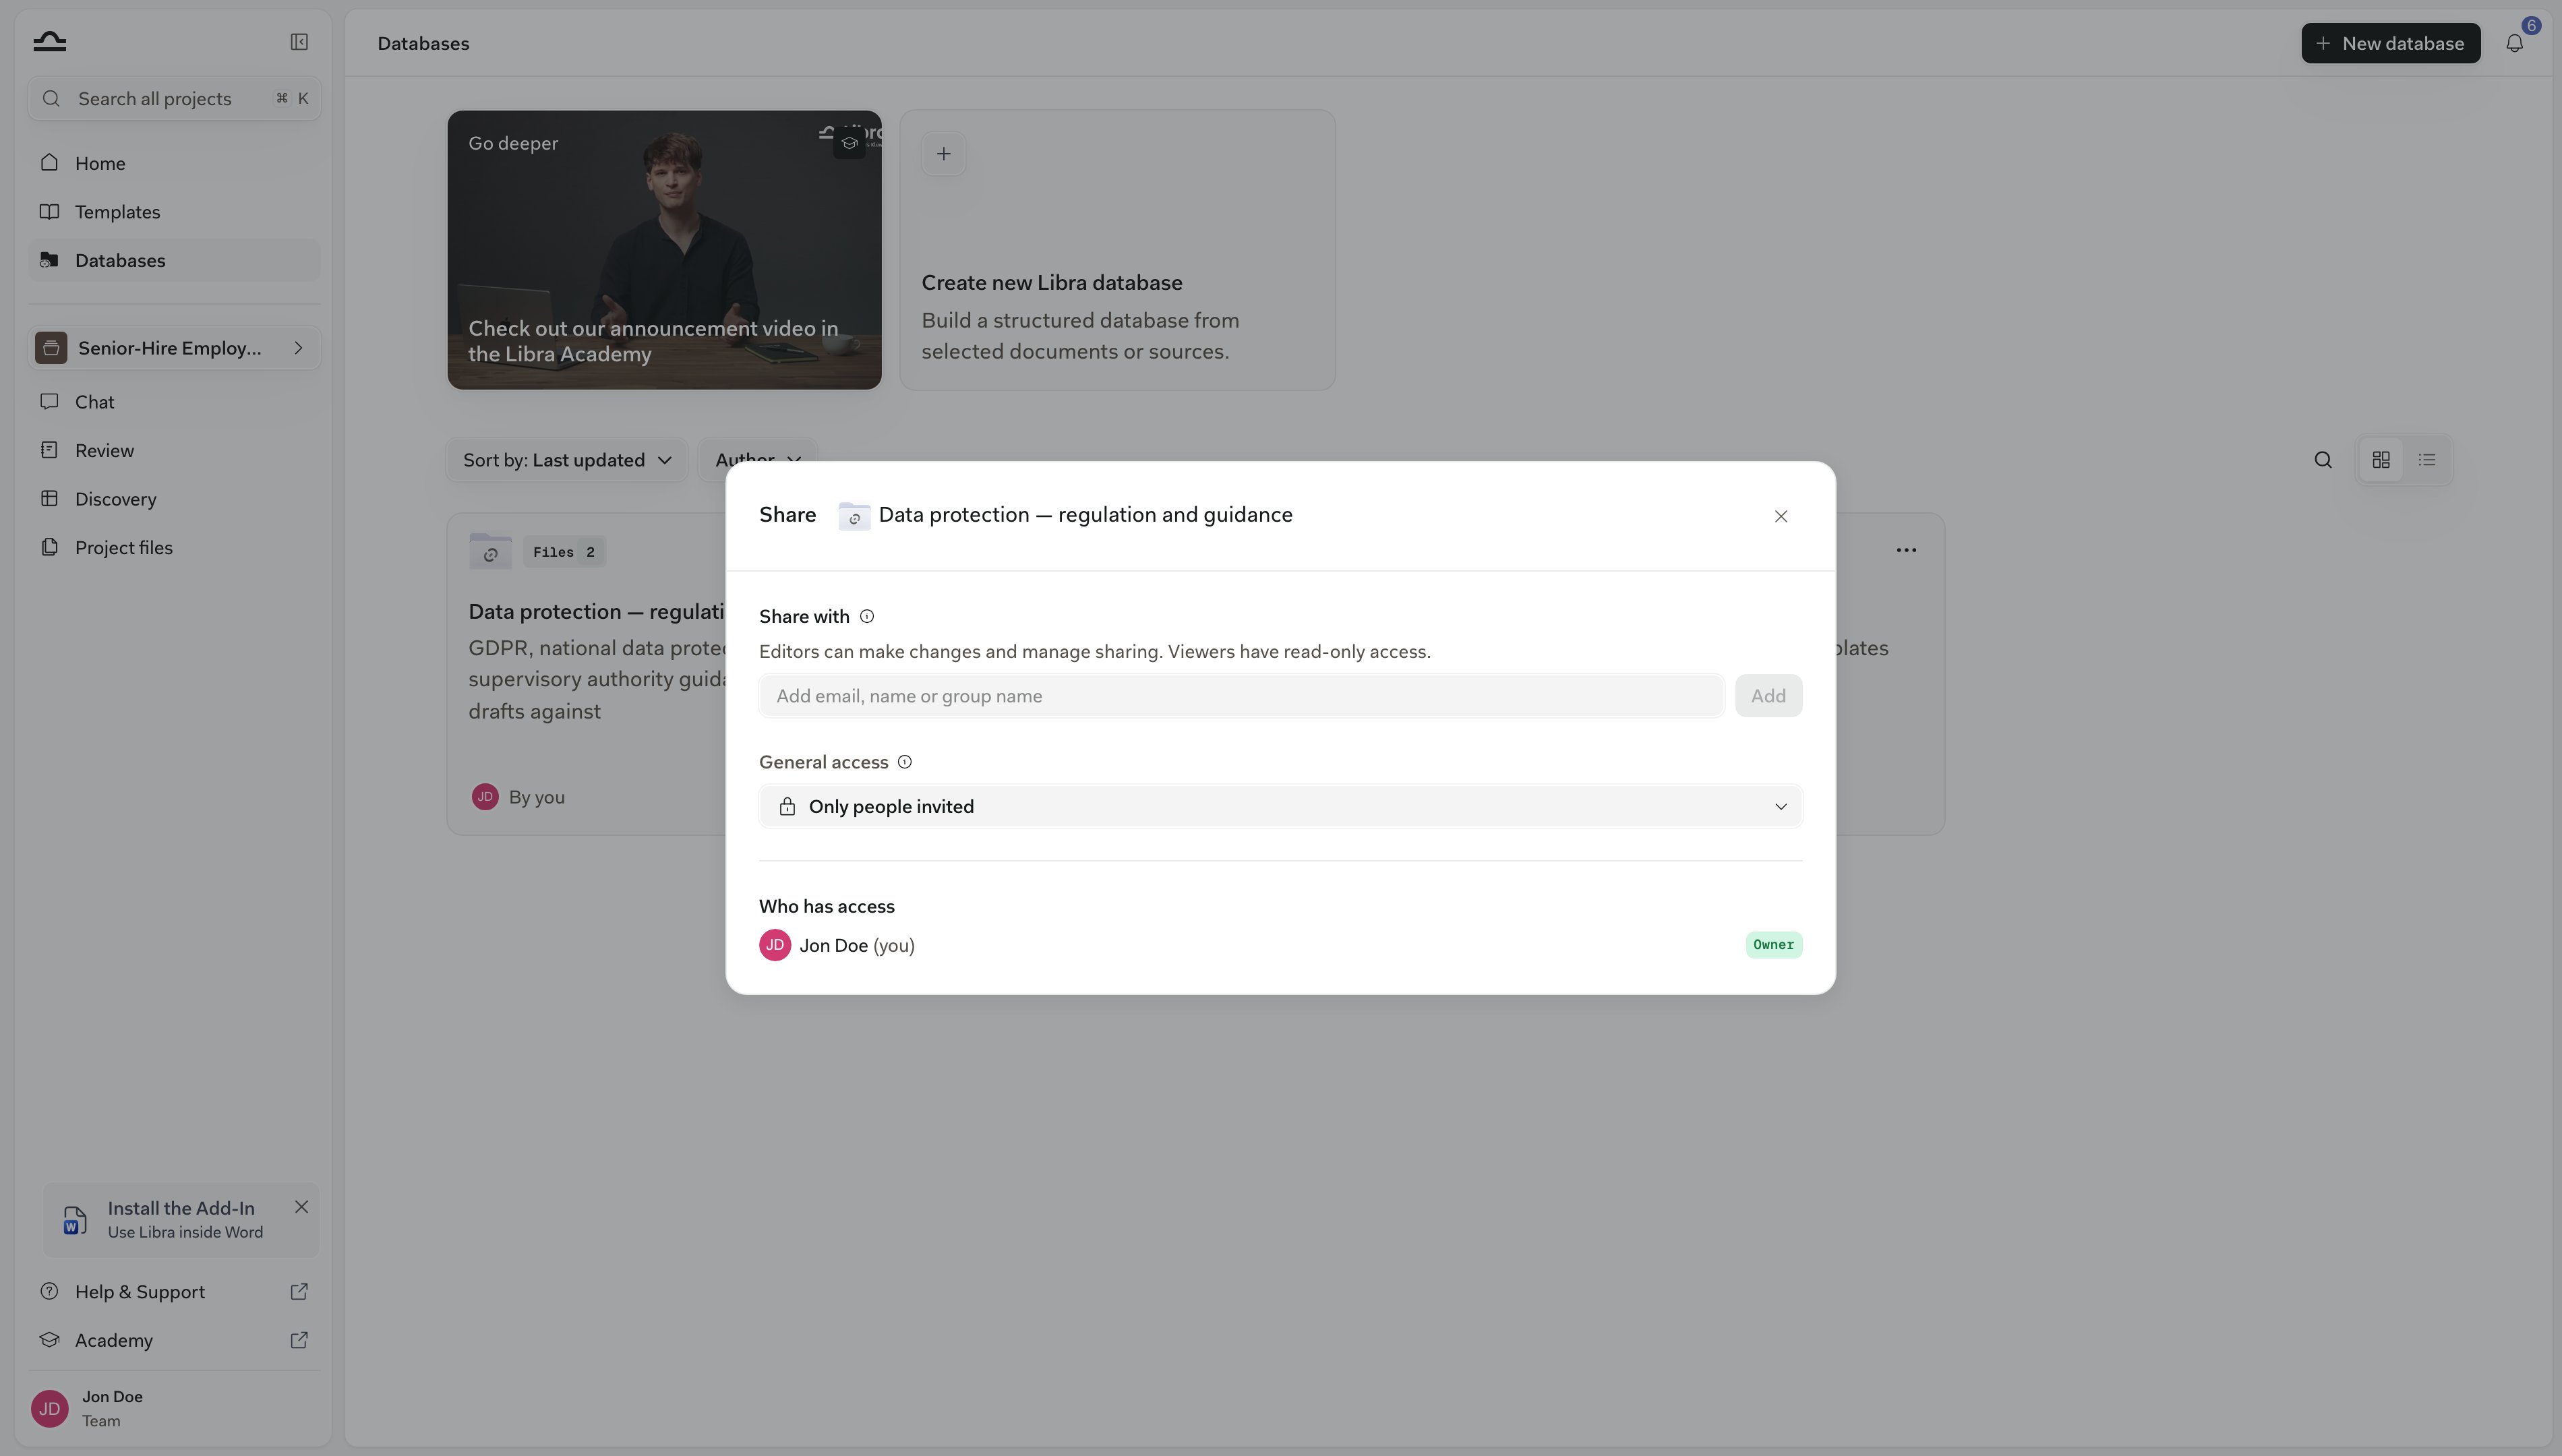
What each role can do
What each role can do
Your role shows as a badge on every row inside the database; the owner sees a Sharing badge (Private or Shared) instead. The model is the same as for projects and templates, see Sharing & access.

Access to a database is separate from access to any project. An unshared database is visible only to its owner — the team’s Owner and Admins cannot see it either.So before a colleague leaves the firm, check that their databases have been shared.
Delete a database
Deleting a database removes it for everyone it was shared with. What happens to the documents depends on where else they live.1
⋯ → Delete
Only the owner or someone with Full access sees it, on the Databases page or in the breadcrumb menu.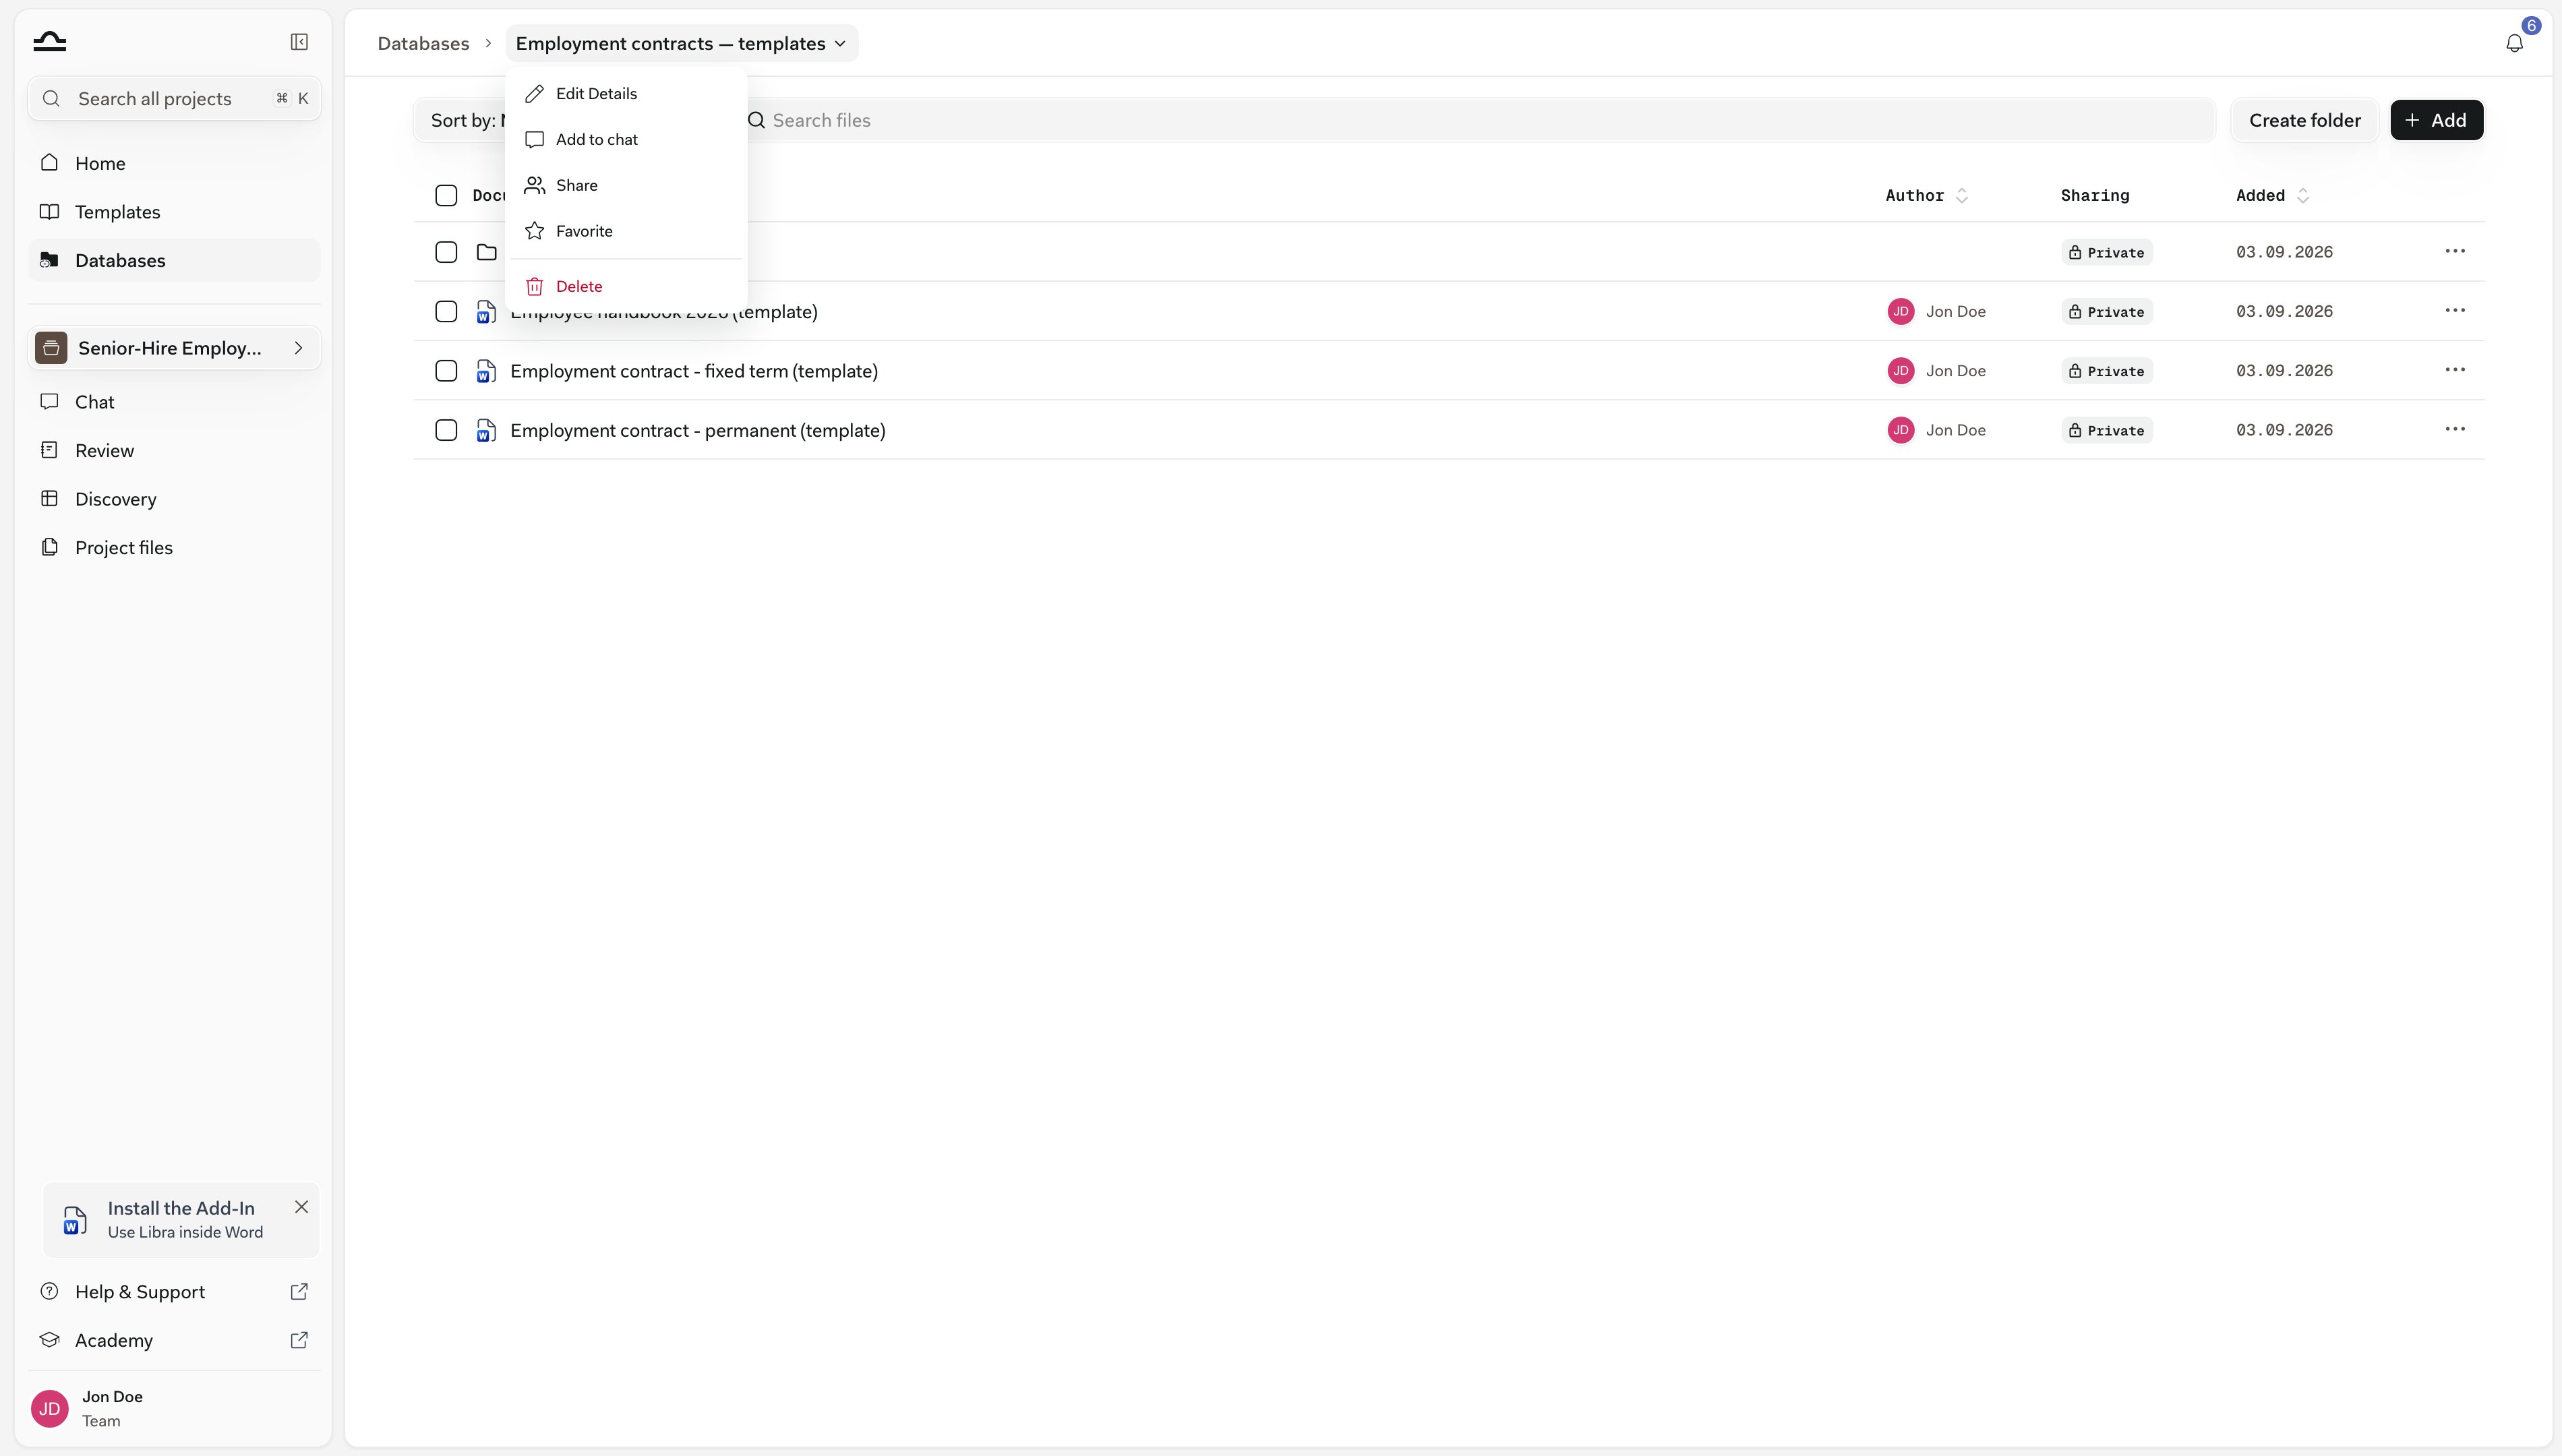
2
Confirm
The Delete global database dialog says the database will be permanently deleted and cannot be undone; from the Databases page it adds that a shared database is deleted for everyone it was shared with. Every share on it goes with it.
Roles and limits
What you can do in a database depends on the access you were given, and how much you can put in it depends on your plan.The page allowance
The page allowance
Uploads into a Libra database count in pages against a team-wide allowance: 100,000 page-equivalents per billed licence, pooled across the team.
- It counts what your databases hold right now, not a monthly total, so removing a document gives its pages back.
- Documents added from a project or a connected app count as well. SharePoint databases don’t, and nor do Kleos documents you link.
- When an upload would exceed the allowance, Libra refuses it and says how many pages remain. There is no usage meter elsewhere in the app.
In an Assistant
In an Assistant
A custom Assistant’s Knowledge tab can hold an entire database or project instead of individual files, up to ten per Assistant. The Assistant then searches everything in it, including documents added later. See Custom Assistants.
In global search
In global search
With Databases switched on, the Cmd+K panel’s Location filter lists projects and databases, and Search document content covers Libra databases. See Search.
A database is missing from the picker
A database is missing from the picker
It hasn’t been shared with you — ask the owner. Empty databases are left out of the
@ picker entirely.SharePoint databases never appear under Databases in the Select files picker. Attach one with @, or with Add to chat from the Databases page or the breadcrumb menu inside it.On the Databases page a SharePoint database stays dimmed, showing Connect your SharePoint account, until you connect.Dialogs say “global database”
Dialogs say “global database”
Global database created, Delete global database: some confirmations still use the older name. It is the same thing.
Next steps
Chat basics
The composer, Tools menu and @-mentions.
Citations & sources
Reading and verifying what Libra cites.
SharePoint databases
How a linked folder behaves in chat.